
How to Sew a Hem: A Beginner-Friendly Step-by-Step Guide
Learning how to sew a hem is one of the most useful beginner sewing skills because it helps you shorten pants, finish skirts, adjust sleeves, and give fabric edges a clean, professional look. A basic hem keeps raw edges from fraying and makes handmade or altered clothes look neat and durable.
The easiest method for most beginners is a double-fold hem, where the fabric edge is folded twice, pressed, and stitched close to the inner fold. In this guide, you’ll learn what tools you need, how to prepare your fabric, how to sew a simple hem step by step, and how to avoid common problems like wavy stitches, uneven folds, and bulky seams.
Whether you are hemming pants, skirts, curtains, napkins, or lightweight home décor projects, this beginner-friendly tutorial will help you get a cleaner finish.
Quick Answer: What Is the Easiest Way to Sew a Hem?
The easiest way to sew a hem for beginners is the double-fold hem. To make it, fold the raw fabric edge up once, press it with an iron, fold it up again, press it again, and sew close to the inner folded edge with a straight stitch. This method hides the raw edge, helps prevent fraying, and works well for many beginner projects such as pants, skirts, curtains, napkins, pillow covers, and simple cotton garments.
Key Takeaways
- Always measure and mark your hemline carefully before you start cutting or folding.
- Pressing your folds with an iron is super important for a neat hem.
- The double-fold hem is a great starting point for most projects because it hides the raw edge.
- Use the right needle and thread for your fabric type to avoid skipped stitches or broken threads.
- Practice on scrap fabric first to get a feel for the technique before working on your actual project.
What Is a Hem?
A hem is the finished edge of a piece of fabric or garment. It is usually made by folding the raw edge of the fabric to the inside and securing it with stitches. Hems are commonly used on pants, skirts, dresses, sleeves, curtains, napkins, and many sewing projects.
The purpose of a hem is to stop the fabric from fraying, improve the shape of the garment, and create a cleaner finished look. For beginners, a basic double-fold hem is one of the easiest and most useful techniques to learn because it hides the raw edge inside the fold.
Why Sewing a Hem Matters
I’ve been playing around with hems since I began sewing clothes, and I would be surprised at how much a hem can alter the look and wear of an item. Hemming isn’t solely about finishing an item of cloth; it’s about ensuring that your garments endure and feel great. If you’re still building your sewing skills, learning how to learn sewing can help you master essential techniques like hemming faster.
One thing I like is that I can hem it to the length I want it to be. I’m able to get more use out of it if I do a hem, or if I change my mind about the style, or if I’m thrifting it. Projects such as how to sew an apron or how to sew a fabric bag also rely on neat hems to achieve a polished finish.
Here’s why I never skip this step:
- A proper hem stops raw edges from fraying, so you don’t end up with loose threads unraveling after just one wash.
- Hems give clothes structure. Pants hang straight, skirts feel balanced, and even T-shirts just look better and neater.
- With different types of hem sewing, I get to choose what works best for each fabric, so my lightweight dresses don’t get bulky, and my jeans hold up to all that heavy-duty use.
One thing I like is that I can hem it to the length I want it to be. I’m able to get more use out of it if I do a hem, or if I change my mind about the style, or if I’m thrifting it.
When I’m in a hurry to finish a project, I always take a little extra time on the hem, and it always feels like I bought it in a store, not created in my cluttered corner at home.
If you believe that the hemming is just an additional chore, then you’re not correct. It may seem like a trivial thing, but it can make any homemade outfit look much more professional and feel much more solid.
Types of Hems Beginners Should Know
| Hem Type | Best For | Difficulty | Notes |
|---|---|---|---|
| Double-Fold Hem | Pants, skirts, curtains, napkins | Easy | Best all-purpose beginner hem |
| Single-Fold Hem | Fabric with finished or serged edges | Easy | Faster, but raw edge may need finishing |
| Blind Hem | Dress pants, skirts, formal clothes | Medium | Creates a nearly invisible finish |
| Rolled Hem | Chiffon, silk, lightweight fabrics | Medium | Best for thin and delicate fabrics |
| Zigzag Hem | Stretchy fabrics and knits | Easy to Medium | Allows the fabric to stretch |
| Hand-Sewn Hem | Delicate garments and repairs | Medium | Slower, but can look very neat |
For most beginners, the double-fold hem is the best place to start because it is simple, strong, and works on many common fabrics.
Essential Tools and Materials for Hemming
Now, let’s discuss the tools you will need for this hemming project. It doesn’t take a lot of space in a workshop, just a few essential tools. Having the right stuff makes all the difference, trust me. It makes a potentially stressful job seem like a pretty manageable one, even for a novice.
Fabric Scissors or Rotary Cutter
A sharp pair of scissors that are only used for cutting fabric is a must. Don’t use your kitchen scissors to cut fabric – they will dull and may snag your fabric. A rotary cutter and cutting mat are also very useful, particularly when making straight cuts frequently. They provide you with really clean edges, which is what we’re looking for.
If you’re assembling your sewing supplies, a good sewing kit for beginners can include many of the basic tools needed for hemming projects.
Measuring Tape or Ruler
The emphasis is on accuracy. I prefer to use a flexible measuring tape, which can bend around fabric, but a quilting ruler is also good to use, particularly for marking straight lines. This will help you determine just how much fabric to fold up for your hem. This measurement is important to make correctly, as your final hem will be even all around.
Fabric Marker or Chalk
After you have measured, you must now mark your hemline. Tailor’s chalk is a disappearing fabric marker, or even a washable pen. It’s just the fact that it appears on your fabric, but it’s not permanent. I always try it out on a scrap piece first, just in case.
Iron and Ironing Board
A good press is not to be underestimated! Ironing the fabric as you work is likely the most important step in achieving a nice hem. It folds crisply and easily sews. It may sound like a step too far, but it really makes your work look so much more professional. One of those simple, yet impactful hemming techniques.
Pairing a quality iron with one of the best ironing boards can make pressing hems much easier and more accurate.
Sewing Machine or Needle and Thread
You’ll need something to sew the hem with, of course. For simple hems, the sewing machine is the quickest and can provide the tidiest finish. Hand sewing with a needle and thread is fine if you don’t have a sewing machine, or if you’re working on something delicate. Just ensure your thread is of the same color as your fabric and strong enough to do the task. If you’re a beginner, I would say that most projects are easiest to do on a machine.
If you’re still looking for a machine, check out the best sewing machines for beginners to find a model suitable for learning basic alterations and hemming.
The right tools can make any job easier. It’s not about the most expensive equipment; it’s about the right equipment that will make the job easier and more effective. It’s like preparing for success before you begin sewing.
Hemming Tools Checklist
| Tool | Why You Need It | Beginner Tip |
|---|---|---|
| Fabric scissors | Cuts fabric cleanly | Use only for fabric, not paper |
| Measuring tape | Helps measure hem allowance evenly | Measure more than once before folding |
| Fabric marker or chalk | Marks the hemline | Test first to make sure it washes out |
| Pins or clips | Holds the fold in place | Clips are useful for thick fabrics |
| Iron | Presses folds flat | Pressing makes the hem look cleaner |
| Sewing machine | Sews the hem quickly | Use a straight stitch for woven fabrics |
| Needle and thread | Useful for hand sewing | Match thread color to fabric |
| Seam ripper | Removes mistakes | Helpful when learning |
Preparing Your Fabric for Hemming
When I’m working on DIY clothing alterations, I never skip the fabric preparation part, before I get to the sewing part, anyway. I don’t know about you, but nothing is worse than coming back to a project with an uneven, stiff, or warped hem because I was in a hurry to get it done. Here’s how I make sure my fabric is ready for a neat, professional finish.
Washing and Drying Your Fabric
If you don’t wash and dry your fabric before hemming, you might run into trouble. Fabrics shrink, and that can ruin all your measurements and efforts after the fact.
Knowing how to wash a wool blanket can help you better understand how delicate fibers react to washing and drying.
- Always prewash your fabric using the same settings (temperature, dryer, or air-dry) as you plan for the finished garment.
- Let it dry completely so it shrinks before you hem, not after.
- Iron out any wrinkles, smoother is better before measuring and marking.
Even if the fabric looks clean and fresh off the bolt, I still wash it. Sizing and chemicals from the factory can change the way the thread grabs onto fibers. Freshly washed fabric also makes it way easier to handle those DIY clothing alterations down the line.
Measuring and Marking Your Hemline
One thing I learned the hard way? Eyeballed hems rarely end up even. Precise measuring sets the stage for a clean, crisp edge.
If you’re planning additional alterations, such as how to hem pants, careful measuring becomes even more important for professional-looking results.
Here’s my method:
- Lay the fabric flat on a hard surface, wrong side facing up.
- Decide on your hem allowance, typically 1/2 inch for lighter summer fabrics, or up to 2 inches for thicker materials.
- Use a measuring tape or ruler and a fabric marker or chalk to mark the hemline all the way around. Mark lightly, so it doesn’t show through.
Fabric and Hem Allowance Guide
| Fabric Type | Suggested Hem Allowance | Best Hem Type | Sewing Tip |
|---|---|---|---|
| Light cotton | 1/2 inch to 1 inch | Double-fold hem | Press well before sewing |
| Medium cotton | 1 inch | Double-fold hem | Use a regular straight stitch |
| Denim | 1 inch to 2 inches | Double-fold or jeans hem | Use a denim needle and sew slowly |
| Knits / T-shirt fabric | 1/2 inch to 1 inch | Zigzag or twin needle hem | Avoid stretching while sewing |
| Chiffon / silk | 1/4 inch to 3/8 inch | Rolled hem | Use low heat and a fine needle |
| Curtains | 1 inch to 3 inches | Double-fold hem | Measure from the hanging length |
This table helps readers choose the right hem allowance before they start folding and sewing.
When tackling finishing fabric edges, I’ll often practice a bit on scrap, especially with tricky or stretch fabrics. It saves headaches later. Prepping might seem slow, but it’s what actually makes those DIY clothing alterations look store-bought in the end.
If you’re learning how to finish fabric edges, this is a good moment to decide if you’ll use a zigzag, serger, or leave the edge raw. Understanding the differences between a serger vs sewing machine can help you choose the best finishing method for your fabric.
Before You Sew: Quick Hemming Checklist
Before sewing your hem, make sure these steps are complete:
- Wash and dry the fabric if the finished item will be washed later.
- Iron the fabric flat before measuring.
- Decide the final length of the garment or project.
- Measure the hem allowance evenly.
- Mark the hemline with chalk or a washable fabric marker.
- Fold and press the hem before stitching.
- Pin or clip the fold to stop shifting.
- Test your stitch on scrap fabric first.
This small checklist can prevent common beginner mistakes like uneven hems, wavy stitching, and fabric shrinkage after sewing.
Step-by-Step Guide to Sewing a Basic Hem
Okay, let’s get on with the job and actually sew this hem. This is where all the measuring and pressing come into use. I will take you through what I feel is the most basic and popular hem for the novice seamstress: the double-fold hem. It’s quite simple and can be used for a lot of projects, such as skirts and the bottom of pants.
First of all, be sure to have folded your second fold from the previous step. This is very crucial to maintain neatness. Now, get your sewing machine! Don’t despair; if you don’t have one, you can do it by hand with a needle and thread, but it will take longer. I typically do this with a straight stitch, and it’s a good idea to use a thread color that matches your fabric.
Here’s how I do it:
Step 1: Press the Double-Fold Hem Before Sewing
If you’re about to sew, be sure that your hem is properly measured, folded, and pressed. The raw edge is folded over once to conceal it and then folded again to form a neat finished edge for a simple double-fold hem. This is one of the best sewing techniques for beginners since the raw edge of the fabric is hidden and will not fray.
Pressing is essential as it keeps the fold in place and makes sewing much easier. The iron should be compatible with the type of fabric, and do not use excessive heat on delicate fabrics. Use sewing pins, clips, or a basting stitch to secure the folded hem if the fabric continues to shift while sewing.
Step 2: Set Up Your Sewing Machine for a Basic Hem
Use a thread color that matches your fabric, particularly if you want the stitching to blend in with the fabric. A straight stitch is the most common stitch for beginner hems and will provide a clean, simple, and secure finish. Select the correct needle for the fabric, e.g., universal for cotton and ballpoint for knit fabric.
For most woven fabrics, adjust the stitch length to approximately 2.5 mm to 3 mm. Use an edge-stitching foot, blind hem foot, or standard presser foot with a guide to help maintain a straight stitching line. But a standard presser foot can easily be used for a simple double-fold hem.
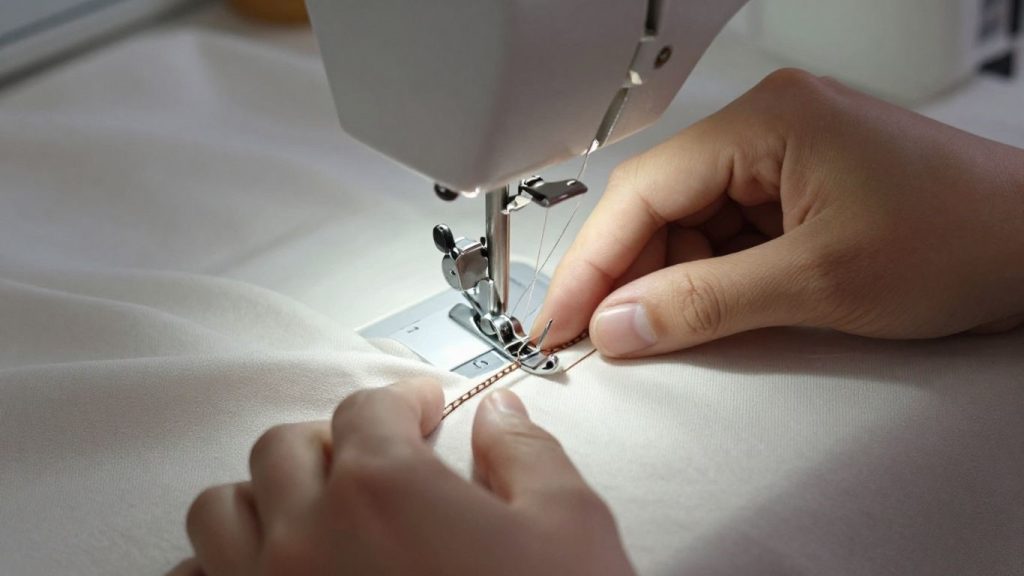
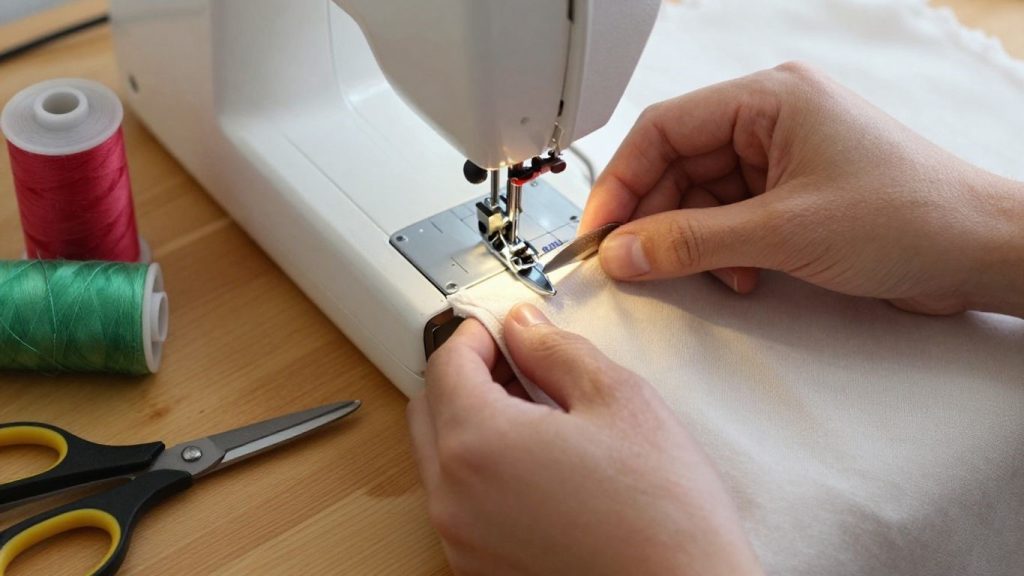
Step 3: Start Sewing at a Side Seam or Less Visible Area
Start sewing at a side seam or other less conspicuous area of the garment. The first and last stitches of the hem are hidden when started at a seam, creating a neater finish. Fold the hem inside and under the presser foot, so you will be able to stitch close to the inner folded edge.
Lower the presser foot and make sure the fabric is sitting flat before you start. The idea is to sew as close as possible to the inner folded edge so that you catch the fold, but not so close that the hem will appear bulky or uneven. Slowly sewing at the beginning helps to keep the fabric under control for beginners.
Step 4: Stitch Along the Inner Folded Edge
Begin sewing slowly and move the fabric carefully through the machine. Avoid pulling or pushing fabric as this can stretch the hem, cause uneven stitches, or cause the seam line to be crooked. The stitch line should be close to the inner folded edge, typically 1/8 inch or 2–3 mm from the folded edge.
This is the section that provides the hem with a clean and professional appearance. Try to keep the same distance from the folded edge all the way around the garment. When sewing a curved hem, slow down even more and cut the fabric slightly at a time to ensure that the hem does not pucker.
Step 5: Backstitch to Secure the Hem
As you come back to the starting point, overlap the stitches and backstitch about 1/4 to 1/2 inch. Backstitching is used to secure the thread and prevent the hem from coming undone after laundering or wearing. This is particularly crucial for clothing, pants, skirts, curtains, and other frequently used items.
Once the backstitch is finished, raise the presser foot and needle and gently remove the fabric from the machine. Cut the loose ends of the thread close to the cloth, but not into the stitches. If you are hand sewing, knot the end and fold the thread tail under the fold.
Step 6: Give the Finished Hem a Final Press
Press them once again with the iron after sewing. This last press ensures that the stitches are settled into the fabric and the hem is flatter, smoother, and more polished. It can also help eliminate small waves or creases that can occur when sewing.
A compact mini iron for sewing can be especially useful when pressing small hems, cuffs, and detailed sewing projects.
Always use the proper heat setting for the fabric; for delicate or shiny fabrics, use a pressing cloth. The final press can make a novice’s hem look much cleaner and more professional. After pressing, the simple double-fold hem is ready to wear or use.
Final Tip for Sewing a Basic Hem
One of the most important sewing skills for beginners is the double-fold hem, as it will prevent raw edges and provide a long-lasting finish. It’s suitable for many basic sewing tasks, such as skirts, pants, napkins, curtains, pillow covers, and lightweight home decor.
Don’t worry if the first hem is not straight. It takes practice to hem, and each project will help you to master your measuring, pressing, stitching, and fabric control skills. Use a scrap piece of fabric first, and then the piece you will use for your garment when you are more comfortable.
This technique is frequently used in beginner-friendly projects such as how to make a simple tote bag at home and free wallet sewing pattern.
Keep in mind that these are some of the basic sewing skills that can be practiced. Learning how hems work will also help you understand various sewing machine parts and how they contribute to smoother stitching and better fabric control.
Hand Sewing vs Machine Sewing a Hem
| Method | Best For | Pros | Cons |
|---|---|---|---|
| Sewing Machine Hem | Pants, skirts, curtains, napkins, cotton projects | Fast, strong, even stitches | Stitching may be visible |
| Hand-Sewn Hem | Delicate garments, formal clothes, small repairs | Can look nearly invisible | Takes more time |
| Zigzag Machine Hem | Knit and stretch fabrics | Allows fabric to stretch | Less formal look |
| Blind Hem Stitch | Dress pants and skirts | Clean and professional | Needs more practice |
For beginners, a sewing machine with a straight stitch is usually the fastest way to sew a basic hem. For delicate or formal garments, hand sewing or a blind hem may give a cleaner finish.
Common Hemming Mistakes and How to Fix Them
| Problem | Common Cause | Simple Fix |
|---|---|---|
| Hem looks uneven | Fabric was not measured evenly | Re-measure, mark again, and press before sewing |
| Hem is wavy | Fabric was stretched while sewing | Do not pull the fabric; let the machine feed it |
| Stitches are skipped | Wrong needle or dull needle | Replace needle and match it to fabric type |
| Thread keeps breaking | Wrong tension, bad thread, or wrong needle | Rethread machine and test on scrap fabric |
| Hem feels bulky | Fabric is too thick for the fold | Trim excess fabric or use a wider hem |
| Fabric puckers | Stitch length is too short or tension is too tight | Test tension and use a slightly longer stitch |
| Raw edge is fraying | Edge was not folded or finished properly | Use a double-fold hem or finish the raw edge first |
Finishing Touches and Tips for a Professional Look
If there’s something I’ve learned from my time hemming clothes, it’s that those small details at the end really matter. The way you finish your hem can completely change the final look and even how the garment feels to wear. There’s a little checklist I like to follow to make sure the hem doesn’t just stay put, but actually looks like it belongs, smooth, even, and sturdy.
Having a comfortable workspace with one of the best sewing chairs and best sewing machine tables can make longer sewing sessions much more enjoyable.
- Give the hem a good press after sewing. I always use a hot iron, sometimes with a little steam, and press both sides. It’s a small thing, but it sharpens those folds and just makes the whole piece look neater.
- Trim any stray threads before turning up the hem. Seriously, those threads sneak out once you start wearing the item, and it just looks messy.
- Double-check that your stitches are even from both the inside and outside. If you’re using a machine, keep your stitch length steady. For hand sewing, try not to rush, even if your hands start to get tired. A few uneven stitches really catch the eye on a finished garment.
- For curved hems or very lightweight fabrics, I sometimes use a shorter stitch length and press after each step so the hem stays flat and doesn’t pucker.
- If the hem is bulky or thick (like denim), use a heavier needle and thick thread, and slow down as you sew over seams. Sometimes, I’ll even use a hammer (gently!) to flatten those seams so the machine handles them better.
If the hem is bulky or thick (like denim), use a heavier needle and thick thread, and slow down as you sew over seams. A sturdy machine from the best Singer sewing machines or best Janome sewing machines guides can handle heavier fabrics more effectively.
It’s the little things, such as pressing each fold and not cutting off those final trims, that make the difference between a homemade hem and a truly finished one. If you have a few minutes to spare, you can practice your hem on a fabric sample first. If there is a strange tension or stitch length, it saves a lot of heartache.
A few extra minutes spent on finishing touches can make a huge difference! Whether you’re simply hemming a pair of pajama pants or a simple skirt, these steps will ensure you have a solid, neat hem every time that you could consider store-bought.
A few extra minutes spent on finishing touches can make a huge difference. Whether you’re simply hemming a pair of pajama pants or creating projects like how to sew an apron, these steps will help you achieve a cleaner, more professional result every time.
Best Beginner Projects to Practice Hemming
If you are learning how to sew a hem, start with simple projects before working on expensive clothing. Practice helps you improve measuring, folding, pressing, and stitching control.
Good beginner hemming projects include:
- Cotton napkins
- Pillow covers
- Simple curtains
- Pajama pants
- Skirt hems
- Tote bag edges
- Table runners
- Scrap fabric samples
- Lightweight cotton pants
- Basic home décor pieces
Start with cotton or other stable woven fabrics because they are easier to press and sew than slippery, stretchy, or very thick materials.
Final Recommendation
For most beginners, the best way to learn hemming is to start with a double-fold hem on a stable woven fabric like cotton. Measure carefully, press every fold, sew slowly, and keep your stitch line close to the inner folded edge. This method gives a neat finish and helps hide the raw edge.
Once you are comfortable with a basic hem, you can try other hemming techniques like a blind hem, rolled hem, zigzag hem, or hand-sewn hem. The more you practice, the easier it becomes to choose the right hem for each fabric and project.
Frequently Asked Questions
What’s the easiest way for a beginner to sew a hem?
The double-fold hem is usually the easiest for beginners. You just fold the fabric edge up twice, press it flat, and then sew along the edge. It works on most kinds of fabric and makes your sewing look really neat.
Do I need special tools to hem?
Not really! You’ll need basic things like fabric scissors, a measuring tape or ruler, an iron and ironing board, and a needle and thread or a sewing machine. A fabric marker or chalk helps a lot for marking your lines.
How much extra fabric do I need for a hem?
This is called the hem allowance. It can be anywhere from about a quarter of an inch to two inches, depending on the fabric and what you’re making. Lighter fabrics need less, while thicker ones might need more.
My hem looks wavy. What did I do wrong?
Wavy hems often happen if you stretch the fabric while sewing or if your machine tension is off. Try not to pull the fabric, and test your stitch tension on a scrap piece first. Sometimes, a new needle can help too!
How do I hem stretchy fabric like t-shirt material?
For stretchy stuff, you need a stitch that can stretch too. A zigzag stitch is a good choice. Some people also use a special twin needle on their sewing machine. A regular straight stitch will just pop when the fabric stretches.
Can I hem without a sewing machine?
Absolutely! You can definitely sew a hem by hand. There are stitches like the slip stitch or whip stitch that can look really clean and almost invisible from the outside. It just takes a bit more time than using a machine.
What is the best hem for beginners?
The best hem for beginners is a double-fold hem. It is simple, strong, and hides the raw fabric edge inside the fold, which helps prevent fraying.
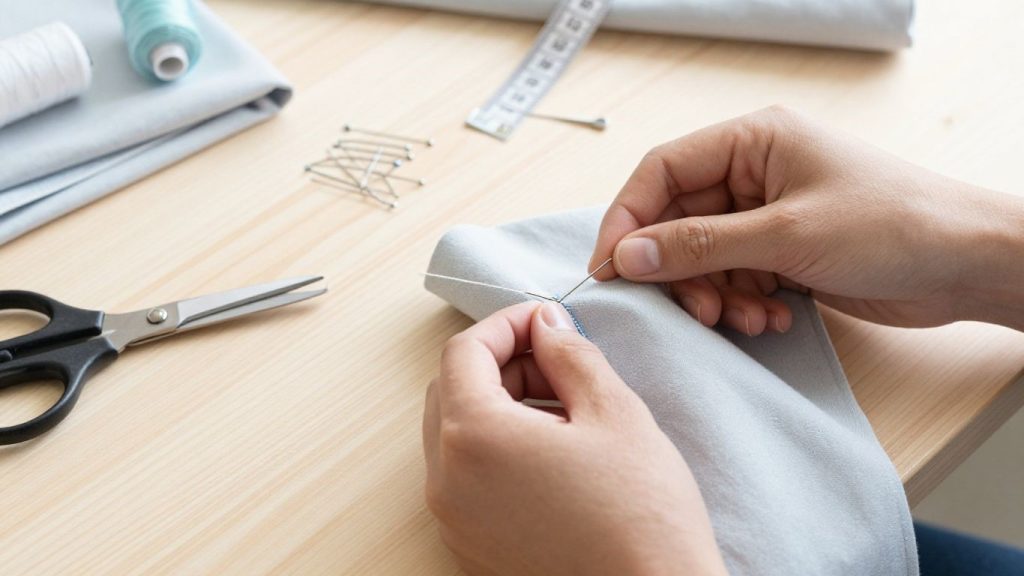
How do you sew a hem by hand?
To sew a hem by hand, fold and press the fabric, pin it in place, then use small stitches such as a slip stitch, whip stitch, or blind stitch. Keep the stitches small and even for a cleaner finish.
What stitch should I use for a basic hem?
For most woven fabrics, use a straight stitch. For stretchy fabrics like T-shirt material, use a zigzag stitch, stretch stitch, or twin needle so the hem can move with the fabric.
Why is pressing important when sewing a hem?
Pressing helps the fabric fold stay flat and makes the stitch line easier to control. It also gives the finished hem a cleaner and more professional look.
Can I hem pants without cutting them?
Yes, you can hem pants without cutting them if you only need a small adjustment. Fold the extra length inside, press it, and sew it in place. For large length changes, trimming extra fabric may reduce bulk.
How do I stop a hem from fraying?
Use a double-fold hem to hide the raw edge, or finish the raw edge with a zigzag stitch, serger, or pinking shears before folding. Fraying depends on the fabric type.