How to Hem Pants: Easy Step-by-Step Guide for Beginners
Learning how to hem pants is one of the easiest sewing skills that can instantly improve the fit, comfort, and overall look of your clothes. Whether your jeans, dress pants, trousers, or casual pants are too long, a clean hem can help prevent dragging, fraying, and an untidy appearance.
In this beginner-friendly guide, you’ll learn how to hem pants at home with simple tools, accurate measuring, pressing, pinning, and either hand sewing or a sewing machine. By the end, you’ll be able to shorten pants neatly and create a polished, professional-looking finish without paying for alterations.
Key Takeaways
- Always try on pants with the shoes you’ll wear them with to get the length just right.
- Use a measuring tape and fabric marker to mark your new hemline accurately.
- Pressing the fabric with an iron before sewing makes a big difference for a neat fold.
- Secure your hem with pins before sewing to keep everything in place.
- Take your time, especially when cutting and sewing, for the best professional look.
To hem pants, wear them with the shoes you plan to use, mark the correct length, measure your hem allowance, cut the extra fabric if needed, fold and press the hem, pin it in place, then sew it by hand or with a sewing machine.
Why Hem Your Pants?
Well, I used to procrastinate on hemming my pants for a long time. It was just a hassle, and I thought I could get used to a few longer pants. But I will tell you, after I got the hang of it, it made a huge difference. The right length can make all the difference when it comes to the appearance and feel of your garments.
If you think about it, you’ve been buying a pair of pants that fit just right in all the other places – the waist, the hips, the thighs – but the pants drag on the floor. It’s frustrating, right? You get frayed cuffs, or they simply look sloppy. I have definitely purchased pants and then not worn them because they were too long.
Learning to hem means you can:
- Make any pair of pants fit you perfectly, no matter your height.
- Save money by not needing to pay for alterations.
- Give older pants a new lease on life.
- Achieve a cleaner, more polished look.
It’s a simple skill, but it really makes your wardrobe work better for you. No more tripping over your trousers or looking like you borrowed them from someone taller! If you’re completely new to sewing, our guide on how to learn sewing can help you build the confidence and skills needed for projects like hemming. By the end, you’ll be able to shorten pants neatly and create a polished, professional-looking finish without paying for alterations.
Gathering Your Hemming Supplies
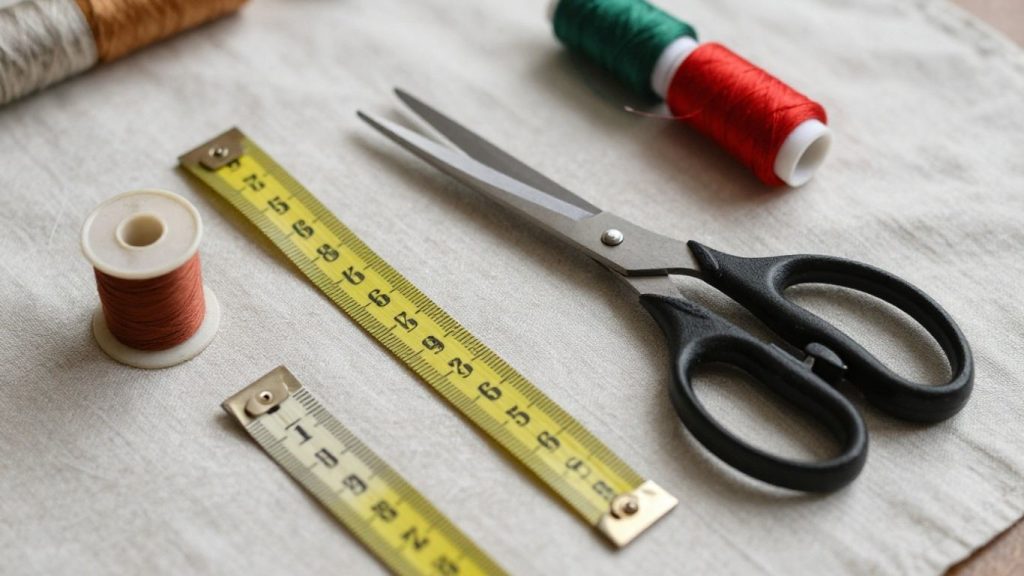
I always have all my tools ready before I even start to cut into fabric. It just makes everything so much easier, doesn’t it? For instance, if you were to hem pants without the proper material, it would be a pain in the neck.
One of these easy beginner sewing projects that is really helped by having the right tools from the beginning. When it’s all within reach, I can concentrate on the sewing and not search for a lost pin.
If you’re building your sewing essentials, consider putting together one of the best sewing kits for beginners to keep everything organized.
| Tool | Why You Need It | Quick Tip |
|---|---|---|
| Fabric Scissors | Used to cut extra fabric cleanly after marking the hem allowance. | Use fabric-only scissors |
| Measuring Tape | Helps measure the correct pant length and hem allowance evenly. | Measure both legs |
| Fabric Marker or Chalk | Used to mark the new hemline before folding or cutting. | Test first |
| Iron | Presses the fold flat so the hem looks crisp and professional. | Press before sewing |
| Pins or Sewing Clips | Hold the folded hem in place while you sew. | Use clips for denim |
| Needle and Thread | Useful for hand hemming, blind hems, and quick repairs. | Match thread color |
| Sewing Machine | Makes hemming faster and stronger, especially for jeans and casual pants. | Use correct needle |
Fabric Scissors
This is non-negotiable. You need a pair of scissors dedicated only to fabric. Seriously, don’t use them for paper or anything else. Paper dulls the blades super fast, and then you’re left with jagged cuts that look messy. Good fabric scissors make a clean cut, which is key for a neat hem.
Measuring Tape or Ruler
Accuracy is important here. I usually grab my flexible measuring tape because it’s easy to wrap around the pant leg. A ruler works too, especially a quilting ruler with clear markings. You need to measure precisely where you want the hem to fall.
Fabric Marker or Chalk
Once I’ve measured, I need to mark the fabric. I like using a fabric marker that disappears with heat or water, or sometimes tailor’s chalk. It’s important to test it on a scrap first to make sure it doesn’t leave a permanent mark. You don’t want your hemline showing up after you’re done!
Iron and Ironing Board
Pressing is a big part of getting a crisp hem. I use my iron to set the fold before I sew. It makes a huge difference in how professional the finished product looks. A good press makes the fabric behave and stay where you want it.
For sewists who frequently press seams, hems, and fabric folds, a compact mini iron for sewing can be a practical addition to your workspace.
Sewing Machine or Needle and Thread
This is the place where the real sewing takes place. I sew with my sewing machine most of the time, since it is faster and makes a really strong stitch, particularly when it comes to jeans. However, if I have to work on something delicate or don’t have my machine on hand, a needle and thread will do just fine.
The only thing you need to do is ensure that you are using a thread colour as close to the fabric as possible. If there is no exact match, choose a slightly darker colour, as this will work better than a lighter one.
If you’re still shopping for your first machine, check out our recommendations for the best sewing machines for beginners to find a model that makes basic alterations and DIY projects much easier.
Pins
Handy for keeping the fabric in place when measuring, marking, and sewing. I keep the folded hem in place with pins prior to it being under the needle. Alternatively, use sewing clips for thicker materials such as denim, since they are not as easy to poke through.
These are the essentials that I can use to work on nearly any pair of pants. Being able to change clothes at home and look professional without going to the tailor is a great empowerment. It can save time and money and provide you with the fit you desire.
Step-by-Step Guide to Hemming Pants
Alright, let’s get down to business and actually hem these pants. This is where the magic happens, turning those too-long trousers into a perfect fit. I find that taking it slow and steady is the best approach, especially when I’m just starting with these kinds of DIY pant alterations. It’s not rocket science, but a little care goes a long way.
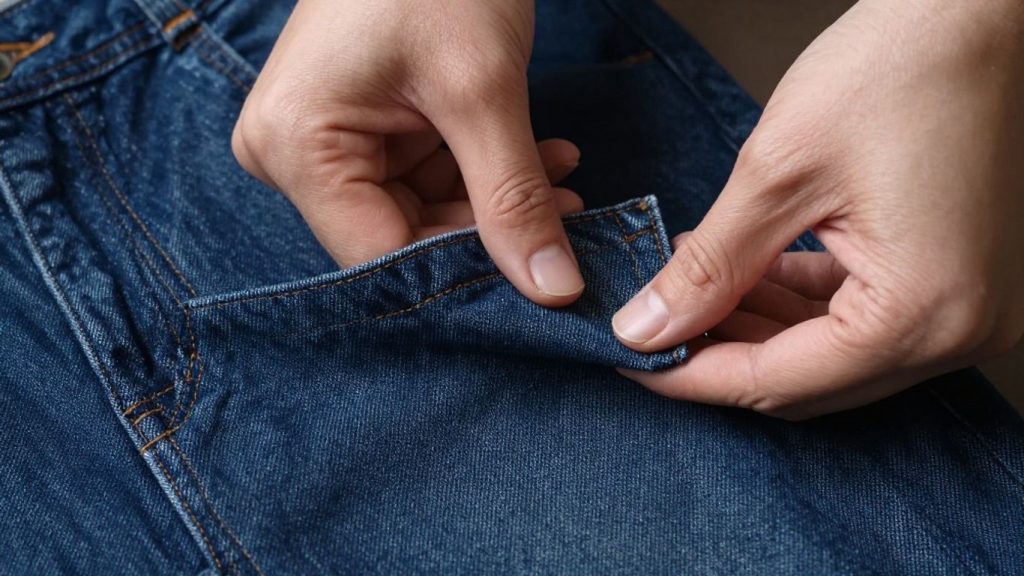
Step 1: Try On and Mark the Desired Length
This is likely the most crucial step, so take your time. I wear the pants and shoes I am most likely to wear with the pants. This is a big difference if you wear heels or boots. In front of a mirror, determine exactly where the hem will end up. Do you want a full break, a slight crease, or no break? When the length is just right, I pin it. I usually have a friend help me with this part, as it’s easier to get an accurate line when someone else is pinning.
Step 2: Prepare the Fabric for Hemming
Now remove the pants and spread them out. If there’s an existing hem, I carefully use a seam ripper to take out those stitches. A bit tedious, but it provides you with a clean edge to work with. Then, I measure down from the pinned edge to determine the amount of fabric to cut off. This is your hem allowance. I leave 1-1.5 inches for most pants, such as jeans or casual trousers. If it’s a dressier pair of pants, I might expand it a little bit, 1.5 to 2 inches, to make it a bit heavier.
Understanding basic machine components can also make sewing projects easier. If you’re unfamiliar with common accessories and replacement pieces, take a look at our guide to sewing machine parts.
| Pants Type | Recommended Hem Allowance | Best Hem Style | Notes |
|---|---|---|---|
| Jeans | 1 to 1.5 inches | Double-fold hem | Works well for denim and helps hide the raw edge. |
| Casual Pants | 1 to 1.5 inches | Straight stitch hem | Good for chinos, cotton pants, and everyday trousers. |
| Dress Pants | 1.5 to 2 inches | Blind hem | Creates a cleaner, less visible finish. |
| Lightweight Pants | 0.5 to 1 inch | Narrow hem | Best for thinner fabrics that do not need a bulky fold. |
| Wide-Leg Pants | 1.5 inches | Pressed hem | Extra pressing helps the hem hang evenly. |
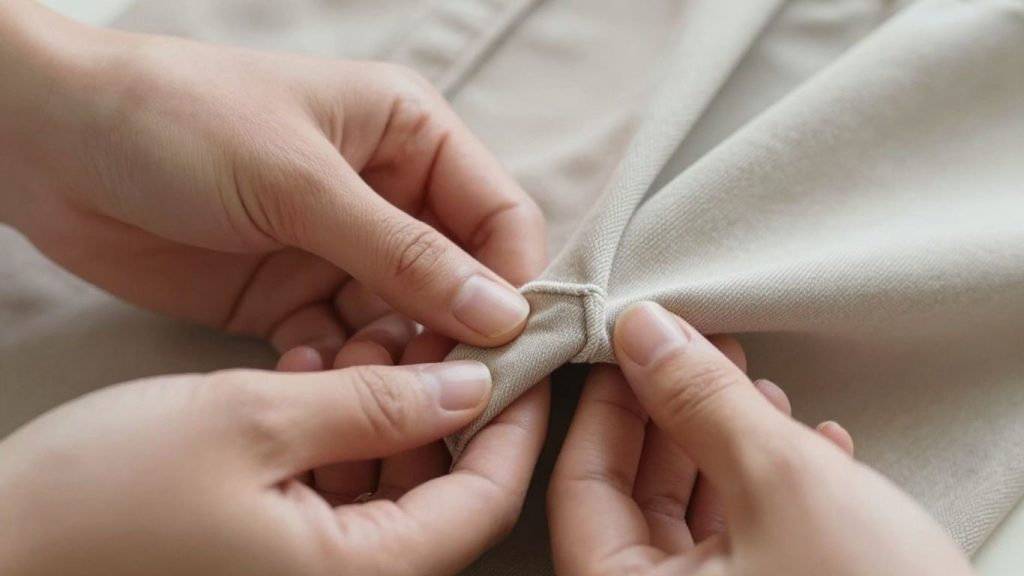
Step 3: Create the Hem Fold
That’s where we make that nice edge. I turn the pants inside out. Then, I take the raw edge of the fabric and fold it up towards the inside of the pant leg. Typically, I fold up half my hem allowance.
So, if I chose to give myself 1 inch of allowance, I fold up 1/2 inch first. This fold is pressed with an iron. Then I fold it up again the same amount. The second fold is a crucial one that covers the raw edge completely, which is essential to avoid fraying and achieve a professional finish. This second fold-down is pressed very tightly.
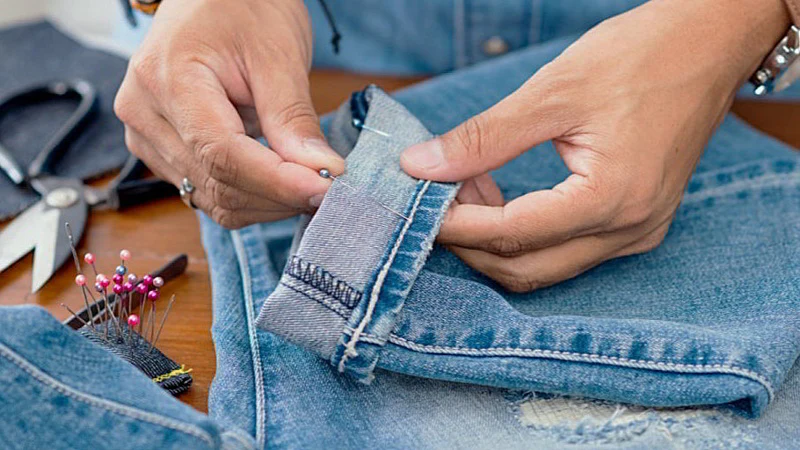
Step 4: Secure the Hem
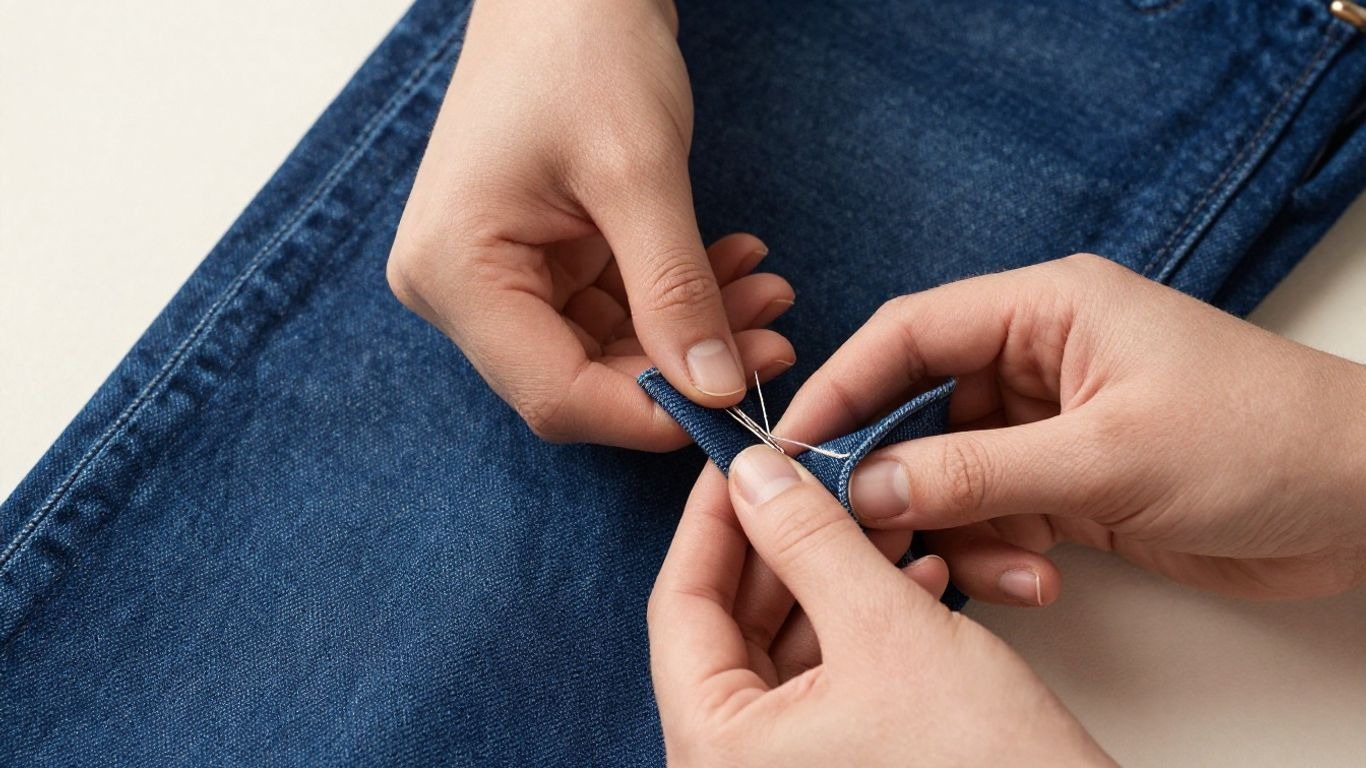
I fold and press the hem and pin it down. I push the pins in horizontally, around the leg. Now you have a choice, either sew by hand or with a sewing machine. Hand sewing can be done for a quick hem pants tutorial, particularly if you are looking to shorten pants without a sewing machine!
I do a simple stitch along the folded edge, such as a blind hem stitch if I can do it, or a small, consistent stitch all along the folded edge. When working on a machine, I simply sew a straight line near the folded edge. This is a very good introduction to sewing clothes.
| Method | Best For | Pros | Cons |
|---|---|---|---|
| Hand Hemming | Dress pants, delicate fabrics, invisible hems, and quick fixes. | Cleaner hidden finish and good control on delicate fabrics. | Takes more time and requires patience. |
| Machine Hemming | Jeans, chinos, casual pants, cotton pants, and stronger everyday hems. | Faster, stronger, and more durable for regular wear. | Stitch line may be visible from the outside. |
| Hem Tape | Temporary fixes, no-sew hemming, costumes, and emergency adjustments. | Fast and does not require sewing skills. | May not last as long as stitched hems. |
If you enjoy simple projects that help improve your sewing skills, you may also like learning how to sew an apron or how to sew a fabric bag
Step 5: Finishing Touches
After I’ve sewn the hem all the way around, I take the pins out. I give the hem a final press with the iron to make sure it’s crisp and lies flat. Next, I right out the pants and re-measure the length once again.
It’s amazing how satisfying it is to see the finished result of your DIY pant length adjustment. It makes these easy sewing projects for pants seem like a huge success, and you have changed the length of pant legs all on your own!
Tips for a Perfect Hem
Well, you’ve got your pants in front of you, and you’re ready to get them just right. Before you begin stitching, I’ve learned a few tips that make a huge difference. It’s the little things, you know?
The first thing to remember is to always press your hem. Come on, it’s not worth missing out on. Once you have made your fold (or folds if you are doing a hem), press it well with your iron. This isn’t only for looks; it makes the fabric easier to stay in place and makes it much easier to sew a straight line. I tend to steam it a bit to really set the crease. It can mean the difference between the world and good.
Sew slowly when sewing. It’s easy to rush through it, particularly when using a machine, but it’s important to take your time and go slowly. Avoid stretching or bunching fabric as it is fed through. When making a double fold (as in jeans), sew near that inner folded edge. It provides a very smooth finish.
Here’s a quick rundown of what I try to remember:
- Use the right needle and thread. For thicker fabrics like denim, I grab a heavier needle and some sturdy thread. For lighter stuff, a finer needle and thread work best. It just makes sewing so much smoother.
- Backstitch at the beginning and end. This is super important! A few stitches forward, then a few back, then forward again. It stops your hem from unravelling later. Trust me, I’ve learned this the hard way.
- Consider your shoes. I know we mentioned this in marking, but it’s worth repeating. The shoes you plan to wear with the pants really do change how they hang. Always measure and mark with the right footwear on.
Feel free to use pins or clips liberally. They are there to assist you in keeping everything in line throughout you sew. If things begin to change, a few extra pins can save you a lot of frustration in the long run.
And, one final note: if you get it wrong, don’t fret. The best tool you have is a seam ripper. Don’t be afraid to unravel some of the stitches and start over. If you get it right, it’s better than if it looks a little odd.
Common Hemming Mistakes to Avoid

So you’ve made it this far and are now ready to complete those pants! That’s awesome! However, before you start to make your final stitch, let’s discuss a few things that might get you in trouble. I’ve definitely made these mistakes, and it can make a good hemming job go from good to… less than good.
Inaccurate measuring is one of the main causes of a wonky hem. I really mean it, I can’t emphasise this enough. If you don’t measure carefully, you will end up with one pant leg being shorter than the other or a hem that is not the length you wanted. Always measure twice, cut once, as they say. Just make sure to wear the shoes you’ll wear with the pants when you take the measurements, as there can be a significant difference between flats and heels!
One of the other frequent mistakes is not allowing enough fabric for a hem allowance. That extra bit is needed to fold over and make a nice edge. If you cut too close to your marked line, you will not have enough to work with and will need to start again. I’m looking for around 1 inch to 1 1/2 inches, but it will depend on the fabric and the style I want to create.
| Mistake | Why It Happens | Quick Fix |
|---|---|---|
| Uneven Pant Legs | Only one leg was measured or the pants were not pinned while worn. | Try the pants on again, re-pin both legs, and measure from the same point. |
| Wrong Length | The pants were measured without the shoes you plan to wear. | Measure again while wearing the correct shoes. |
| Fraying Edge | The raw fabric edge was left exposed after cutting. | Use a double-fold hem to hide the raw edge. |
| Wavy Hem | The fabric was stretched while sewing or not pressed properly. | Press the fold first and sew slowly without pulling the fabric. |
| Visible Messy Stitches | The thread color, stitch size, or sewing line was not consistent. | Use matching thread and keep the stitch line close to the folded edge. |
| Broken Needle | The needle was too thin for denim or thick fabric. | Use a denim or heavy-duty needle for thicker pants. |
Don’t rush the process. The key to making a DIY look like it was done by a tailor is paying attention to the little details, such as ensuring your fabric is flat and your stitches are even.
Last but not least, take into account the type of fabric. Delicate fabrics such as chiffon or silk require a much more delicate approach than strong denim. If too much pressure is applied or the technique is incorrect, puckering or damage can easily occur. Before you begin, always take into account the characteristics of the fabric.
Conclusion
Here is your answer! Even if you’re just getting started, you can learn how to hem pants! It may take some practice, but it’s worth it. Not only will you save money, but your pants will fit just right.
Regardless of whether you’re using a needle and thread or a sewing machine, follow these instructions, and you’ll be left with a tidy, professional-looking hem in no time. Give it a try on your next pair of pants that are a bit too long!
Once you’ve mastered hemming, you can continue building your skills with beginner-friendly projects like how to make a simple tote bag at home and expand your sewing knowledge even further.
Frequently Asked Questions
Why should I learn how to hem pants?
Learning to hem pants is super handy! It means you can make your pants fit perfectly without paying someone else. Plus, it’s a cool skill to have that can save you money and make your clothes look way better.
Can I really hem pants without a sewing machine?
Absolutely! You can totally hem pants by hand with just a needle and thread. It might take a bit longer, but it works just fine, especially for simpler hemming jobs. Just be sure to use a strong stitch.
What’s the best way to measure the length?
The best way is to put the pants on with the shoes you’ll wear them with. Then, fold the pants up to the length you like and pin them. It’s also good to measure from the crotch down to your pinned hemline for accuracy.
How much fabric should I leave for the hem?
For most pants, like jeans or casual trousers, leave about 1 to 1.5 inches of extra fabric. For dressier pants, you might want a little more, maybe 1.5 to 2 inches, to give them a nice weight.
What if my fabric starts to fray after cutting?
To stop fraying, you can fold the raw edge of the fabric under twice before sewing. This is called a double-fold hem, and it hides the rough edge nicely. Using pinking shears can also help prevent fraying.
How do I make sure my hem looks professional?
Pressing is key! Use your iron to make sharp creases on your folds before you sew. Also, try to sew as straight as possible, close to the folded edge. Matching your thread colour to the pants helps a lot, too.