
How to Hand Sew a Hem: A Beginner-Friendly Step-by-Step Guide
Learning how to hand sew a hem is one of the most useful beginner sewing skills because it helps you repair clothes, shorten pants, finish skirts, adjust sleeves, and create clean garment edges without a sewing machine.
A hand-sewn hem is especially helpful for delicate fabrics, formal wear, lightweight materials, and small clothing alterations where you want more control and less visible stitching. With the right needle, matching thread, careful pressing, and even stitch tension, you can create a neat hem that looks polished and lasts through regular wear.
The easiest way to hand sew a hem is to prepare the fabric first, press the fold flat, choose the right hemming stitch, and sew small, even stitches along the folded edge. For an invisible finish, the blind hem stitch is usually the best choice, while a running stitch works better for quick visible repairs. In this beginner-friendly guide, you’ll learn what supplies you need, how to mark and press your hem, which hand sewing stitch to use, and how to finish garment edges by hand with confidence.
Key Takeaways
Learning to finish garments by hand is a rewarding skill that gives you full control over the look and longevity of your favorite clothes. Here are the most important things to remember when working on your own sewing projects at home.
- Hand stitching allows for invisible, professional-quality edges on delicate fabrics.
- Preparing your hem with careful pressing prevents puckering later on.
- Choosing the right needle and thread combination ensures a secure and clean result.
- The blind hem stitch is perfect for a subtle, professional finish on formal wear.
- Practicing simple manual hemming for clothing alterations can save you costly trips to a professional tailor.
Quick Answer: What Is the Best Way to Hand Sew a Hem?
The best way to hand sew a hem is to fold and press the fabric edge first, secure it with pins or clips, then use small, even stitches along the folded edge. For a nearly invisible finish on dress pants, skirts, sleeves, and formal clothing, use a blind hem stitch and catch only one or two threads from the outer fabric. For quick repairs or casual clothing, a running stitch is faster but more visible. Always keep your thread tension relaxed so the hem does not pucker or pull.
What Is a Hand-Sewn Hem?
A hand-sewn hem is a finished fabric edge that is folded, pressed, and stitched by hand instead of using a sewing machine. It is commonly used on pants, skirts, dresses, sleeves, formalwear, curtains, and delicate garments.
The goal of a hand-sewn hem is to hide or secure the raw edge, prevent fraying, and create a clean finish. Depending on the stitch you choose, the hem can be almost invisible from the outside or slightly visible for a casual handmade look. If you’re new to garment finishing, learning how to learn sewing can help you build the foundational skills needed for neat and professional hems.
Why Hand Sew a Hem?
Some people think a sewing machine is required for a clean hem, but hand sewing gives you more control over the stitch placement, thread tension, and finished look. It is especially useful for delicate fabrics, formal clothing, curved hems, and small repairs where machine stitching may look too harsh or visible.
A hand-sewn hem can create a soft, flexible finish that blends into the garment. It may take longer than machine sewing, but it is one of the best techniques for invisible hems, dress pants, skirts, sleeves, lightweight fabrics, and clothing alterations that need a careful finish.
When Should You Hand Sew a Hem Instead of Using a Machine?
Hand sewing is best when you want control, softness, and a less visible finish. It is especially useful for formal garments, delicate fabrics, lightweight materials, curved hems, small repairs, or clothing that should not show a strong machine stitch line.
Machine sewing is faster and stronger for casual hems, curtains, cotton projects, and everyday clothing. But if you are hemming dress pants, skirts, sleeves, silk, chiffon, wool trousers, or formalwear, hand sewing often gives a cleaner and more professional result.
| Situation | Best Method | Why |
|---|---|---|
| Dress pants | Hand sewing | Creates a subtle, less visible finish |
| Skirts and dresses | Hand sewing | Good for curved and delicate hems |
| Curtains | Machine sewing | Faster for long straight hems |
| T-shirts and knits | Machine sewing with stretch stitch | Needs stretch-friendly stitching |
| Silk or chiffon | Hand sewing | More control on delicate fabric |
| Quick casual repair | Running stitch by hand | Fast and simple |
| Everyday cotton hem | Machine or hand sewing | Both can work depending on finish |
Gathering Your Supplies
The first step to any project is to get the proper tools, so that the work will not seem like a chore. When everything is within reach, you’ll maintain the momentum, and you will be able to concentrate on the rhythm of the stitching rather than the search for lost items.
A good sewing kit can help you avoid frustration and make it easier to sew the hems of clothes on your material. A good sewing kit for beginners can help you avoid frustration and make it easier to sew the hems of clothes on your material.
Hand Sewing Hem Tools Checklist
| Tool | Why You Need It | Beginner Tip |
|---|---|---|
| Hand sewing needle | Used to stitch the hem by hand | Choose a sharp needle that suits your fabric |
| Matching thread | Helps stitches blend into the fabric | Use thread close to the garment color |
| Pins or clips | Holds the folded hem in place | Clips work well for thicker fabrics |
| Measuring tape | Helps measure the hem evenly | Measure at several points |
| Hem gauge | Keeps small measurements consistent | Useful for pants, sleeves, and skirts |
| Fabric chalk or marker | Marks the fold line | Test first to make sure it disappears |
| Fabric scissors | Cuts extra fabric cleanly | Use fabric-only scissors |
| Iron | Presses the hem fold flat | Press before and after sewing |
| Pressing cloth | Protects delicate fabric | Use it on silk, wool, or shiny fabric |
Fabric and Thread
When you’re just beginning, choosing the right materials is the key to any successful project. Ideally, you want to use an all-purpose thread that is as close as possible to the weight and color of your fabric so that the stitches will blend in with the grain of the fabric. Remember that a good quality thread will save you from the hassle of knots and fraying during the process.
For lighter silk or cotton fabrics, a fine-weight thread may be better, and for heavier trouser fabrics, a sturdier polyester thread may be better. Make sure to test any thread on a scrap of your project fabric to ensure that the color matches for the simple hand sewing stitches you will use with your fabric. Keeping your supplies organized in one of the best sewing boxes can make sewing projects much easier.
Needles and Pins
Your needle should be sharp and appropriate for the fabric you’re working with, since a dull needle can tear delicate fibers. I use sharps for general purposes; they are medium length and work well on a variety of fabrics. Be sure to have lots of small, pointed pins to keep your work from moving around while you are working on it, so you can concentrate on the stitching itself.
If you are hemming by hand for clothes alterations, you might find it easier and quicker to catch individual threads with a smaller needle. A little planning can go a long way towards making your process more efficient and comfortable.
Measuring and Cutting Tools
Accurate measurement is the distinction between a professional and a sloppy project. With a flexible measuring tape, measure the length you want; with a sharp pair of fabric shears, cut cleanly with no frayed edges. I find it much easier to use a ruler and a marking tool to make the entire setup stage much more accurate, particularly when attempting to keep an even fold all the way around a garment.
If you have the basic sewing machine parts and tools and cutting equipment, you will not have to worry about cutting too much or cutting unevenly. Keep in mind, if you prepare it correctly using your measuring and cutting tools, the actual sewing process will seem like a sort of meditative activity.
Preparing Your Fabric for Hemming
The preparation of the edges is likely the most critical step in the process, since it can determine the cleanliness of the final product. Without taking two measurements or pressing your folds well, you’ll end up with twisted hems or different lengths when it’s finished.
During this step, maintaining a taut and well-marked fabric is important because it sets the stage for a successful hemming experience when you are a beginner in sewing. Don’t forget that good fabric will work for you, bad fabric will work against you. Before folding and pressing, it helps to understand how to thread a sewing machine if you plan to compare hand-sewn and machine-sewn hems.
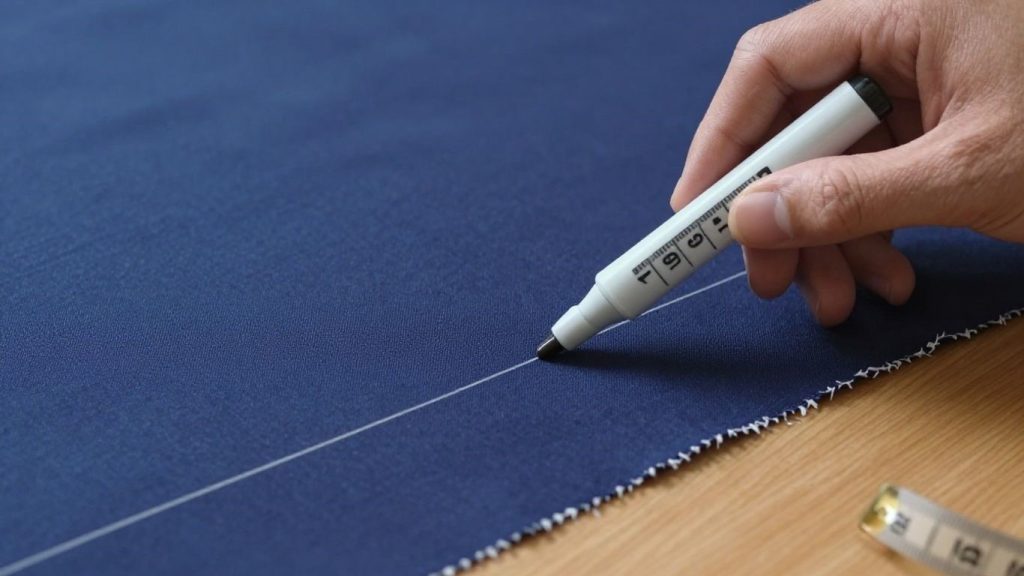
Measuring and Marking the Hemline
Measure carefully with a measuring tape to make sure you cut the crease in the correct place, and use a wash-away fabric marker or tailor’s chalk to mark the crease. This is a visible guide to help you sew around the whole hem, without having to guess distances as you go.
If the fabric is stretchy, avoid stretching it when marking; otherwise, the line will stretch, and the hem of the skirt or pants will not be even. Many crafters prefer to pin the garment while it is on the wearer, but for smaller projects, laying it flat on a table with a clear guideline is also fine.
Hand Sewing Hem Allowance Guide
| Fabric / Garment Type | Suggested Hem Allowance | Best Stitch | Notes |
|---|---|---|---|
| Dress pants | 1 inch to 1.5 inches | Blind hem stitch | Gives a cleaner formal finish |
| Skirts | 1 inch to 2 inches | Blind hem or slip stitch | Good for curved hems |
| Lightweight cotton | 1/2 inch to 1 inch | Slip stitch or running stitch | Press well before sewing |
| Silk or chiffon | 1/4 inch to 1/2 inch | Tiny slip stitch | Use fine needle and light thread |
| Wool trousers | 1 inch to 2 inches | Blind hem stitch | Use matching thread and light tension |
| Sleeves | 1/2 inch to 1 inch | Slip stitch | Keep stitches small and even |
| Casual repairs | 1/2 inch to 1 inch | Running stitch | Faster but more visible |
Choosing the Right Hand Sewing Stitch for Hems
The choice of stitch depends on the type of garment to be repaired and the skill level of the individual. Each stitch can offer varying amounts of strength, flexibility, and visibility, so it is important to take into account how the garment will be used before you pull the needle through for the first time.
With a grasp of basic hemming skills, you can decide the right choice that’s both quick and beautiful. These two basic stitches are the perfect sewing tool kit for most repairs when you’re a new sewer. If you’re considering whether hand sewing or machine sewing is better for a project, comparing a serger vs sewing machine can provide additional insight.
The Blind Hem Stitch (for an Invisible Finish)
When you’re looking to have your work be as inconspicuous as possible, this is the best method because there are no exterior loops of thread. The stitch is used to catch only one or two threads of the garment fabric, leaving the majority of the thread on the inside of the turned-up hem.
It takes a little patience to get the tension just right, but the finished product is beautiful and clean, and looks like it came from a high-end boutique. If you’re nervous, practice on a scrap piece of fabric until you feel the weight and rhythm necessary to prevent the outer threads from pulling and puckering.
A good hem, done with the right tension, will be almost invisible if the right thread is used to match the weight and color of the garment.
The Running Stitch (for a Quicker, Visible Hem)
At times, you wish to have a finish that is sturdy and reliable and does not have to be hidden perfectly. Running stitch is a simple in-and-out stitch that is easy to do and works rhythmically to secure your fabric edge fast.
It’s great for quick fixes on clothing or for casual wear, where some stitching is visible and helps make it more handmade. This method is obviously quicker than a blind hem, but the key is to keep your stitches even and neat, not a mess.
Blind Hem Stitch vs Running Stitch
| Stitch Type | Best For | Visibility | Difficulty | Main Benefit |
|---|---|---|---|---|
| Blind hem stitch | Dress pants, skirts, formalwear | Nearly invisible | Medium | Professional finish |
| Slip stitch | Delicate hems, sleeves, repairs | Low visibility | Easy to medium | Clean and flexible |
| Running stitch | Quick repairs, casual hems | Visible | Easy | Fast and simple |
| Whip stitch | Raw edge repairs, inside seams | More visible | Easy | Strong edge control |
| Catch stitch | Stretchy or curved hems | Low to medium | Medium | Flexible and secure |
For most beginners, the running stitch is easiest to learn, but the blind hem stitch is better when you want a cleaner, almost invisible hem.
Step-by-Step Guide to Hand Sewing a Hem
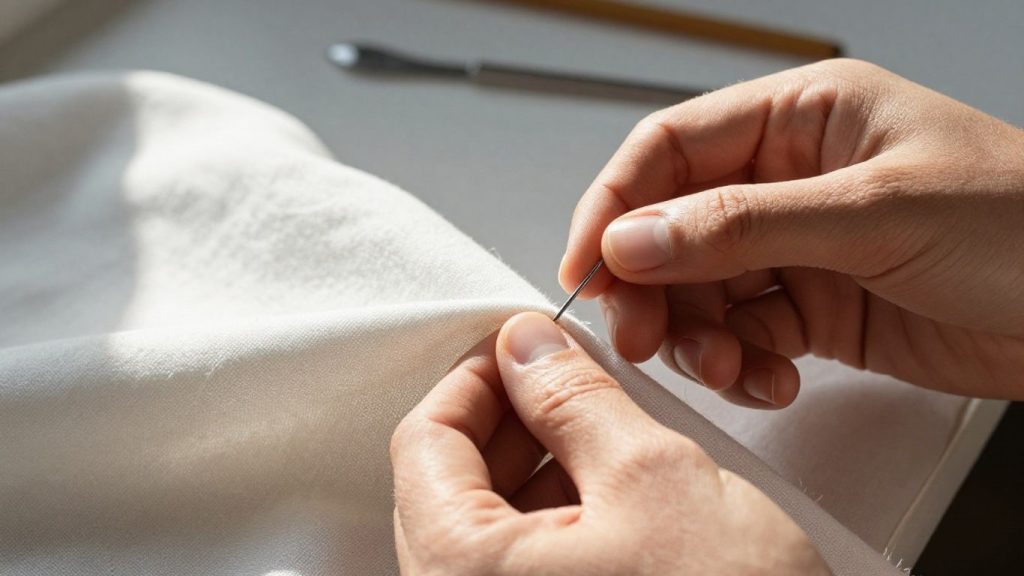
When the fabric is pressed and the thread is ready, you can begin to secure your edge. First of all, tie your thread into a knot and pass the needle through the folded edge so that the knot is completely inside the hem layer.
Pull the needle through the fabric at even intervals following the marked line, keeping the tension even so the hem will not shrink or pucker. Occasionally, inspect the outside of the garment to ensure that you are not getting too much of the fabric and causing unwanted pull lines.
Repeat the pattern around the perimeter of the piece, overlapping the initial stitches slightly for added security. When you get to the starting point, make a hidden knot on the bottom of the fabric and cut off the excess thread. With a little time and patience, you will learn how to hand-finish garment edges with confidence. If you enjoy beginner-friendly projects, you may also like learning how to sew an apron or how to sew a fabric bag.
Before You Start Hand Sewing a Hem
Before you begin stitching, make sure the hem is ready:
- Wash and dry the garment if it may shrink later.
- Iron the fabric flat before measuring.
- Measure the hem allowance evenly.
- Mark the fold line with chalk or washable marker.
- Fold and press the hem before sewing.
- Pin or clip the folded edge in place.
- Thread the needle with matching thread.
- Knot the thread neatly.
- Test your stitch on scrap fabric if possible.
This preparation helps prevent uneven hems, puckering, twisted fabric, and visible stitch marks. This preparation helps prevent uneven hems, puckering, twisted fabric, and visible stitch marks. For garment alterations involving trousers, you may also find our guide on how to hem pants useful.
Step 1: Knot the Thread and Hide It Inside the Hem
First, pass your needle and thread through the small knot at the end of the thread. When hand sewing a hem, select the thread color that is similar to the color of your fabric to make the hem look neat and unobtrusive from the outside.
Take the needle through the hem allowance from the inside, not the outside of the garment. This conceals the fabric layers’ knot and makes hand sewing neater and more professional.
Step 2: Take Small Stitches Along the Folded Edge
Start stitching with small, even stitches along the hem, which is folded over. To get a cleaner invisible hem, take just one or two threads from the main fabric and pass them through the folded hem layer.
Stitches should be close and even, but not too tight. Even tension is important to avoid puckling, shrinking, or noticeable pull marks on the outside of the garment.
Step 3: Check the Outside of the Fabric as You Sew
Turn the garment over after every couple of stitches and inspect the outside. The aim is to ensure that your stitches are not too noticeable and that you are not picking up too much of the outer fabric.
This is particularly critical when hand sewing hems on dress pants, skirts, sleeves, light fabrics, or formal clothing. By checking as you go, you will be able to correct any errors at an early stage rather than removing a long line of stitches later.
Step 4: Continue Around the Hemline Evenly
Continue to sew around the entire hem line, along the pressed fold and the guide. Handle slowly and keep fabric flat in your hands to maintain a smooth, even hem.
Try to keep the same stitch size and spacing all the way around the garment. The hem is stronger, cleaner, and more durable after washing or wearing because of consistent stitching.
Step 5: Overlap the Starting Stitches for Extra Security
At the end, repeat the first few stitches, slightly overlapping at the starting point. This will help to hold the hem securely in the hand-sewn area and will keep the thread from loosening with time.
The overlap doesn’t have to be cumbersome. A few small stitches in the same area will suffice to hold the seam, but not form a noticeable lump on the fabric.
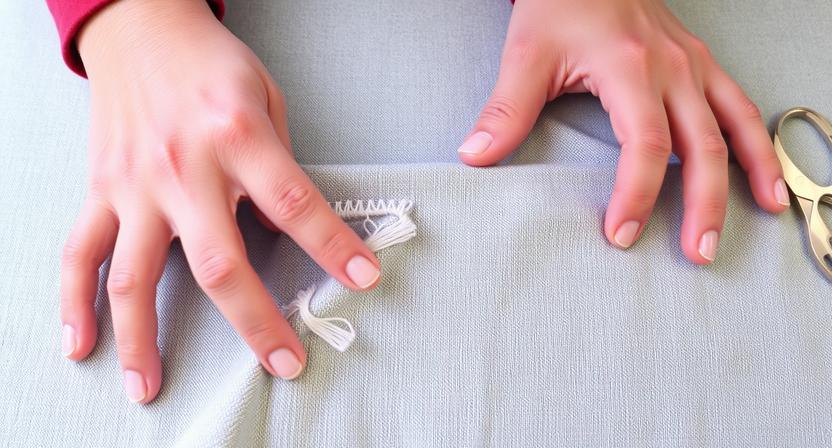
Step 6: Tie Off the Thread and Trim the Tail
Just tie a small knot inside the hem allowance to complete the hem. Aim to hide the knot between the layers of fabric or on the underside.
Once the knot is tied, cut the surplus thread just above the material, but not through the stitches. Press the hem one last time with an iron to ensure the edge is flat and shiny.
Final Tip for Hand Sewing a Hem
Hemming by hand is slower than sewing by machine, but it can produce a cleaner hem on delicate or formal clothing. It is good for dress pants, skirts, sleeves, repairs, lightweight fabrics, and projects where the stitches are close to being invisible.
If your initial hemmed hand stitching doesn’t turn out as expected, try it on scraps before doing it on the actual piece. With practice, patience, and proper pressing, you can master the art of hand-pressing garment edges with confidence.
Common Hand Hemming Mistakes and How to Fix Them
| Problem | Common Cause | Simple Fix |
|---|---|---|
| Hem looks uneven | Measurements were not consistent | Re-measure and press the fold again |
| Stitches show outside | Too much outer fabric was caught | Pick up only one or two fabric threads |
| Hem puckers | Thread tension is too tight | Loosen your tension and press again |
| Thread tangles | Thread is too long or twisted | Use 18 inches of thread or thread conditioner |
| Knot shows outside | Knot started on the garment face | Hide the knot inside the folded hem |
| Fabric shifts | Hem was not pinned or clipped | Secure the fold before stitching |
| Hem feels bulky | Hem allowance is too wide for fabric | Trim excess fabric or use a smaller fold |
| Stitching looks messy | Stitch size is inconsistent | Practice on scrap fabric first |
Best Beginner Projects to Practice Hand Sewing a Hem
Start with simple items before hemming expensive clothes. Practice helps you improve stitch spacing, thread tension, and how much fabric to catch with the needle.
Good beginner projects include:
- Cotton napkins
- Pillow covers
- Pajama pants
- Simple skirt hems
- Dress pants
- Sleeves
- Lightweight curtains
- Table runners
- Scrap fabric samples
- Small clothing repairs
Stable woven fabrics like cotton are easiest for beginners because they press well and do not stretch as much as knit fabric. Stable woven fabrics like cotton are easiest for beginners because they press well and do not stretch as much as knit fabric. Once you’re comfortable with hemming, try beginner sewing projects like how to make a simple tote bag at home or use a free wallet sewing pattern to practice your stitching skills further.
Final Recommendation
For most beginners, the best way to learn hand sewing a hem is to start with a simple cotton fabric and use a running stitch or slip stitch. Once you feel comfortable, practice the blind hem stitch on scraps before using it on dress pants, skirts, sleeves, or formal garments.
Always measure carefully, press the hem before sewing, use matching thread, and keep your stitches small with relaxed tension. These simple habits will make your hand-sewn hems cleaner, stronger, and more professional over time. As your skills improve, you may be ready to explore the best sewing machines for beginners to handle larger sewing and alteration projects more efficiently.
Frequently Asked Questions
Is it hard to learn how to hand-sew a hem for a beginner?
It is entirely manageable for a beginner. While it requires some practice to keep your stitches uniform, most people can learn the basic techniques within a few hours of focused effort.
What do I do if my thread keeps getting tangled when hand sewing?
Keep your thread length manageable, ideally around eighteen inches, to prevent excessive twisting. Using a wax coating on your thread can also help smooth the fibers and prevent knots while you work.
How do I ensure my hem is the same length all the way around?
Use a hem gauge to measure your distance from the bottom edge at regular intervals. Marking these points with a fabric pen helps you stay consistent and prevents the hem from spiraling or sagging.
What is the advantage of hand sewing over machine sewing for hems?
Hand sewing provides more control over the tension and the amount of fabric caught. It is significantly more gentle on delicate fabrics and creates a softer, more flexible finish that machines cannot always replicate.
Can I use a regular sewing needle for every type of fabric?
While a standard needle works well for cotton and medium-weight fabrics, you should use specialized needles for thicker materials like denim or fine, delicate materials like silk to avoid fabric damage.
How do I finish the thread at the end of a hem securely?
To finish securely, make a tiny stitch through the fabric layers and pass your needle through the loop before pulling it tight. Repeating this knotting process twice ensures the thread stays firmly in place.
How often should I press the hem during the sewing process?
It is beneficial to press your hemline before you start to set the edge, and again once you finish your stitching. This final press helps to meld the stitches into the fabric and gives a professional crispness to the garment.