Sewing Machine Troubleshooting Guide: 15 Common Problems & Fixes
Most sewing machine problems start with a small setup issue rather than a major internal failure: incorrect threading, a damaged needle, the wrong bobbin, lint near the hook, an unsuitable presser foot, or a setting that does not match the fabric. The fastest way to troubleshoot is to stop sewing, make the machine safe, return to a known baseline, and change one thing at a time instead of turning several dials at once.
In this guide, I walk through 15 of the problems I see most often during hands-on testing, explain the safest first checks, and show when a symptom points beyond normal user maintenance. Always use your exact machine manual as the final authority because threading paths, bobbin systems, oiling instructions, feed controls, and user-serviceable parts vary by model.
Key Takeaways
Troubleshooting works best when you protect the machine from further damage and keep the test process controlled. These are the habits I use before changing tension or assuming a part has failed.
- Turn off and unplug the machine before clearing jams, removing the needle plate, or cleaning accessible areas.
- Incorrect threading can cause loops, nests, thread breaks, and bobbin-area rattling.
- A bent, dull, damaged, or incorrectly installed needle can cause skipped stitches and thread or fabric damage.
- Use the correct bobbin size and insertion direction to prevent jams and poor stitches.
- Check the presser foot, feed dogs, stitch length, lint, pressure, and bobbin-winder position if fabric will not move.
- Test on scrap fabric using the same fabric, thread, needle, layers, and presser foot as the project.
- Stop and seek service if the handwheel binds, the needle strikes metal, wiring is exposed, or grinding or electrical smells occur.
The goal is not to prove that you can repair everything at home. It is to separate normal setup errors from the faults that should be handled by a technician.
How to Troubleshoot a Sewing Machine Safely
When I troubleshoot a machine, I start from the outside and work inward. I do not remove covers or touch adjustments that the manual does not identify as user-serviceable, and I never use force to free a handwheel or pull fabric from a tangle.
- Stop sewing as soon as the symptom changes. A new clicking, grinding, needle strike, or sudden jam is a reason to stop rather than stitch through it.
- Switch off and unplug before internal checks. Do this before removing the needle plate, cleaning the bobbin area, or cutting tangled thread near the mechanism.
- Raise the presser foot before rethreading when instructed. On many machines this opens the upper tension discs so the thread can seat correctly.
- Remove fabric gently. Cut tangled thread into manageable sections instead of pulling the project away from the needle area.
- Return settings to a normal baseline. Use the manual’s normal straight-stitch, tension, and stitch-length settings before diagnosing a new problem.
- Change one variable at a time. If you change tension, needle, thread, bobbin, and stitch length together, you will not know which correction worked.
If you are not sure which component you are looking at, start with my sewing machine parts guide before removing or adjusting anything.
Once the machine is safe and back at a known baseline, the symptom itself can guide the next check. The 15 sections below are arranged from common setup problems to symptoms more likely to require service.
How I Test Sewing Machines and Diagnose Problems at MariaSew
I have more than 12 years of hands-on sewing experience, and I personally use the sewing machines I recommend on MariaSew. When I troubleshoot a machine, I do not jump straight to a tension dial or assume the bobbin is at fault. I reproduce the problem on scrap fabric, return the machine to a normal setup, and then isolate the needle, upper threading, bobbin, feed system, presser foot, and stitch settings one by one.
I test straight stitches first, then move to the fabric and stitch that triggered the problem. I inspect both sides of the seam, listen for changes in sound, feel for resistance at the handwheel, and watch how the fabric feeds under the foot. For computerized machines, I also verify stitch selection, speed limits, needle position, bobbin-winding mode, and any model-specific warnings before deciding a problem is mechanical.
- Thread path. I rethread from the spool to the needle and confirm the take-up lever and guides are not skipped.
- Needle condition. I install a fresh needle in the correct orientation and match its type and size to the fabric.
- Bobbin system. I check the correct bobbin type, winding quality, insertion direction, bobbin case, and accessible lint.
- Feed and presser foot. I confirm the feed dogs, stitch length, presser-foot position, foot compatibility, and pressure adjustment when the model provides one.
- Controlled test seam. I use matching scrap and change one variable at a time so I can identify the real cause instead of masking it.
- Stop point. If the machine remains mechanically resistant, strikes metal, smells hot, shows damaged wiring, or repeatedly breaks needles after correct setup, I stop and recommend service.
This approach matches MariaSew’s editorial standard: sewing-machine recommendations and techniques are personally tested before publication.
15 Common Sewing Machine Problems and Solutions
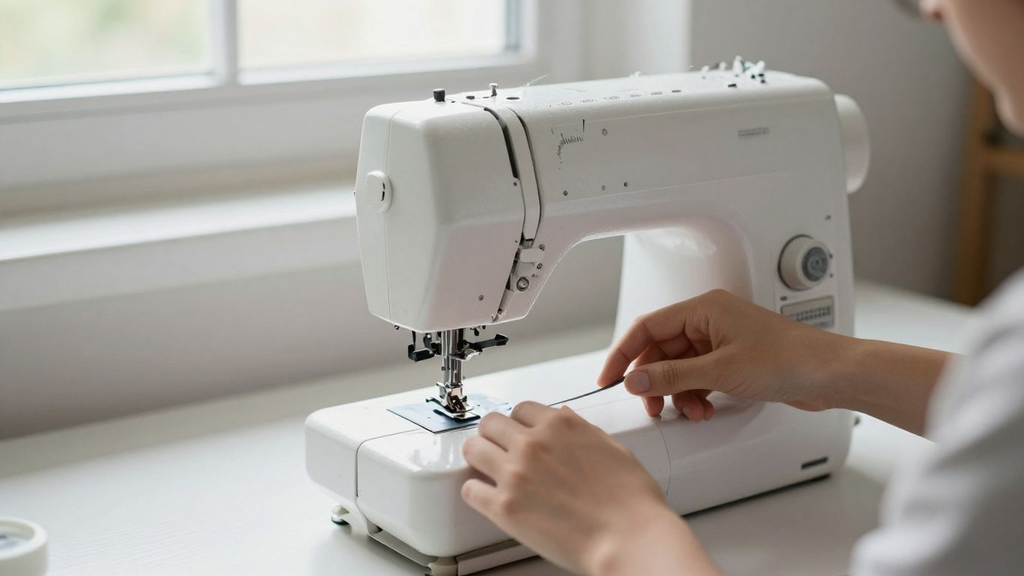
The same symptom can have more than one cause, so use these sections as a diagnostic order rather than a guaranteed diagnosis. Your exact manual takes precedence whenever the bobbin direction, threading path, feed control, tension system, or recommended maintenance differs.
For each problem, I start with the least invasive checks, test on scrap fabric, and only move deeper when the simple causes have been ruled out.
1. Sewing Machine Won’t Turn On or Has Power but Will Not Sew
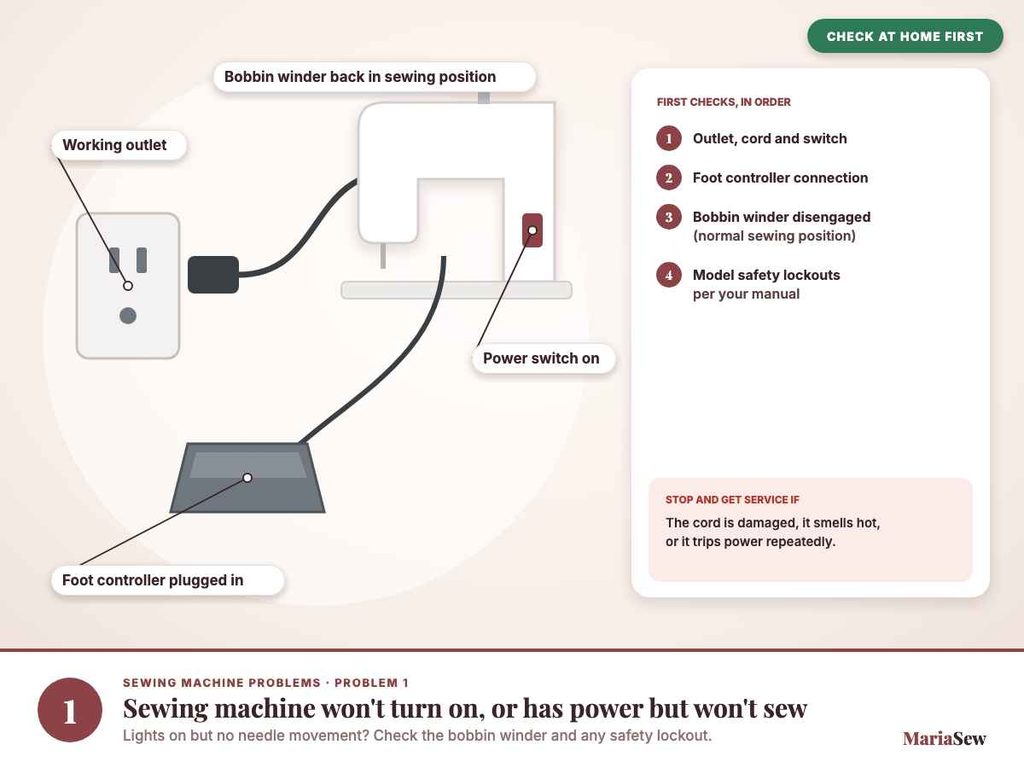
Check the outlet, power cord, machine power switch, and foot-controller connection first. If the lights come on but the needle does not move, confirm that the bobbin-winder spindle is returned to the normal sewing position and that no model-specific safety lockout is active.
Do not use a damaged cord or repeatedly cycle a machine that smells hot or trips power. If the connections and normal operating position are correct but the machine remains dead, leave it unplugged and arrange service.
2. Sewing Machine Needle Keeps Breaking
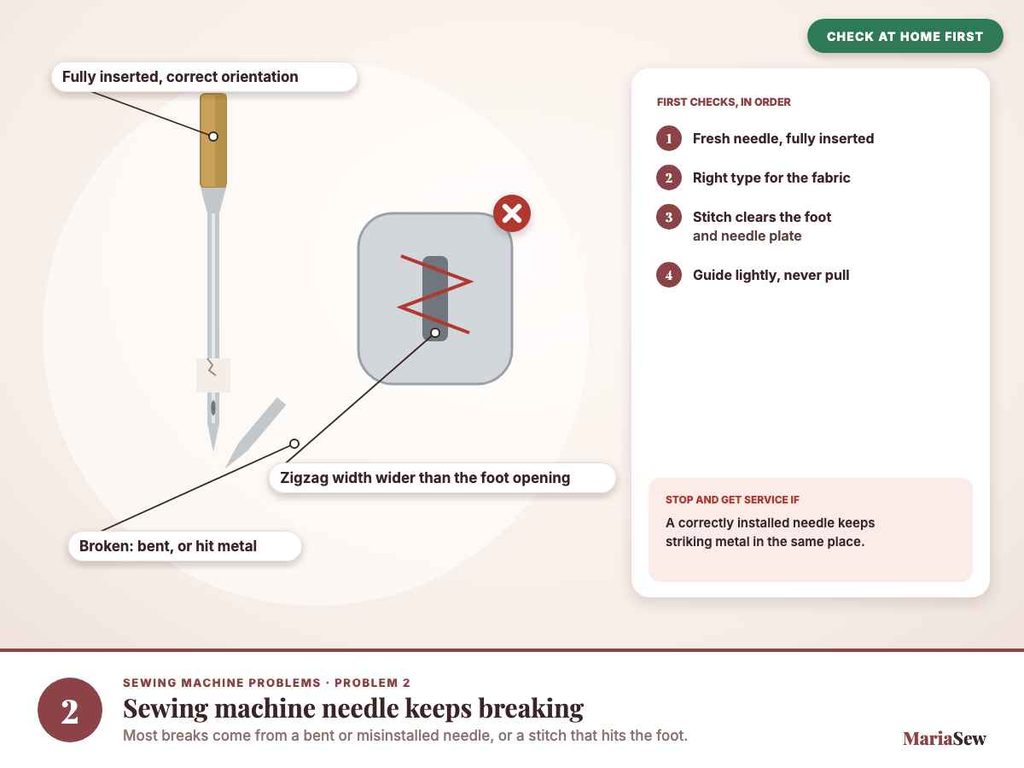
A needle can break when it is bent, installed too low or in the wrong orientation, mismatched to the fabric, pulled sideways by the fabric, or allowed to strike the presser foot or needle plate. Replace it with a fresh needle, insert it fully as the manual shows, and confirm the selected stitch clears the installed foot.
Guide the fabric lightly and let the feed dogs move it. If a correctly installed needle repeatedly hits metal or breaks in the same area, stop sewing because timing, alignment, a damaged foot, or another mechanical issue may need professional inspection.
3. Upper Thread Keeps Breaking or Shredding
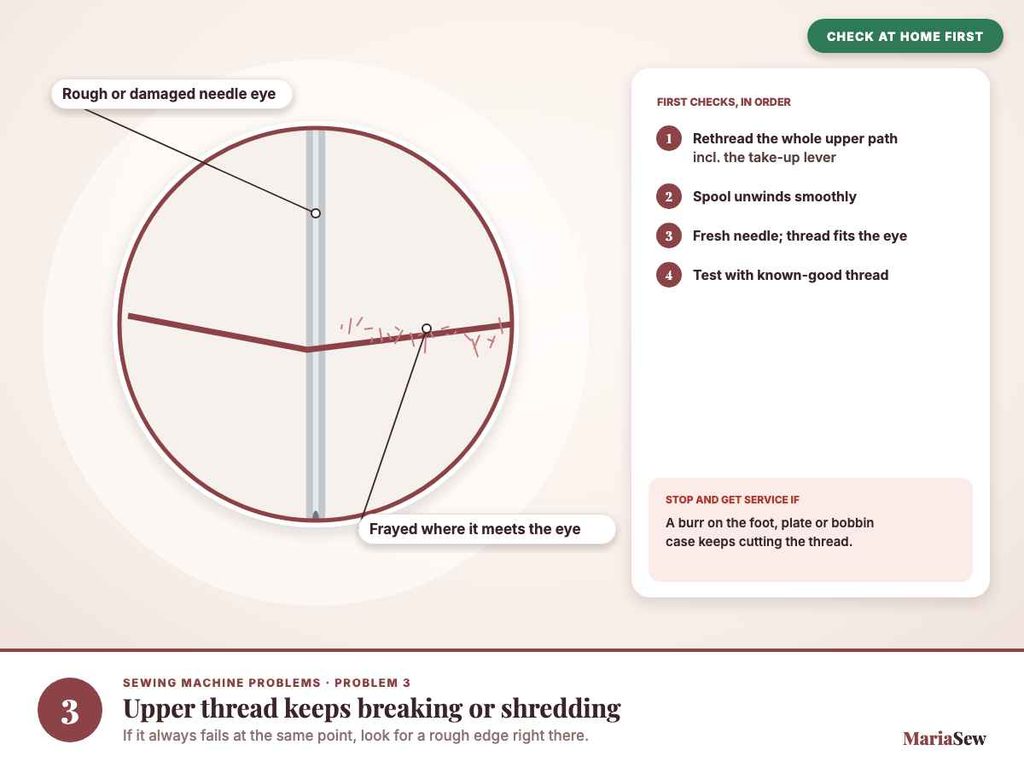
Rethread the complete upper path and check that the spool unwinds smoothly, the thread passes through the take-up lever, and the tension is not excessively tight. A rough or damaged needle eye, old thread, an incorrect needle/thread combination, or a burr on the presser foot, needle plate, or bobbin case can also shred thread.
Install a fresh correct needle and test with known-good thread before making large tension changes. If the thread always breaks at the same physical point, inspect that area for a rough edge and stop if a damaged metal part needs service.
If you want to verify the complete upper path before changing settings, use my how to thread a sewing machine guide.
4. Sewing Machine Is Skipping Stitches
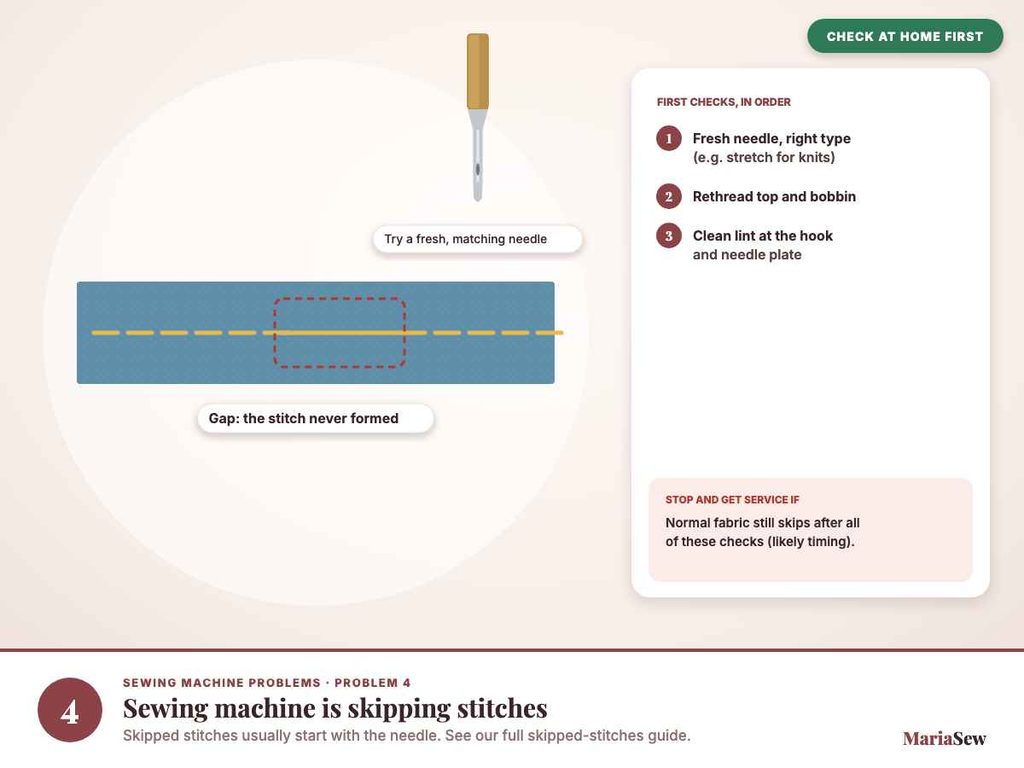
Skipped stitches commonly start with the needle. Replace a bent or dull needle, install it correctly, and use the right type for the fabric, such as a stretch or ballpoint needle where appropriate. Then rethread the machine and verify the bobbin is installed correctly.
Lint around the hook or needle plate can also interfere with stitch formation. If skipped stitches continue across normal fabric after correct threading, a fresh needle, and accessible cleaning, hook-to-needle timing or another internal issue may need service.
5. Stitches Are Loose, Uneven, or the Bobbin Thread Shows on Top
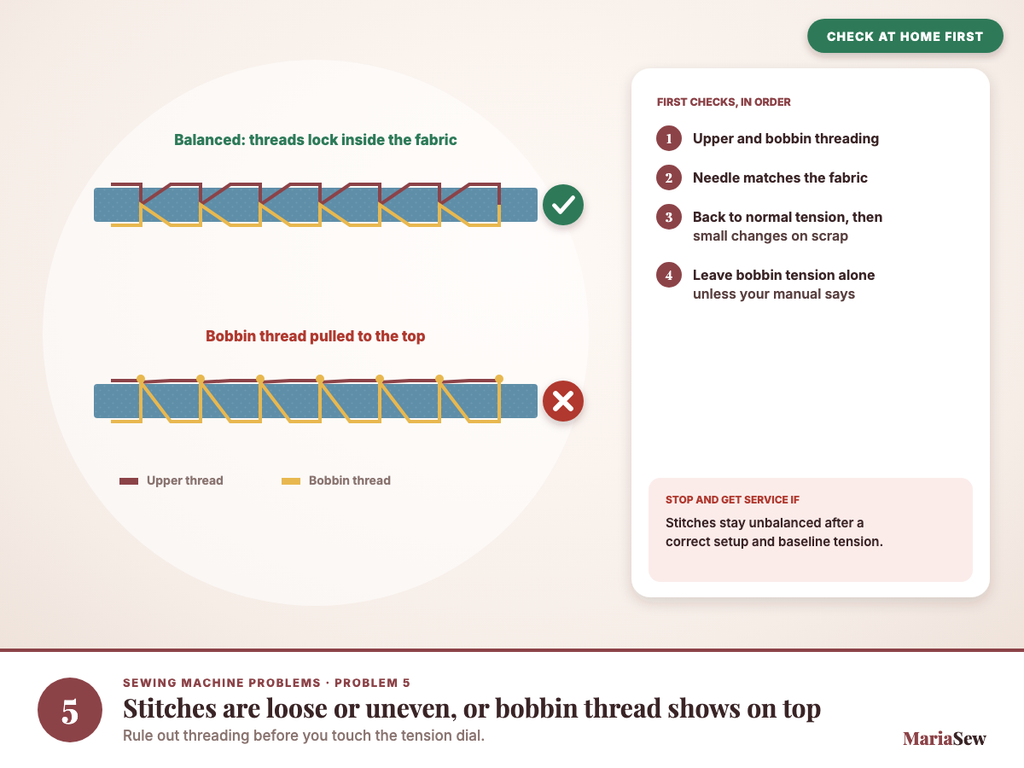
Before touching the tension dial, confirm the upper thread and bobbin are threaded correctly and the needle matches the fabric. Loose loops underneath often begin with the upper thread not seated correctly, while bobbin thread pulled to the top can indicate excessive upper tension or a lower-thread setup problem.
Return to the manual’s normal tension range, make small changes, and inspect both sides of a test seam. Avoid large bobbin-tension adjustments unless the manual specifically calls for them and the upper-thread path has already been ruled out.
For a full tension diagnosis, see How to Adjust Sewing Machine Tension.
6. Fabric Will Not Feed Under the Presser Foot
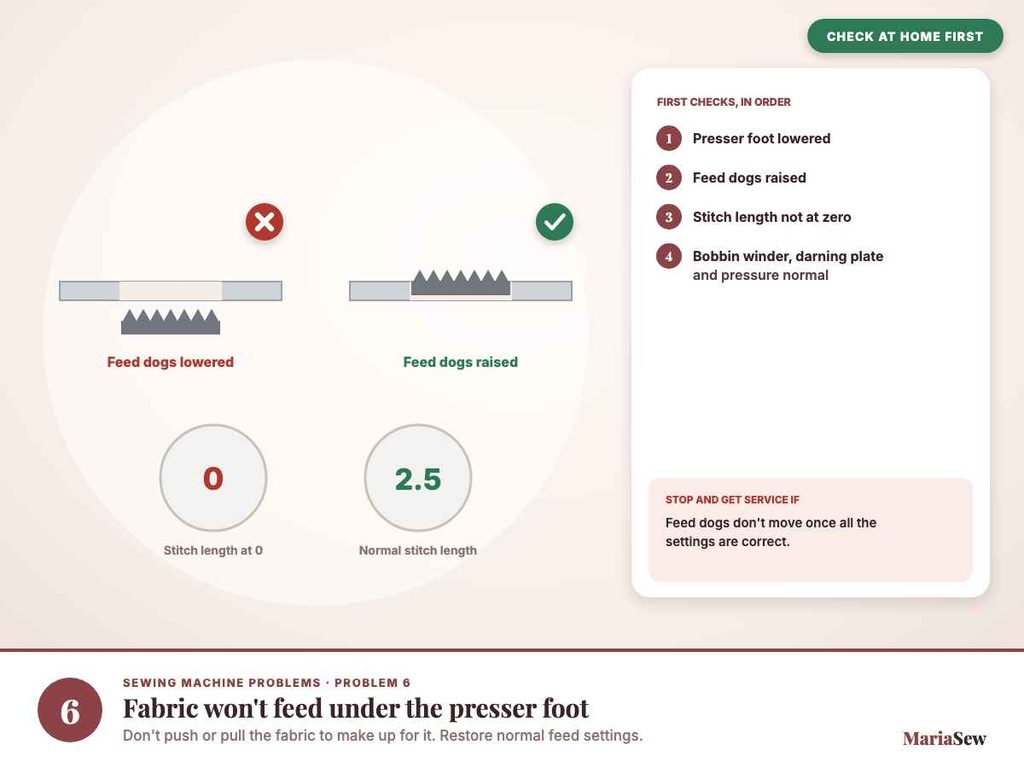
Check that the presser foot is lowered, the feed dogs are raised for normal sewing, and the stitch length is not set at or near zero. Some machines also stop normal feeding when the bobbin winder is engaged, a darning plate is installed, or the wrong presser foot or pressure setting is being used.
Clean accessible lint from the feed-dog area with the machine off and unplugged. Do not push or pull the fabric to compensate; if the feed mechanism still does not move after the settings are correct, it may need inspection.
7. Thread Is Bunching or Nesting Under the Fabric
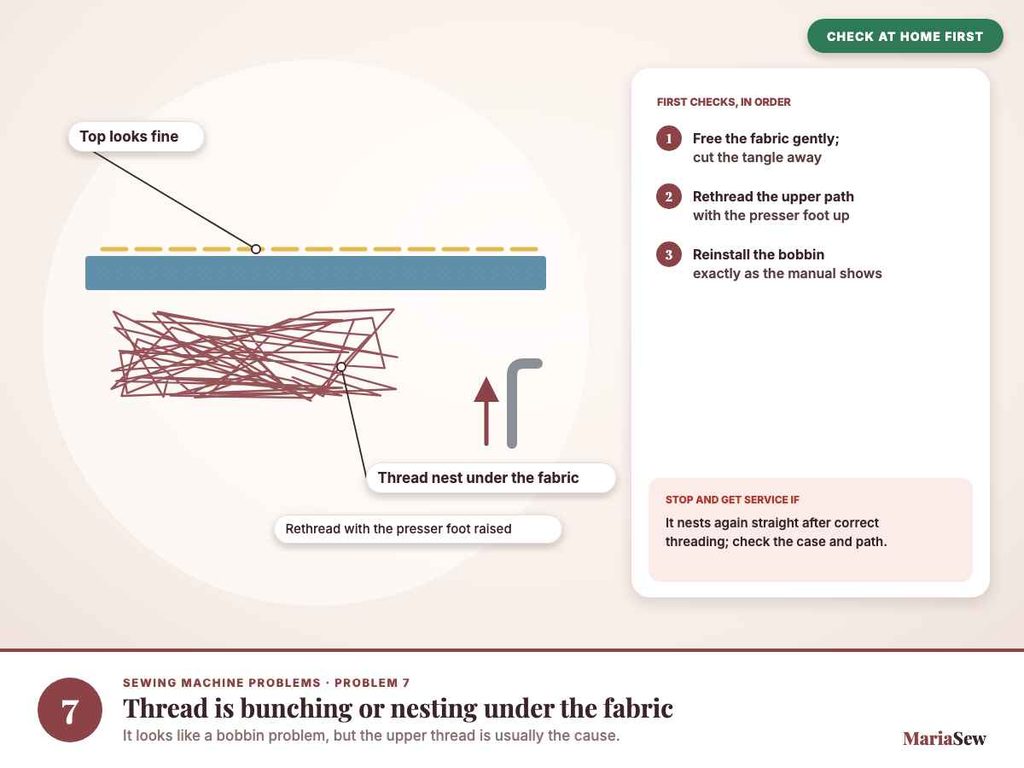
A thread nest under the fabric often looks like a bobbin problem, but the upper thread is one of the first things I check. Stop, free the fabric gently, remove the tangled thread, then rethread the upper path and reinstall the bobbin exactly as the manual shows.
Thread with the presser foot raised when your model instructs it so the thread can enter the tension system. Test again before increasing tension. If the problem returns immediately after correct threading, inspect the bobbin case, needle, and thread path for damage or lint.
8. Sewing Machine Is Jamming or Making Grinding, Clicking, or Knocking Noises
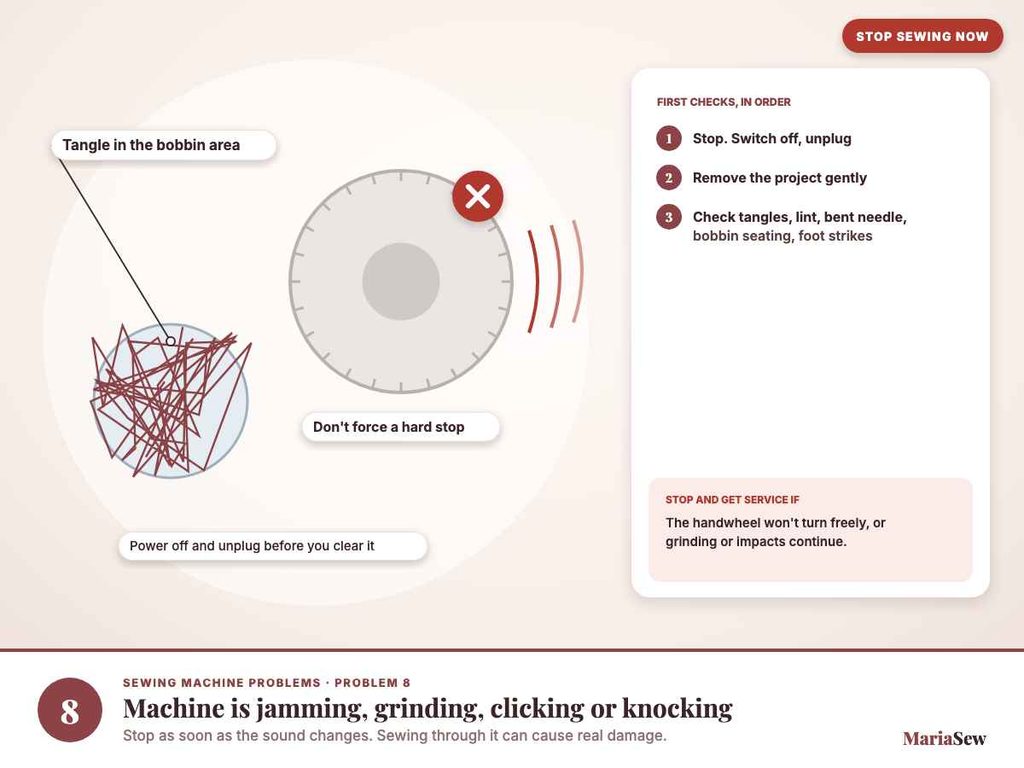
Stop sewing as soon as the sound changes or the handwheel becomes resistant. With the machine off and unplugged, remove the project carefully and check for tangled thread, lint, a bent needle, an incorrectly seated bobbin, or a needle striking the foot or plate.
Never force the handwheel through a hard stop. If the mechanism does not turn freely after the visible obstruction is removed, or if grinding and repeated impact continue, professional service is safer than further testing.
For a deeper jam-specific checklist, read Why Does My Sewing Machine Keep Jamming?.
9. Bobbin Thread Keeps Breaking
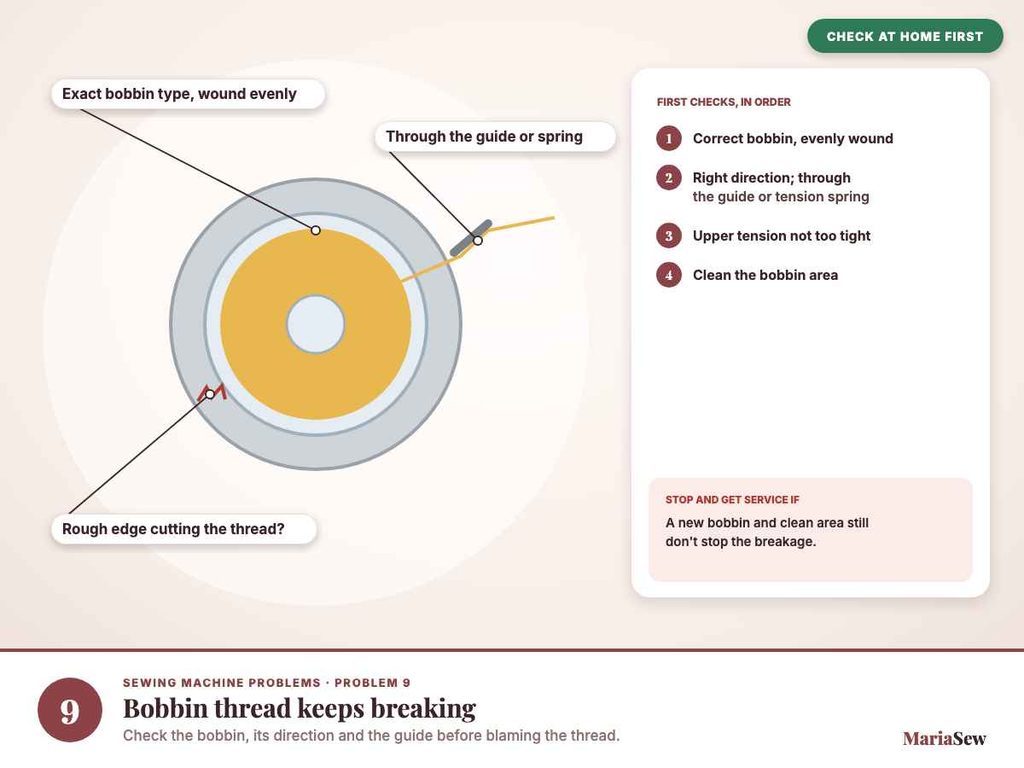
Remove the bobbin and confirm it is the exact type specified for the machine, wound evenly, inserted in the correct direction, and pulled through the required guide or tension spring. Damage to the bobbin, bobbin case, or a rough edge can cut thread repeatedly.
Also verify that the upper thread is not so tight that it is pulling aggressively against the lower thread. If a new correct bobbin and clean bobbin area do not solve repeated lower-thread breakage, have the case and hook area inspected.
10. Machine Will Not Pick Up the Bobbin Thread
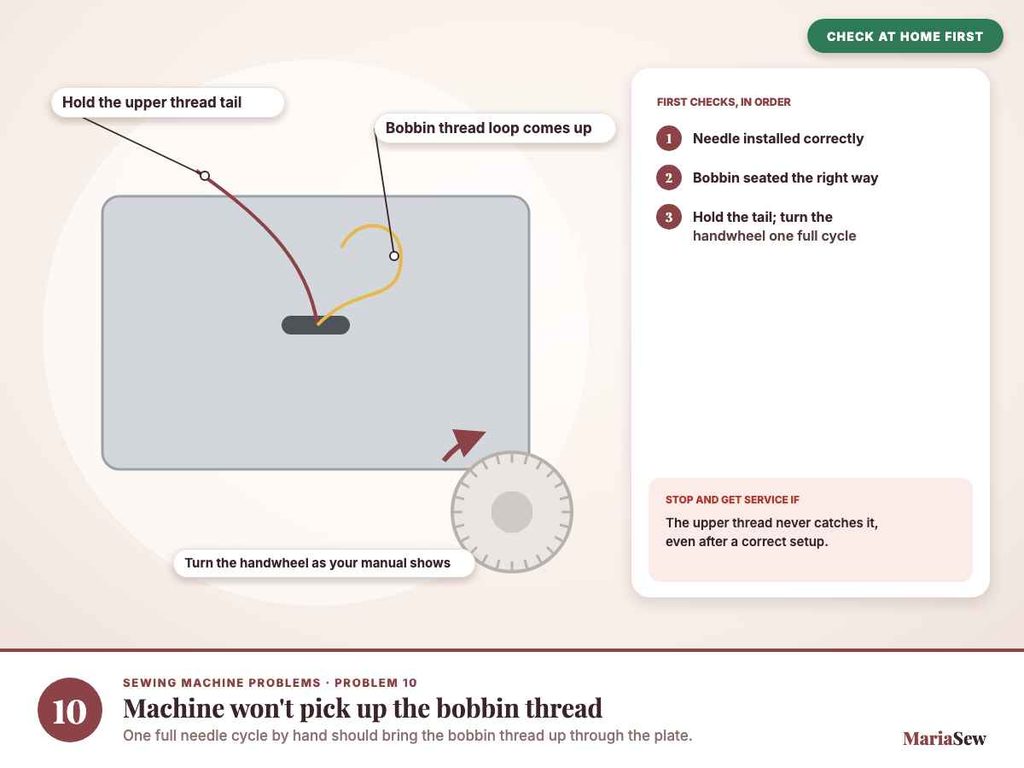
First confirm that the needle is installed correctly and the bobbin is seated in the proper direction. Hold the upper thread tail and turn the handwheel in the direction specified by the manual, usually through one full needle cycle, so the needle thread can catch the bobbin thread.
If the upper thread never catches despite correct threading, a fresh needle, and correct bobbin installation, do not keep forcing the handwheel. A hook-timing or needle-position problem may require technician service.
11. Fabric or Seams Are Puckering
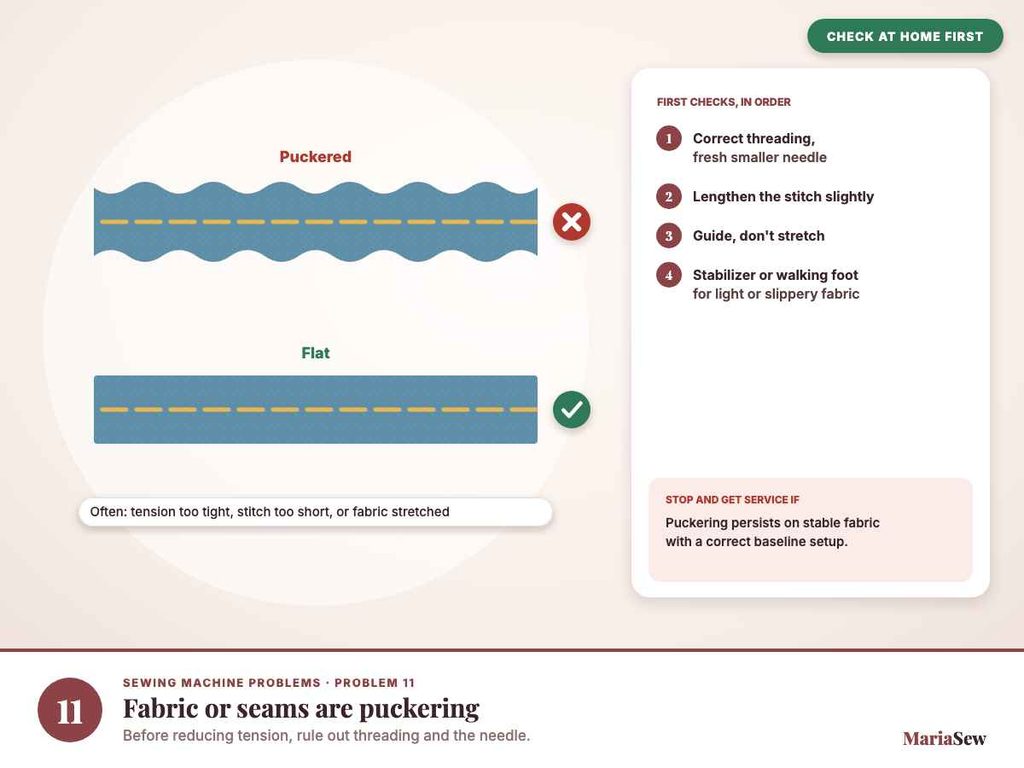
Puckering can come from excessive upper tension, a stitch that is too short for the fabric, a needle that is too large, fabric being stretched during sewing, or insufficient stabilization on lightweight material. Start with correct threading and a fresh needle before reducing tension.
Lengthen the stitch slightly when appropriate and guide the fabric without pulling it. For slippery, stretchy, or layered materials, a walking foot or appropriate stabilizer can solve feeding distortion that looks like a pure tension problem.
12. Fabric Layers Keep Shifting or Seams Finish Uneven
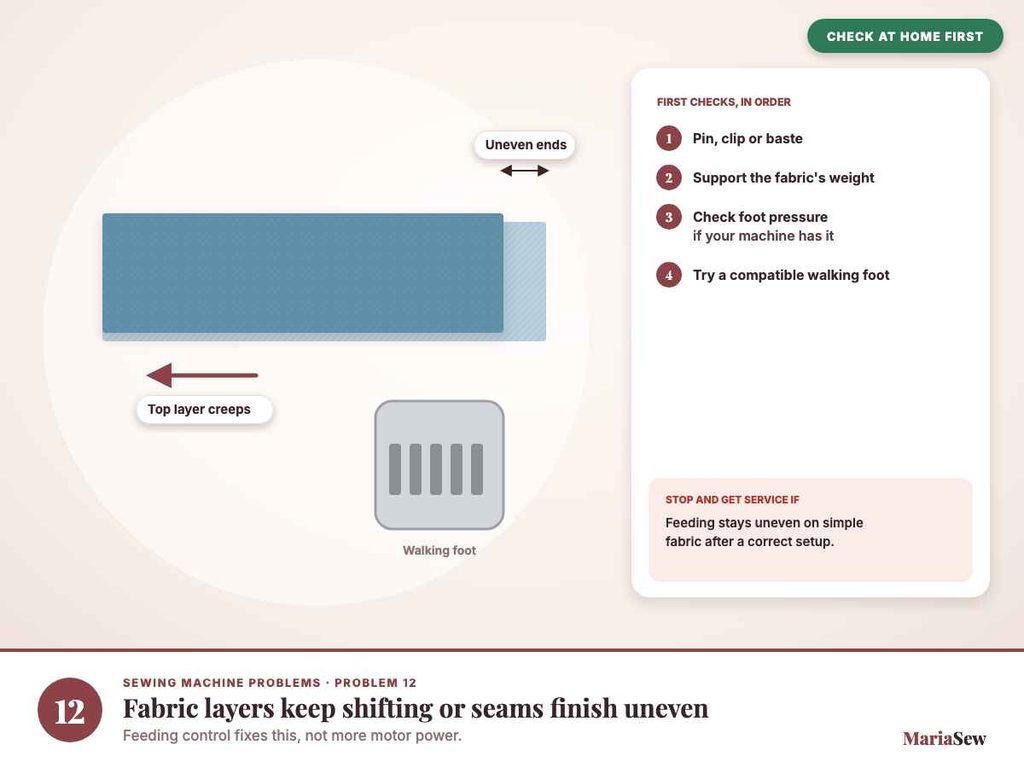
When the top layer creeps ahead of the bottom layer, check presser-foot pressure if your machine offers adjustment and reduce unnecessary pulling from behind the foot. Pinning, clipping, basting, and supporting the fabric weight can make a large difference.
For quilting, denim, knits, vinyl, or slippery layers, a compatible walking foot can help the top and bottom layers feed more evenly. It improves feeding control but does not increase the machine’s motor power or replace correct needle and thread choices.
For layered or slippery fabric, my walking foot guide explains when even-feed support is useful.
13. Buttonholes Are Uneven, Too Dense, or Will Not Complete
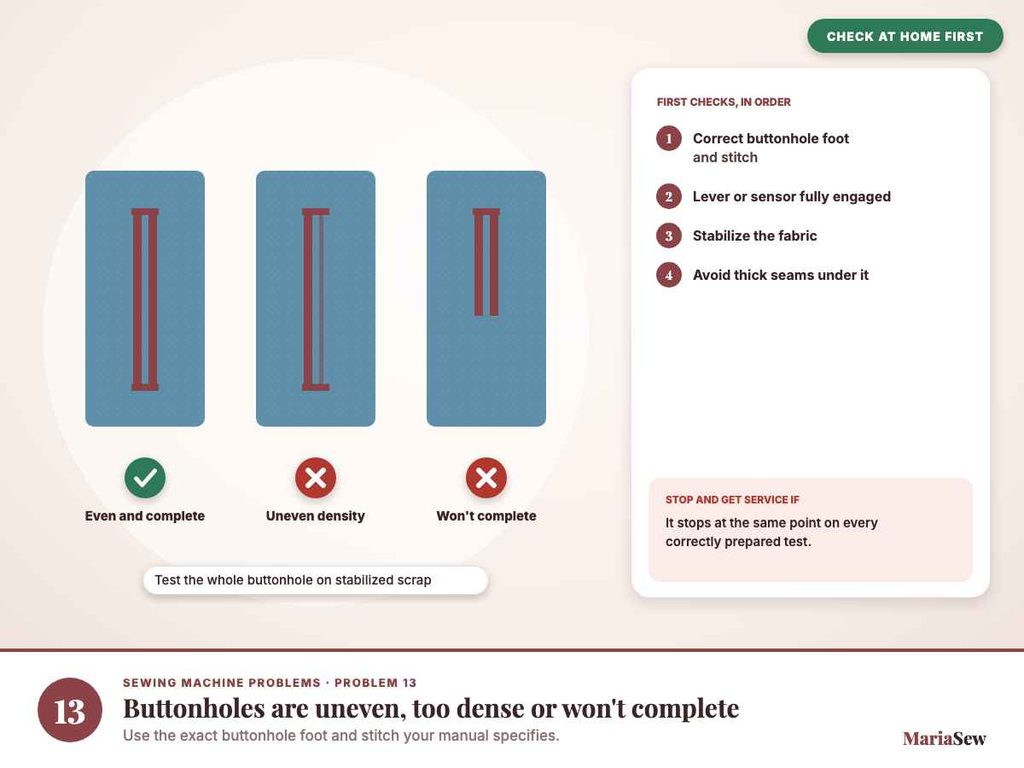
Use the buttonhole foot and stitch specified by the manual, stabilize the fabric, and test the entire buttonhole on a matching scrap before sewing the garment. Thick seams, an incorrectly installed buttonhole foot, wrong stitch settings, or fabric that cannot feed smoothly can distort the result.
On automatic one-step systems, make sure any buttonhole lever or sensor is fully engaged as required. If the machine stops at the same point on every correctly prepared test, consult the model manual before assuming the sensor or mechanism has failed.
14. Sewing Machine Runs Slowly or Feels Sluggish
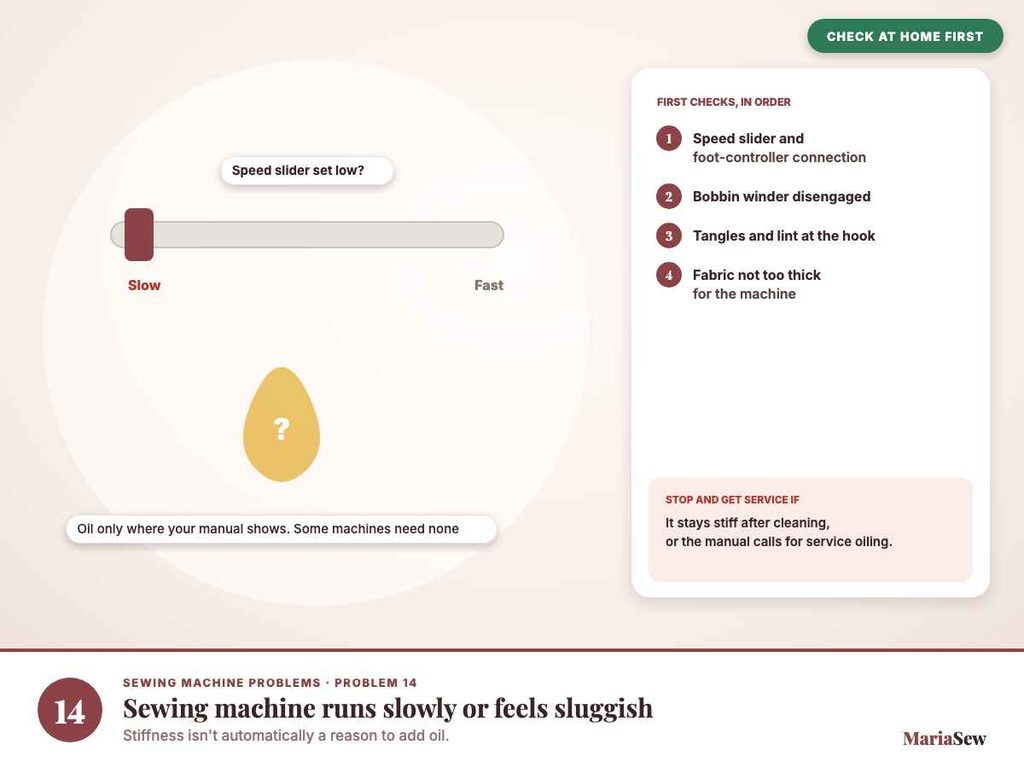
Check the speed-control slider on computerized machines, the foot-controller connection, bobbin-winder position, tangled thread, and whether the machine is struggling against excessive fabric thickness. A lint-heavy hook area can also make operation feel less smooth.
Do not add oil unless the manual specifies user oiling and shows the exact location. Many modern machines are designed around limited or technician-applied lubrication, so the correct response to stiffness is not automatically ‘add more oil.’
Before lubricating anything, check How to Oil and Clean a Sewing Machine because oiling requirements differ by model.
15. Handwheel Is Hard to Turn or the Needle Will Not Move
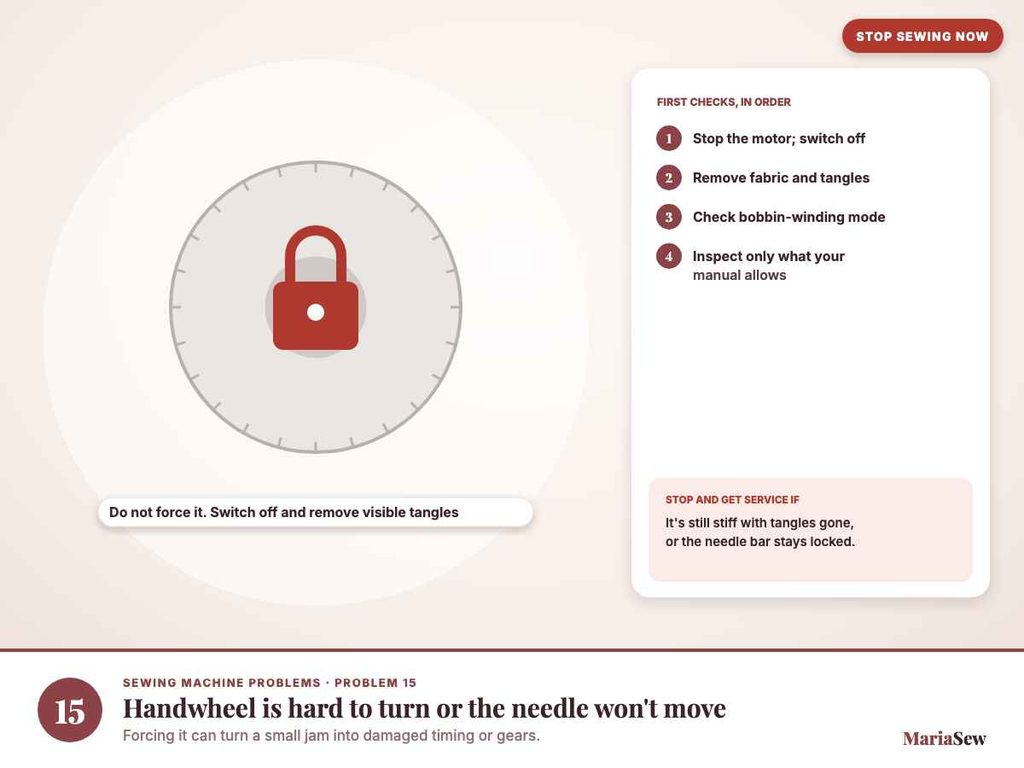
Stop using the motor and switch the machine off. Remove the fabric and visible thread tangle carefully, check whether the bobbin-winding mode is engaged, and inspect the bobbin and needle areas only as far as the manual allows. Do not force the handwheel against resistance.
If the handwheel remains hard to turn with visible tangles removed, or if the needle bar is locked and the machine makes abnormal sounds, the safest next step is qualified service. Forcing the mechanism can turn a small jam into damaged timing, gears, or hook components.
Quick Sewing Machine Troubleshooting Table
The 15 sections above give the full troubleshooting order. The table below is only a fast first-pass reference for matching a visible symptom with the first system I would check.
Use it to choose your starting point, then return to the detailed section before changing several settings. A symptom can have multiple causes, and the manual for your exact machine still overrides generic advice.
| What You See | First System to Check | Best First Action |
|---|---|---|
| Loops / thread nest underneath | Upper threading | Rethread completely and verify the take-up lever |
| Bobbin thread visible on top | Bobbin setup + upper tension | Check bobbin insertion, then make small upper-tension changes |
| Skipped stitches | Needle | Install a fresh correct needle and rethread |
| Needle breaks | Needle installation / stitch clearance | Check needle orientation, foot, stitch width, and fabric handling |
| Fabric will not feed | Feed dogs / stitch length / presser foot | Restore normal feed settings and clean accessible lint |
| Thread keeps breaking | Thread path / needle / rough edges | Rethread, replace needle, inspect the thread path |
| Machine jams | Tangled thread / bobbin area | Power off, unplug, free the tangle gently; do not force handwheel |
| Puckered seam | Threading / tension / stitch length | Return to baseline, test longer stitch and correct needle |
| Layers shift | Fabric feeding | Support fabric and consider a compatible walking foot |
| Handwheel hard to turn | Obstruction or internal fault | Stop, remove visible tangle; service if resistance remains |
If the first action fixes the problem, sew a longer scrap test before returning to the project. If the symptom immediately returns, move to the next likely cause rather than repeatedly changing the same setting.
When to Repair or Replace Your Sewing Machine
A misthreaded machine, worn needle, incorrect bobbin, or lint buildup is usually worth correcting at home. I consider professional repair when the problem persists after a controlled baseline test or when continuing to sew could damage the machine.
- Arrange service for repeated mechanical resistance. Grinding, knocking, a handwheel that will not turn freely, or a needle that repeatedly strikes metal after correct setup are not normal.
- Stop for electrical damage. Damaged cords, exposed wiring, burning smells, smoke, or repeated power faults require qualified inspection.
- Service repeated needle breakage. If fresh correctly installed needles keep breaking without fabric pulling or stitch-clearance problems, alignment or timing should be checked.
- Get a repair estimate before replacing. Older machines can still be worth repairing when the frame, motor, and parts support are good.
- Consider replacement when the machine no longer fits your work. Frequent costly repairs, unavailable essential parts, inadequate workspace, or fabric demands beyond the machine’s design can make replacement the better value.
Age alone is not a reason to replace a sewing machine. Condition, repairability, parts availability, the quality of the machine, and whether it still suits your projects matter more.
If replacement makes more sense, my best sewing machines for beginners guide is a useful starting point for easy-to-use current models.
Sewing Machine Maintenance to Prevent Future Problems
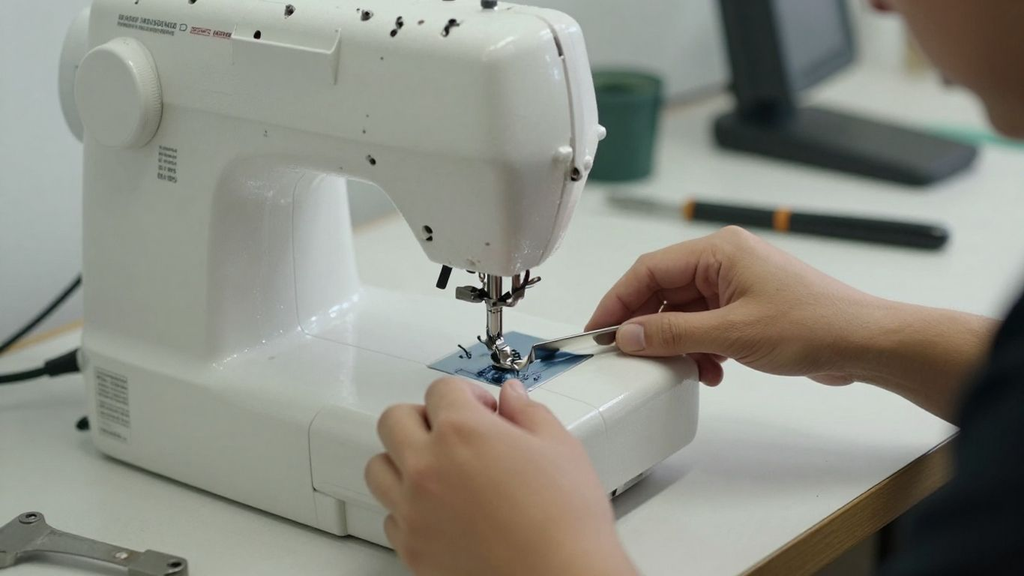
Preventive care is simpler than troubleshooting a machine in the middle of a project. My routine is modest: keep the accessible bobbin and feed area clean, use fresh needles, store thread and bobbins correctly, and follow the exact manual for oiling and service.
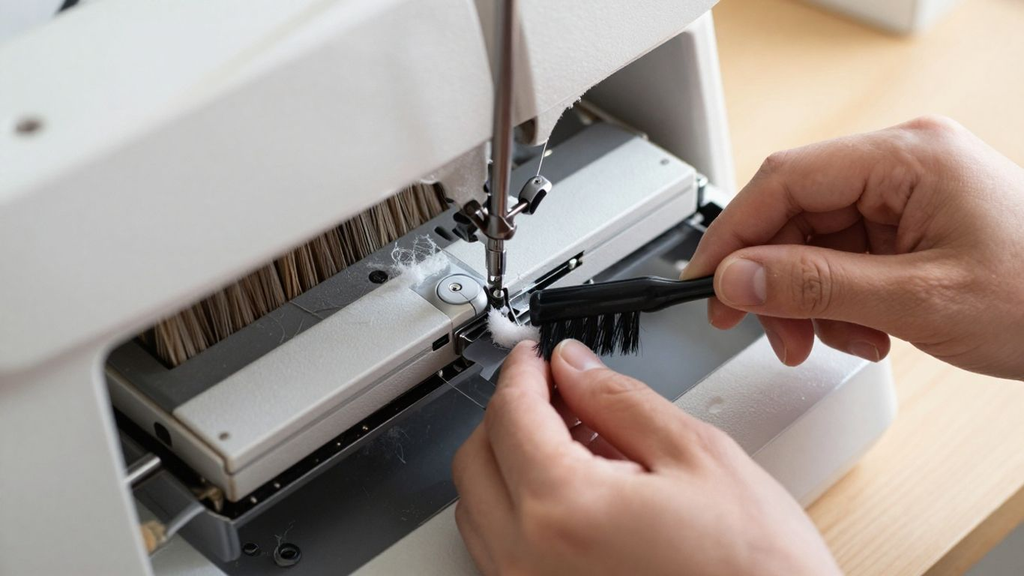
- Brush out accessible lint. Clean the bobbin, hook, needle-plate, and feed-dog areas only as your manual allows, with the machine switched off and unplugged.
- Replace damaged or worn needles. Do it immediately after a needle strike, visible bend, blunt point, or unexplained skipped stitches.
- Use the correct bobbin. Near-identical bobbins can differ in height, curvature, or material and may not feed correctly in another machine.
- Keep thread quality consistent. Brittle, fuzzy, damaged, or oversized thread can create breakage, lint, and tension instability.
- Do not over-oil. Only oil locations and intervals the manufacturer specifies; some modern machines do not call for routine user oiling.
- Note recurring symptoms. If the same noise, jam, or tension issue keeps returning, write down the fabric, needle, thread, stitch, and settings before service.
My full sewing machine cleaning and oiling guide explains why the manual should decide whether user oiling is appropriate.
A clean machine with a correct needle and thread path gives you a reliable baseline. That makes the next real problem much easier to identify.
Common Sewing Machine Troubleshooting Mistakes to Avoid
Troubleshooting goes wrong when the fix creates a second problem. Most of the mistakes below come from changing too much too quickly or treating a model-specific adjustment as if it were universal.
- Turning the tension dial before rethreading. A threading error can imitate a tension problem, so tension is not my first move.
- Changing bobbin tension casually. Bobbin-case adjustments are sensitive and often unnecessary for normal home sewing.
- Pulling fabric through the machine. This can deflect or break the needle and distort stitch length.
- Forcing a stuck handwheel. Resistance can mean a tangle, obstruction, or internal fault; force can cause more damage.
- Using the wrong bobbin because it looks similar. Always match the bobbin specification in the machine manual.
- Oiling because the machine sounds rough. Many machines have specific or limited lubrication instructions; random oil can contaminate parts or fabric.
- Testing on unrelated scrap. A thin cotton test does not diagnose a problem that only appears on denim, knit, batting, or multiple layers.
- Changing five things at once. One-variable testing is the only way to learn what actually fixed the symptom.
- Continuing after repeated needle strikes. Metal-on-metal impact is a reason to stop and check clearance or service.
- Opening non-user-serviceable covers. Internal timing, gears, wiring, sensors, and electronic boards belong with a qualified technician unless the manual explicitly says otherwise.
If you are still learning how threading, bobbins, stitch length, and feed settings interact, my beginner sewing guide is a useful companion to this troubleshooting checklist.
The safest troubleshooting habit is to stop once the symptom moves beyond normal setup, cleaning, threading, needle, bobbin, or model-approved adjustments.
Final Verdict: Fix the Simple Causes First, Then Know When to Stop
Most sewing machine problems can be narrowed down by making the machine safe, installing a fresh correct needle, rethreading, checking the bobbin, cleaning accessible lint, and testing on matching scrap. If resistance, grinding, repeated needle strikes, or electrical problems remain, stop and arrange professional service.
Frequently Asked Questions
Why does my sewing machine keep skipping stitches?
Start with a fresh correctly installed needle that matches the fabric and thread, then rethread the upper path and bobbin. Clean accessible lint around the needle plate and hook. If normal fabric still produces skipped stitches after those checks, the machine may need service.
Why is there a nest of thread under my fabric?
The upper thread is one of the first things to check. Stop sewing, remove the tangle gently, rethread the upper path with the presser foot raised when your manual instructs it, reinstall the bobbin, and test on scrap before changing tension.
Why does my sewing machine thread keep breaking?
Incorrect threading, excessive upper tension, a bent or rough needle, damaged thread, the wrong needle/thread combination, or a burr in the thread path can all cause breakage. Rethread and install a fresh needle before making large setting changes.
Why won’t my sewing machine feed the fabric?
Check that the presser foot is down, feed dogs are in the normal sewing position, stitch length is not at zero, and any bobbin-winding or darning mode is disengaged. Clean accessible lint and confirm the correct presser foot.
Why does my needle keep breaking?
Replace the needle, insert it fully in the correct orientation, and make sure the selected stitch clears the installed presser foot and needle plate. Do not pull the fabric. Repeated metal strikes after correct setup need service.
Should I adjust bobbin tension when stitches look uneven?
Usually not first. Verify upper threading, bobbin installation, needle condition, thread choice, and normal upper tension before changing bobbin-case tension. Follow your exact manual if bobbin adjustment is required.
Why is my sewing machine making a grinding noise?
Stop immediately. Turn the machine off and unplug it, remove visible tangles or a bent needle, and check the bobbin area only as the manual allows. If grinding or mechanical resistance remains, arrange service.
How often should I replace a sewing machine needle?
Replace it whenever it is bent, dull, damaged, or causing stitch problems. How often that occurs depends on the fabric, thread, needle type, and amount of sewing, so condition is a better universal rule than one fixed schedule.
Can lint cause sewing machine problems?
Yes. Lint and loose thread around the feed dogs, hook, or bobbin area can interfere with feeding and thread movement. Clean only the areas your manual identifies as user-accessible.
Should I oil my sewing machine if it is noisy?
Only if the manual says the machine requires user oiling and shows where to apply it. Some modern machines do not call for routine owner lubrication, and random oiling can create new problems.
When should I take a sewing machine to a repair technician?
Seek service for repeated jams after correct setup, grinding or knocking, a handwheel that remains hard to turn, repeated needle strikes or breakage, damaged wiring, burning smells, or problems inside parts the manual does not identify as user-serviceable.
Is it worth repairing an old sewing machine?
Often, yes. Age alone does not decide value. Compare the repair estimate, machine quality, parts availability, accessories you already own, and whether the machine still suits your projects before replacing it.