How to Use a Bias Tape Maker: Step-by-Step Guide for Clean Binding
A bias tape maker is one of the simplest tools for turning fabric strips into neat, consistent binding, but the tool only works well when the strip width, grain direction, feeding, and pressing are controlled from the start. For curved necklines, armholes, quilt edges, and rounded details, true bias-cut fabric gives the tape the flexibility to bend without fighting the shape, while straight-grain strips can still be practical for straight edges.
The maker folds the raw edges toward the center as the strip passes through, and an iron sets those folds before the tape is sewn to the project. In this guide, I show the exact process I use, explain single-fold versus double-fold tape, correct a few common sizing mistakes, and cover the testing and troubleshooting steps that make homemade bias binding look much cleaner.
Quick Answer: How Do You Use a Bias Tape Maker?
Cut a fabric strip to the width recommended for your specific bias tape maker, trimming on the true bias at about 45 degrees to the selvage when the binding needs to curve. Feed the pointed end into the wide side of the maker, guide it through with a pin or blunt awl if needed, then pull the tool forward while pressing the folded strip as it exits. The maker usually creates single-fold tape; to make double-fold tape, fold the finished strip in half lengthwise and press again. Always test a short piece first because input strip width can vary by maker size, fabric weight, and brand.
Key Takeaways
Good bias tape is decided by the preparation as much as the tool. These are the checks I make before committing a full strip of fabric.
- Cut fabric on the true bias at about 45° for smoother curves and better flexibility.
- Match the strip width to the exact bias tape maker and manufacturer guidelines.
- Guide the fabric gently through the maker without pulling or stretching it.
- Press the tape as it exits to set the folds evenly.
- Most makers create single-fold tape, which can be folded and pressed again for double-fold binding.
- Test a short piece first to check the strip width, folds, stretch, and fabric thickness.
- Ease bias tape around curves without pulling it tight to prevent ripples or wavy edges.
Once the sample comes through evenly and lies flat after pressing, the full-length strip is usually much easier to make and attach.
What Is a Bias Tape Maker?
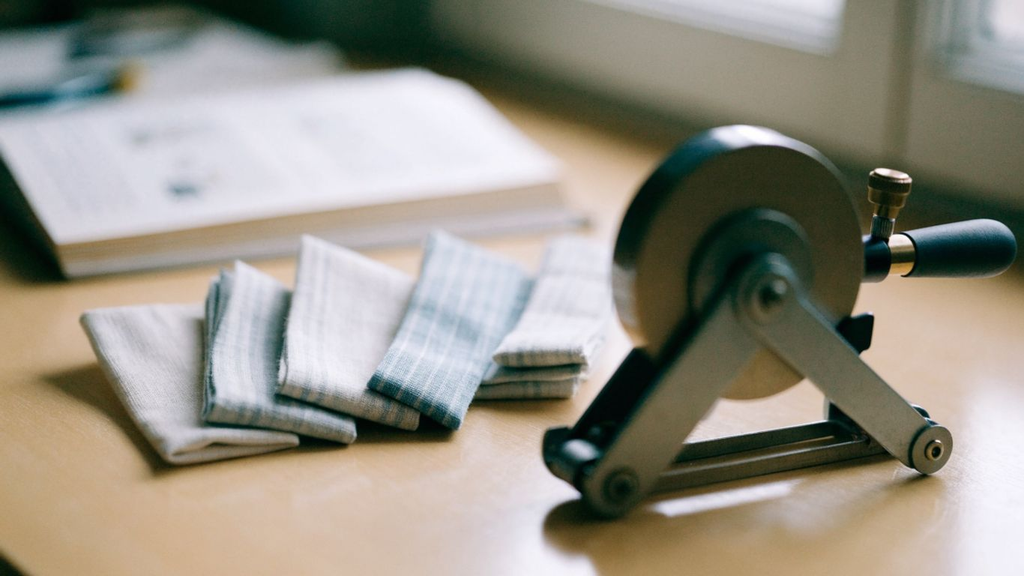
A bias tape maker is a small folding tool with a wide input opening and a shaped internal channel that turns the long raw edges of a fabric strip toward the center. As I pull the strip through the narrow end, I press the folds immediately so the fabric keeps the new shape.
The tool does not stitch the binding and it does not automatically make every strip “bias.” The grain direction comes from how the fabric is cut. I use true bias strips for curved necklines, armholes, quilt binding, rounded pockets, and other shapes that need flexibility; for straight edges, a straight-grain or cross-grain strip may be sufficient.
Standard tape makers are sold in finished widths such as 6 mm, 12 mm, 18 mm, 25 mm, and 50 mm by major brands such as Clover and Prym. The number usually refers to the folded tape coming out of the maker, not the original flat strip width, so I always check the instructions before cutting.
Bias Tape Maker Features That Matter
Bias tape makers look simple, but a few design details change how easy they are to use and what kind of binding they produce. I focus on the output width, the folding channel, how easily fabric can be guided through, and whether the tool is a standard or fusible style.
Shaped Folding Channel
The internal funnel folds both long raw edges inward as the strip travels through the tool. A smooth, accurately sized channel matters because rough feeding or a poor fit can make one fold noticeably wider than the other.
Finished-Width Sizing
The number printed on a standard maker generally describes the width of the single-fold tape that comes out. Common standard sizes include 6, 12, 18, 25, and 50 mm, but the required input strip is wider and should be cut to the maker manufacturer’s chart.
Wide Input and Narrow Output
The fabric enters flat through the wider opening and exits with the sides folded inward. I taper the leading end to a point because a pointed tip is easier to start than a full-width blunt edge.
Guide Slot for a Pin or Awl
Many hand-held makers let me use a pin, awl, or similar blunt guide to help move the fabric through the channel. I use just enough pressure to advance the strip without snagging fibers or pushing the folds out of alignment.
Standard vs. Fusible Tape Maker
A standard bias tape maker only folds fabric. A fusible version can feed compatible fusible web with the fabric so the finished tape can be positioned or temporarily fused before final stitching, which is useful for appliqué and decorative work.
Heat-Press Workflow
The iron is part of the system even though it is not built into a basic hand-held maker. I keep the iron on the emerging fabric, not on the plastic or metal tool body, and press rather than stretch or drag the bias strip.
Fabric Compatibility
Medium-weight cotton is the easiest fabric for learning because it feeds smoothly and holds a crease. Very thick, loosely woven, slippery, or heat-sensitive fabrics may need a larger maker, a different strip width, a lower iron setting, or extra testing.
Bias Tape Maker Features & Size Guide
The feature explanations above cover how the tool behaves in practice. The table below gives a compact specification-style reference for standard hand-held tape makers and uses Clover’s published strip-width examples for common finished sizes.
Those strip widths are useful starting points, not universal rules for every brand. Clover also specifies slightly different input widths for lightweight cloth, and the finished result can vary with fabric thickness, so I still cut a short sample before preparing the full length.
- Choose by finished tape width. Pick the size based on the single-fold tape width you want coming out of the tool.
- Use the brand’s strip-width chart. For some sizes, the ideal input is a little narrower or wider than a simple two-times calculation.
- Size up for bulky fabric. Thick fabric can crowd a narrow channel and create poor folds even when the mathematical strip width looks correct.
| Finished Maker Size | Example Input Strip, Medium Cotton* | Typical Use |
|---|---|---|
| 6 mm / 1/4 in | 13 mm / 1/2 in | Appliqué, narrow decorative tape, detail work |
| 12 mm / 1/2 in | 23 mm / about 1 in | Narrow binding, small curves, craft details |
| 18 mm / 3/4 in | 35 mm / about 1 3/8 in | General bias binding, garment edges |
| 25 mm / 1 in | 48 mm / about 1 7/8 in | Quilt binding, broader garment finishes |
| 50 mm / 2 in | 98 mm / about 3 7/8 in | Wide binding, straps, broad decorative tape |
*Clover standard bias tape maker instructions for medium-weight cloth. Check your own tool because other makers and lightweight fabrics can require different input widths.
The most useful number is the width that actually comes out after pressing. If the folds are uneven or fabric sticks out past the channel, adjust the strip width before cutting several yards of binding.
How I Test Bias Tape Makers at MariaSew
I test the bias tape makers I recommend by using them on real fabric, not by judging the size label alone. I start with stable quilting cotton because it gives me a clean baseline, then I try lighter woven fabric and a slightly thicker fabric to see how sensitive the channel is to weight, strip width, and pressing temperature.
For each maker, I cut repeated strips, feed them without forcing, press at a consistent pace, and compare both folded edges from end to end. I also sew the finished tape onto straight and curved samples because a tool can produce neat-looking tape on the ironing board but still stretch, twist, or sit unevenly once it is wrapped around an actual edge.
- Fold symmetry. I check whether both folded edges stay close to the same width instead of drifting as the strip moves through.
- Feed resistance. The strip should move with light guidance rather than bunching, tearing, or needing hard pulling.
- Width accuracy. I measure the pressed output and compare it with the maker’s stated finished size.
- Fabric range. I test at least a stable cotton plus lighter or thicker woven fabric to see where the tool becomes fussy.
- Pressing response. I check whether the folds hold after cooling and whether the fabric can be pressed without shine, distortion, or heat damage.
- Curve performance. I attach the finished tape around a curve and check for rippling, stretching, puckering, and exposed raw edges.
- Sewing performance. I stitch through the tape on a regular home sewing machine and check whether the layers stay aligned on both sides of the project.
You can read more about MariaSew’s hands-on testing approach and the experience standards used across our sewing guides.
What You’ll Need to Make Bias Tape
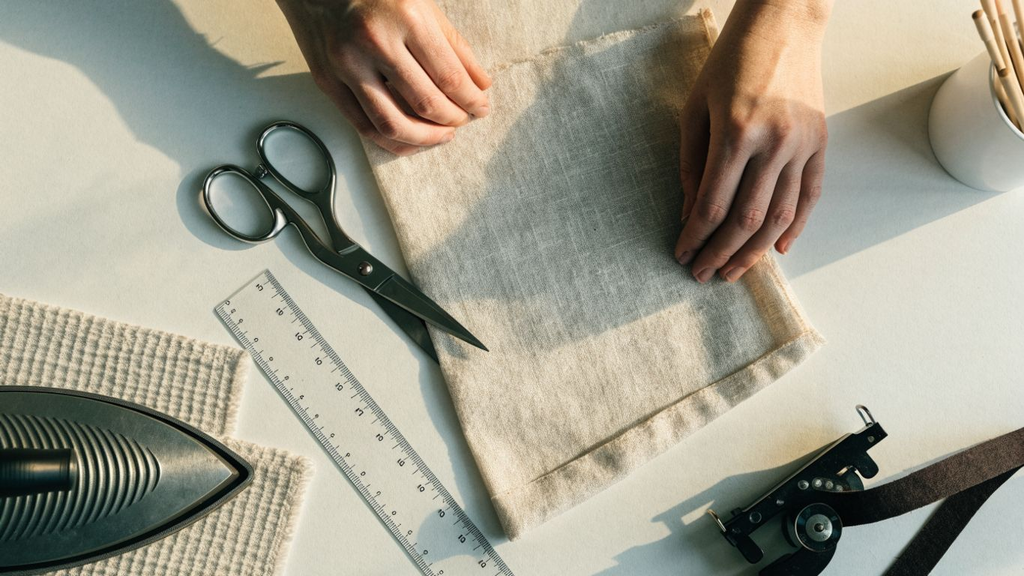
I set everything out before I cut because bias strips can grow and twist if I keep moving them around. For a first attempt, stable quilting cotton is easier than slippery rayon, chiffon, or loosely woven linen.
- Fabric. Use a woven fabric that presses well. Quilting cotton is my easiest practice option.
- Bias tape maker. Choose the finished width that fits the project and confirm the brand’s input strip recommendation.
- Rotary cutter or sharp fabric scissors. Consistent strip width is one of the biggest factors in getting even folds.
- Quilting ruler or straightedge. A clear ruler helps me mark the 45-degree bias and keep long strips consistent.
- Iron and pressing surface. Pressing sets the folds as they leave the maker.
- Pin or blunt awl. Useful for coaxing the first inch of fabric through the maker without damaging the strip.
- Sewing machine, thread, and appropriate needle. Needed when the finished tape is attached to the project.
- Pins or clips. Helpful for positioning binding, especially around curves or thick edges.
If you are still building your basic sewing kit, my beginner sewing guide covers the core tools and machine skills I recommend learning first. For yardage and binding calculations, the MariaSew Fabric Calculator includes a dedicated bias-binding calculator.
Bias Grain, Straight Grain, Single-Fold & Double-Fold Tape
The word “bias” describes grain direction, not the folding tool. True bias runs diagonally across the warp and weft, usually about 45 degrees to the selvage, and that diagonal structure gives a woven strip more flexibility around curves.
For a straight project edge, I do not always need true bias. A straight-grain or cross-grain strip can work when the binding does not need to bend tightly. The tape maker can fold either type of strip as long as the fabric fits the channel.
Single-Fold Bias Tape
This is the normal output from a standard maker: both raw long edges are folded toward the center and pressed. I use it for facing-style finishes, appliqué, decorative strips, or as the first stage before making double-fold tape.
Double-Fold Bias Tape
I take the pressed single-fold tape, fold it in half lengthwise, and press again. Double-fold binding wraps around a raw edge and is useful for quilt edges, neckline binding, armholes, bibs, placemats, bags, and other exposed finishes.
Continuous Bias Binding
For long projects, I can make a continuous length from a larger fabric square rather than joining many short strips. If I need to estimate how much fabric a binding length requires, I use the bias-binding tool in the MariaSew Fabric Calculator before cutting.
How to Use a Bias Tape Maker: Step by Step
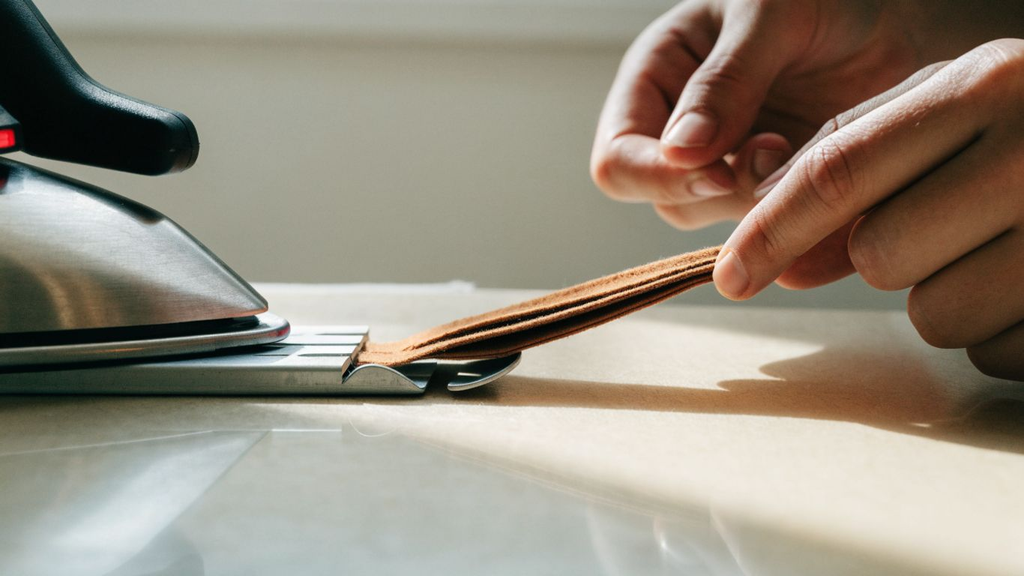
Making clean tape is a sequence of accurate cutting, low-bulk joins, controlled feeding, and immediate pressing. I practice with a short strip first, then make the full length only after the sample exits the tool evenly.
Step 1: Choose the Finished Tape Width
Start with the project, not the fabric strip. Decide how wide you want the single-fold tape to be, choose the matching maker, then read that maker’s strip-width instructions before cutting.
Step 2: Find the True Bias
Square the fabric and identify the selvage. For binding that needs to curve, mark a line about 45 degrees to the selvage. That diagonal cut gives the strip the stretch and flexibility that true bias binding is known for.
Step 3: Cut Consistent Fabric Strips
Use a rotary cutter and ruler or sharp fabric scissors to keep the strip width even. If the strip narrows or widens, the tool cannot maintain equal folds all the way down the tape.
Step 4: Join Strips With Diagonal Seams
Place strip ends right sides together at a right angle, stitch diagonally across the overlap, trim the seam allowance, and press the seam open. A diagonal join spreads the bulk over a longer area so it passes through the maker more smoothly than a straight crosswise seam.
Step 5: Taper the Leading End
Trim the first end to a narrow point. A tapered end enters the wide side of the maker more easily and gives a pin or blunt awl something to guide through the opening.
Step 6: Feed the Strip Through the Maker
Insert the strip into the wide opening and keep it centered. If it stalls, use the tool’s guide slot, a pin, or a blunt awl to ease the fabric forward instead of pulling hard enough to distort the bias.
Step 7: Pull the Maker and Press at the Same Pace
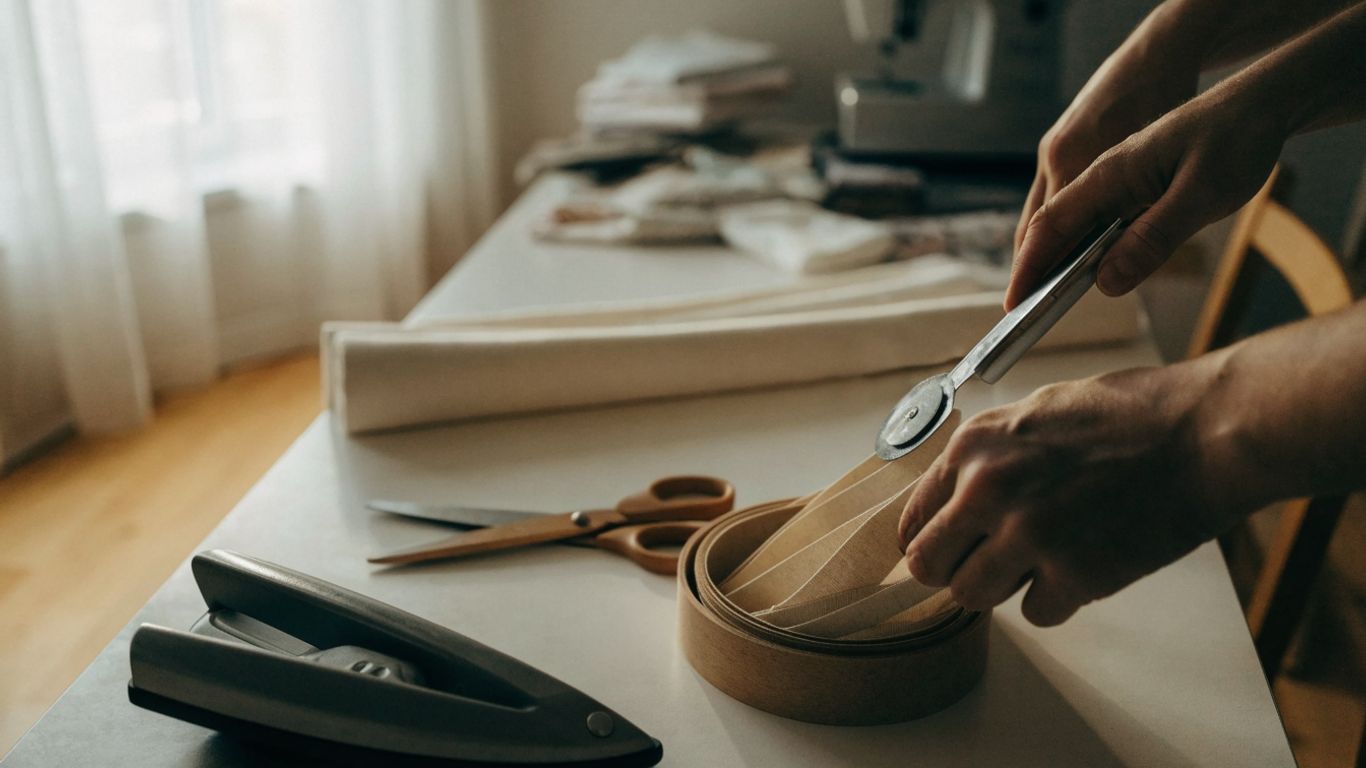
As folded fabric appears from the narrow end, press it immediately with the iron. I move the maker only a few inches at a time so the folds are set before they have a chance to spring open.
Step 8: Check the Folds Every Few Inches
Both folded edges should remain reasonably even and the tape should lie flat. If one side starts drifting, stop, back the fabric up, recenter it, and fix the problem before continuing.
Step 9: Make Double-Fold Tape if Needed
Fold the single-fold tape in half lengthwise and press again. For many bindings, I offset the fold very slightly so the underside is a touch wider, which makes it easier to catch both sides when machine stitching.
Step 10: Let the Tape Cool Flat
Do not coil hot tape tightly or stretch it while it is still warm. I let the pressed length cool before measuring, pinning, or sewing so the folds have time to set.
How to Sew Bias Tape onto Fabric
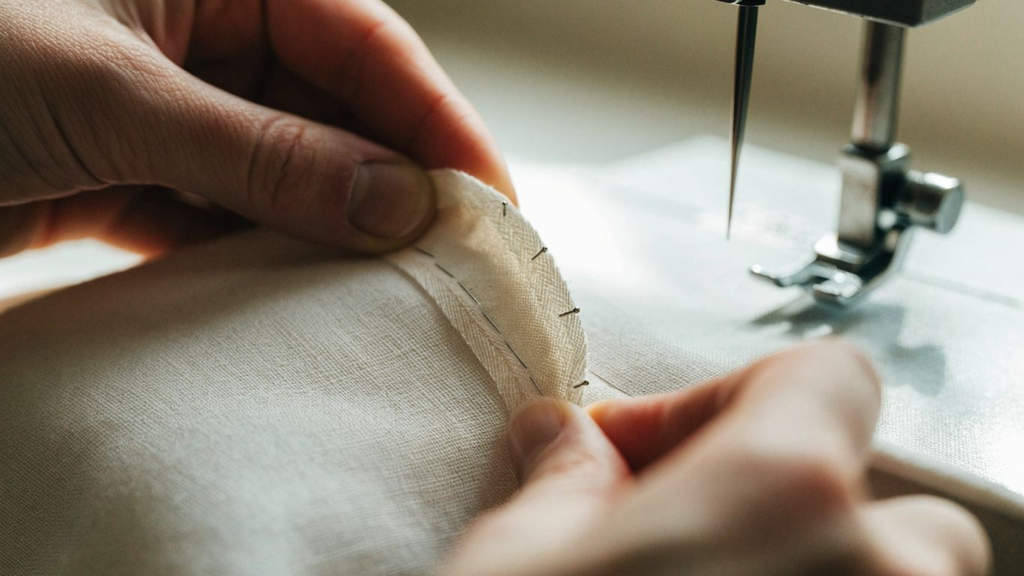
Once the tape is made, I treat attachment as a separate sewing step. The cleanest method depends on whether I want an invisible first seam, a visible topstitched finish, or a quick beginner-friendly application.
For a classic wrapped binding, I open one fold, align that crease with the project’s raw edge, and stitch in the fold. Then I wrap the tape over the raw edge, press or clip it in place, and secure the second side by topstitching or stitching in the ditch from the front.
Step 1: Test the Binding on a Scrap
Use the same fabric layers and tape you plan to sew. Check needle size, stitch length, tension, and whether the tape covers the raw edge on both sides.
Step 2: Open One Fold and Align the Crease
Place the tape right sides together with the project if the method calls for it, then line the fold crease with the raw edge. Clip or pin without stretching the tape.
Step 3: Stitch in the Fold
Sew along the first pressed crease at a controlled speed. On curves, stop often with the needle down, pivot gradually, and let the bias tape ease around the edge rather than pulling it tight.
Step 4: Wrap the Tape Over the Edge
Fold the tape over the raw edge and check the underside. I want the second fold to extend far enough to be caught by the final line of stitching.
Step 5: Press, Clip, and Topstitch
Press the wrapped binding lightly, clip it in place, then topstitch close to the folded edge. I check the underside every few inches until I know the stitch line is catching both layers consistently.
Step 6: Press the Finished Binding
A final press flattens the seam and helps the binding sit cleanly against the project. On delicate or synthetic fabric, I use a pressing cloth and the lowest safe heat setting.
If the layers creep while you sew quilt binding or bulky fabric, my walking foot guide explains when an even-feed foot can help. If the stitch itself looks loopy or unbalanced, use the sewing machine tension guide before changing several settings at once.
How to Use Bias Tape Around Curves and Corners
Bias-cut tape is valuable because it can bend, but it should be eased rather than stretched. Stretching the tape around an outside curve can make the finished edge pull inward, while stretching it around an inside curve can make the binding ripple when it relaxes.
Inside Curves
Use true bias tape, keep the binding relaxed, and clip or pin more frequently. I guide the tape around the curve in small sections and avoid forcing the raw edge to stay perfectly straight.
Outside Curves
Let the outer edge of the bias spread naturally as the inner edge follows the curve. A narrower binding is usually easier to shape around a tight curve than a very wide one.
Mitered Corners
For square quilt corners, I stop the first seam before the corner by approximately the seam allowance, fold the tape to create a diagonal miter, then continue along the next edge. Pressing the fold before the final topstitch helps the corner stay crisp.
Joining the Final Ends
Before the last few inches, I leave enough overlap to join the tape neatly rather than stacking one bulky end over the other. A diagonal join usually produces the flattest continuous finish.
For quilting projects where binding is a regular task, see my best quilting sewing machines guide for machines with the workspace and control features that make larger quilts easier to manage.
Best Fabrics for Making Bias Tape
The easiest tape comes from woven fabric that cuts cleanly, travels through the channel without snagging, and holds a pressed crease. I start beginners with quilting cotton because it gives clear feedback without being too slippery or bulky.
- Quilting cotton. My easiest all-purpose choice for practice, quilt binding, craft projects, and stable garment details.
- Cotton lawn or voile. Useful for lightweight garment edges, but the strip needs careful feeding and lower heat.
- Linen and linen blends. Good for natural-looking binding when the weave is stable enough to hold a crease; bulky linen may need a wider tool.
- Chambray and lightweight denim. Suitable for casual garments and accessories when the maker is large enough for the fabric thickness.
- Silk, rayon, or slippery synthetics. Possible, but I test first because the fabric can shift, stretch, scorch, or refuse to hold a crisp fold.
For very sheer fabric, the binding method may need to change because multiple folded layers can look bulky through the garment. My how to sew chiffon guide covers pressing, stabilizing, and seam-finish choices for delicate transparent fabric.
Tips for Cleaner, More Consistent Bias Tape
The best improvements are small and repeatable. I do not pull harder or increase iron heat when a strip misbehaves; I first check width, grain, alignment, and fabric bulk.
- Make one short test strip first. It is faster to correct a 12-inch sample than to recut several yards of fabric.
- Support long strips on the table. Letting a long bias strip hang off the table can stretch it before it even reaches the maker.
- Press, do not drag. Lift and set the iron instead of sliding aggressively along the bias, especially with soft fabric.
- Keep joins flat. Trim diagonal seam allowances and press them open so the joint can pass through the channel.
- Use consistent heat. Too little heat will not set the fold; too much heat can shine, shrink, or damage the fabric.
- Store finished tape loosely. Roll or coil it without tension after it cools so the bias does not stretch before use.
- Make extra length. Allow for joins, test pieces, mitered corners, overlap, and mistakes rather than cutting the exact edge measurement.
For new sewists, these habits are more useful than trying to move quickly. Once the strip feeds smoothly, speed comes naturally.
Common Bias Tape Maker Problems and Fixes
When bias tape looks uneven, I treat the symptom as a setup clue. Most problems come from strip width, alignment, fabric bulk, pressing, or stretching rather than from the tape maker itself.
The Folds Are Uneven
Stop and check whether the strip is centered and whether its width matches the maker. If one edge is consistently wider, recut a short sample to the manufacturer’s recommended size before continuing.
The Fabric Bunches Inside the Maker
The strip may be too wide, too bulky, twisted, or feeding at an angle. Back it out gently, flatten the strip, reduce bulk at any join, and try again without forcing it.
The Tape Will Not Hold a Crease
Check the fabric care instructions and use enough heat and contact time to set the fold. Some synthetics need lower heat and a pressing cloth, while very springy fabric may need slower pressing.
The Tape Stretches and Becomes Wavy
Bias fabric stretches easily. Support the strip, pull the maker rather than the fabric, and press by lifting and setting the iron instead of dragging it lengthwise.
The Join Gets Stuck
A thick straight-across seam creates a lump inside the channel. Use a diagonal join, trim the seam allowance, press it open, and guide the joint through slowly.
The Sewn Binding Misses the Back Edge
The underside may not extend far enough beyond the first seam. Re-press the double fold with a slight offset or attach more deliberately so the back fold sits just beyond the front stitch line.
Binding Ripples Around a Curve
The tape may have been stretched during pinning or sewing. Ease the bias around the curve, use more clips, reduce tension from your hands, and press only after the curve sits naturally.
If a problem repeats on every fabric even after the strip width is correct, compare the maker with another size or brand. A tool that is slightly rough, bent, or poorly sized can make consistent folding unnecessarily difficult.
Common Bias Tape Maker Mistakes to Avoid
The easiest mistakes to make are the ones that seem harmless at the beginning but show up later as stretched, uneven, or bulky binding. I prevent them before sewing the final edge.
- Assuming the strip is always exactly twice the maker width. That is only a rough rule. Manufacturer charts can call for slightly different widths based on maker size and fabric weight.
- Cutting on the bias for every single project. True bias is essential for curves, but straight-grain tape can be more stable for some straight edges.
- Using thick fabric in a very narrow maker. The channel can overfill, causing bunching, uneven folds, and difficult pressing.
- Pulling the strip instead of guiding the maker. Hard pulling stretches the bias and makes the finished tape longer, narrower, and less stable.
- Pressing over the tool body. Keep the iron on the fabric emerging from the maker so you do not overheat or damage the tool.
- Skipping the test strip. A small error in input width becomes a large waste when repeated across several yards.
- Stretching bias tape around curves. Use the flexibility to ease around the shape rather than pulling it taut.
- Sewing without checking the underside. A beautiful topstitch is not useful if the stitching repeatedly misses the folded edge underneath.
If I correct these points before the tape reaches the project, the final sewing is usually much easier. Accurate cutting and pressing solve more bias-binding problems than extra stitching ever will.
Bias Tape vs. Other Edge-Finishing Methods
Bias binding is only one way to finish a raw edge. I choose it when I want the edge covered, reinforced, decorative, or able to follow a curve. A hem, facing, serged edge, or adhesive finish may be more appropriate for other projects.
- Use bias binding for curved necklines, armholes, quilt edges, bibs, bags, decorative edges, and raw seams you want fully enclosed.
- Use a folded hem when the project edge can turn inward without excessive bulk or distortion.
- Use fusible hem tape when a no-sew or temporary adhesive hem is appropriate and the fabric tolerates the product and heat.
- Use a serger or overcast finish when you mainly need to control fraying inside a garment rather than cover the edge with a visible binding.
For a no-sew alternative, see my fusible hemming tape guide. If you are looking for easy projects that build cutting and pressing skills, browse 25 easy sewing projects for beginners.
Final Verdict: The Easiest Way to Use a Bias Tape Maker
A bias tape maker works best when I treat it as a precision folding guide rather than a shortcut that fixes inaccurate cutting. I choose the finished width first, cut a consistent strip to the maker’s actual recommendation, use true bias only when the project needs that flexibility, guide the strip gently, and press every few inches as it exits.
For beginners, medium-weight cotton and a medium-size maker are the easiest combination to learn. Once the folds are consistent, the same process can be adapted to garment binding, quilt edges, appliqué, bags, home décor, and decorative tape. The most important habit is still the simplest one: make a short test strip before committing the full length.
Frequently Asked Questions
What does a bias tape maker do?
It folds the two long raw edges of a fabric strip toward the center so the strip can be pressed into consistent single-fold tape. The tool shapes the tape; an iron sets the folds and a sewing machine or hand stitching attaches it to the project.
Do I have to cut the fabric on the bias?
Use true bias, roughly 45 degrees to the selvage, when the binding needs to follow curves. Straight-grain or cross-grain strips can work for many straight edges.
How wide should I cut fabric for a bias tape maker?
Follow the instructions for your exact maker. Twice the finished size is a rough rule, but official strip widths can vary by tool size and fabric weight.
What size bias tape maker should I buy first?
A 18 mm or 25 mm maker is easier for many beginners than a very narrow 6 mm tool because the fabric is easier to cut, feed, press, and sew.
Can I make double-fold bias tape with a standard maker?
Yes. Make and press the single-fold tape first, then fold it in half lengthwise and press again.
Can I use straight-grain fabric in a bias tape maker?
Yes. The tool can fold straight-grain strips, but they will not have the same flexibility around curves as true bias-cut fabric.
Why does my bias tape come out uneven?
The strip may be off-center, inconsistent in width, too thick for the maker, or being pulled at an angle. Stop and test a carefully cut sample before continuing.
Do I need an iron to use a bias tape maker?
For clean, stable folds, yes. The maker shapes the fabric but pressing sets the crease so the tape stays manageable during sewing.
Can I use a bias tape maker with thick fabric?
Sometimes, but the fabric must fit the channel without bunching. Bulky denim, upholstery fabric, or heavy linen may need a larger maker or a different edge finish.
How do I keep bias tape from stretching?
Support the strip, pull the maker rather than the fabric, press by lifting and setting the iron, and avoid pulling the tape taut when pinning or sewing.
Can I use a walking foot to sew bias binding?
Yes, especially when several layers tend to creep or shift. The foot does not make the binding, but it can help feed quilt layers and thick edges more evenly during attachment.
How much bias tape should I make?
Measure the edge, then add extra for joins, mitered corners, overlap, tests, and mistakes. For long or continuous binding, use a bias-binding calculator rather than cutting the exact perimeter length.