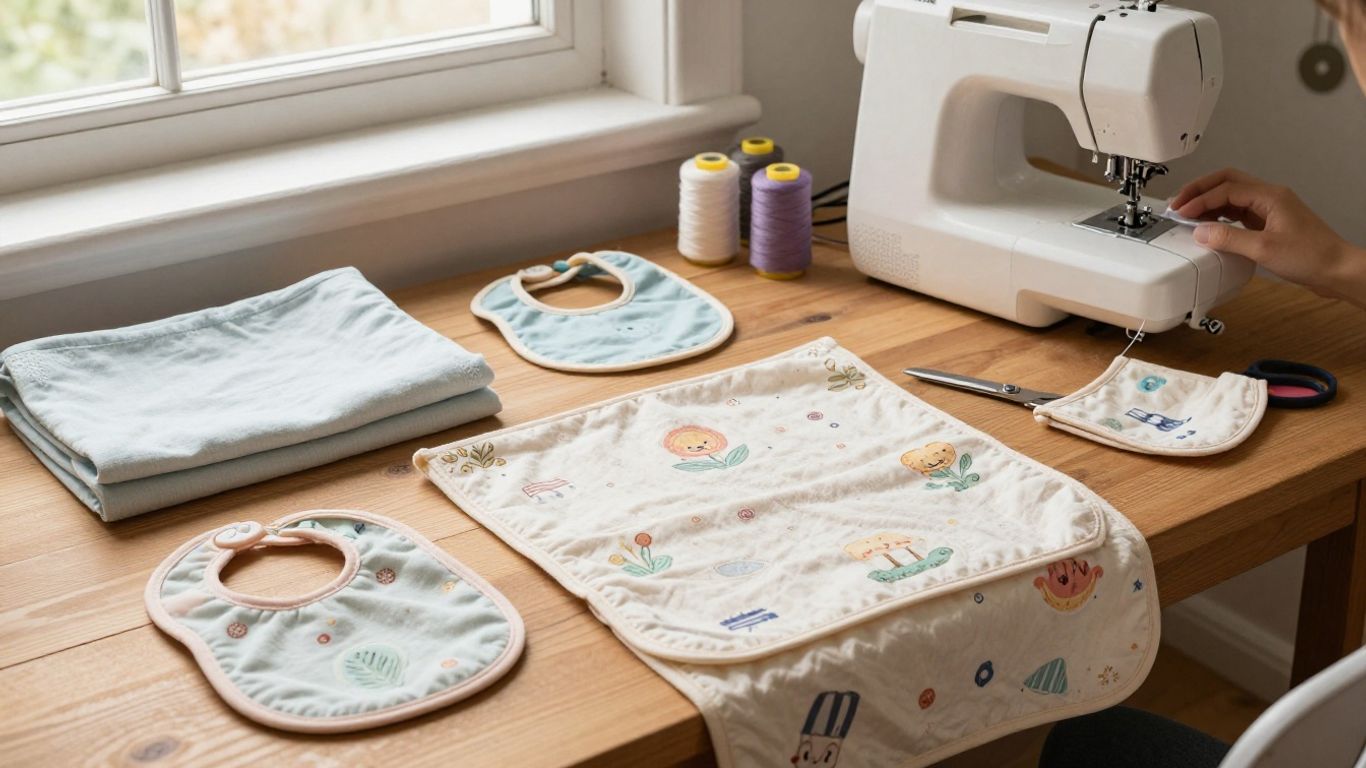
8 Easy Baby Sewing Projects for Beginners: Simple Handmade Ideas for 2026
Easy baby sewing projects are one of my favorite ways to practice core sewing skills because the pieces are small, useful, and forgiving enough for a beginner to finish in a single afternoon. Projects such as burp cloths, bibs, receiving blankets, simple hats, changing pad covers, soft toys, fabric books, and basic baby clothes teach accurate cutting, straight seams, curves, topstitching, elastic, stretch fabric, and clean finishing without requiring a huge amount of material.
I choose soft, washable fabrics, prewash anything that may shrink, test my stitches on scraps, and keep every design simple enough to inspect carefully before it reaches a baby. This guide moves from the easiest baby sewing projects to slightly more advanced beginner ideas, with practical safety notes so the finished item is not only cute, but also appropriate for how it will actually be used.
Quick Answer: What Are the Easiest Baby Sewing Projects for Beginners?
Start with a burp cloth, bib, or simple blanket if you are completely new to sewing. These projects use easy shapes and mostly straight seams, so they teach measuring, cutting, turning, pressing, and topstitching without complex fitting. After that, move to a changing pad cover, fabric book, soft toy, knit hat, or simple baby garment. For anything made for a baby, prioritize washable fabric, secure seams, age-appropriate construction, and a final safety check over decorative extras.
Key Takeaways
Baby sewing is easiest when I keep the first projects practical, washable, and simple enough to finish cleanly. These are the habits that make the biggest difference.
- Start with simple projects like burp cloths, bibs, and blankets.
- Choose soft, washable fabrics like cotton, flannel, jersey, or terry cloth.
- Prewash fabric before cutting to account for shrinkage.
- Secure seams, trim threads, reinforce stress points, and check finished items.
- Match each project to the baby’s age, use, and safety needs.
- Test stitches, tension, needles, and fabric on scraps first.
- Keep loose blankets, stuffed toys, and soft items out of infant sleep spaces.
- Focus on finishing one well-made project rather than starting too many.
The goal is not to make a perfect nursery in one weekend. One carefully sewn item teaches more than cutting fabric for five projects and leaving all of them half-finished.
Why Start With Baby Sewing Projects?
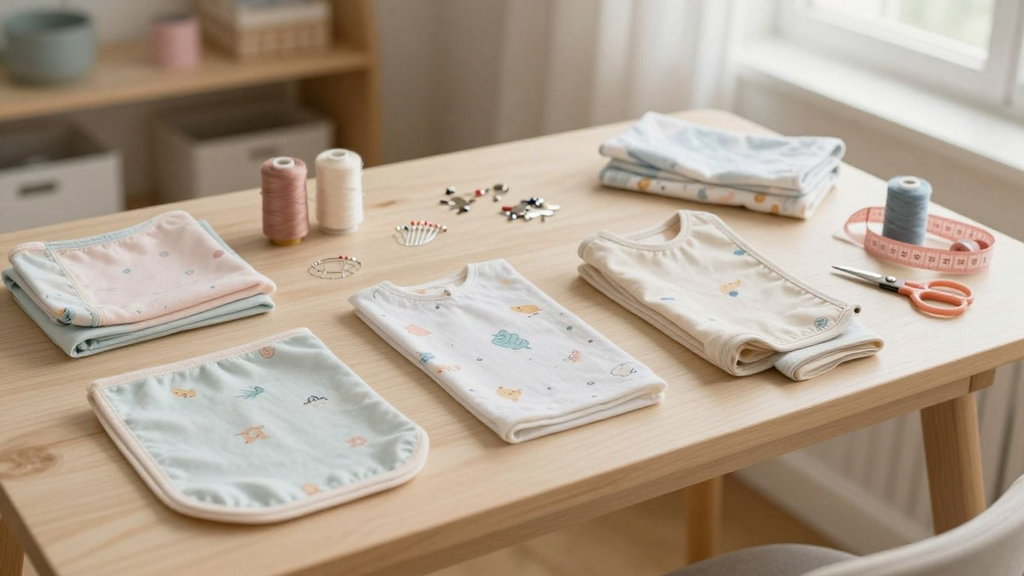
I like baby projects because the scale is manageable. A small rectangle can become a burp cloth, a few shaped pieces can become a bib, and one simple pattern can teach me curves, turning, topstitching, elastic, or knit fabric without the commitment of a full adult garment.
They are also useful handmade gifts. I can choose fabric for a specific family, make matching sets, use smaller cuts efficiently, and learn how different materials behave in the wash. That combination of usefulness and skill-building is why baby sewing projects work so well for beginners.
How I Make Baby Sewing Projects as a Mom
As a mom, I approach baby sewing differently from a decorative craft project because I know the finished item will be washed, pulled, chewed on, dropped, carried around, and used in ways a flat-lay photo never shows. I start by asking what the item is actually for, how often it will need washing, whether it will touch the baby’s skin, and whether any part could loosen after repeated use.
When I sew for my son, I keep the designs practical and easy to inspect. I prewash fabric, test seams on scraps, reinforce high-stress areas, avoid loose buttons or decorative pieces on infant toys, and check every edge and closure after the final wash. For blankets, stuffed toys, and other soft items, I treat them as supervised-use or gift items rather than crib bedding, because safe-sleep guidance calls for a clear infant sleep space.
- I start with the use case. A feeding bib, stroller blanket, changing-pad cover, and toy all need different fabrics, finishes, and safety checks.
- I wash the fabric first. If the fabric is going to shrink, soften, bleed, or distort, I want to know before I cut the pattern pieces.
- I keep attachments simple. For infant items, I prefer embroidery, secure stitching, or integrated fabric details over loose buttons, beads, bells, or long ties.
- I test the seam, not just the look. I tug finished seams gently, check corners and turning openings, and make sure there are no loose thread loops or exposed filling.
- I think about cleaning. If an item cannot be washed or wiped easily, it is usually less useful in real life with a baby.
- I separate sleep items from play items. A handmade blanket or stuffed animal can be lovely for supervised use, but it does not belong loose in an infant crib or bassinet.
That routine keeps my baby sewing focused on comfort, usefulness, and repeatable construction instead of adding detail just because it looks cute.
Baby Sewing Safety: What I Check Before I Start
Baby projects need an extra layer of judgment because some items can become choking, strangulation, suffocation, or entrapment hazards if they are used in the wrong setting. I do not treat a handmade item as automatically safe just because it is soft.
For U.S. readers, the American Academy of Pediatrics recommends a firm, flat infant sleep surface with no loose blankets, stuffed toys, pillows, bumper pads, or similar soft objects in the crib or bassinet. The U.S. Consumer Product Safety Commission also warns against small detachable parts and strings or cords that can create choking or strangulation hazards for young children.
- No loose soft items in infant sleep spaces. Use handmade blankets and stuffed toys for awake, supervised use rather than loose crib or bassinet bedding.
- Avoid small detachable parts. For babies and toddlers, skip buttons, beads, plastic eyes, bells, or decorations that could loosen and become a choking hazard.
- Avoid long ties and neck cords. CPSC warns that strings, cords, ribbons, and similar items around an infant’s neck can create strangulation risk.
- Remove bibs before sleep. Bibs and garments with neck ties should not remain on a sleeping baby.
- Be careful with baby sleepwear. If you sew pajamas or other sleepwear, follow the applicable pattern, fabric, fit, and local flammability requirements rather than improvising from a casual clothing pattern.
- Inspect after washing. Repeated laundering can reveal loose seams, stretched elastic, exposed filling, or attachments that looked secure when new.
Essential Supplies for Beginner Baby Sewing Projects
I do not need a large sewing room or a specialty machine to start. Most of these projects can be made with a dependable straight stitch, a few basic tools, and fabric that is easy to wash.
- Sewing machine or hand-sewing needles. A machine speeds up repeated seams, but small repairs and simple details can be sewn by hand.
- Sharp fabric scissors or rotary cutter. Clean cuts make small pattern pieces easier to align and reduce frayed edges.
- Pins or sewing clips. Clips are useful for thick terry, minky, or layers that shift.
- Measuring tape and ruler. Accurate measurements matter more on fitted covers, hats, and garments than on simple rectangles.
- Iron and pressing surface. Pressing folds and seams often makes a beginner project look more polished than extra decorative stitching.
- Quality all-purpose thread. Use thread that suits the fabric and laundering method; I avoid old, brittle thread on items that will be washed often.
- Fresh machine needles. Use universal needles for many woven fabrics and ballpoint or stretch needles when the knit fabric and machine call for them.
- Seam ripper. Fixing one crooked seam is normal and usually cleaner than trying to hide it later.
If you are still choosing a machine, start with the features you actually need rather than a huge stitch count. MariaSew’s beginner-machine guide compares models for setup, stitch quality, fabric handling, and accessories.
See the best sewing machines for beginners
Sewing Machine vs. Hand Sewing for Baby Projects
Both methods can work. I use a sewing machine when I want consistent seam allowances, repeated topstitching, stretch stitches, or several matching pieces. Hand sewing is useful for small openings, repairs, invisible finishing, or a project where I only need a few short seams.
For a beginner, I would not delay starting just because the perfect machine is not available. A simple hand-sewn project can teach measuring and finishing, while a borrowed or entry-level machine can handle the longer seams once you are ready.
- Choose hand sewing for small repairs, closing turning openings, tiny decorative details, or quiet portable work.
- Choose a sewing machine for blankets, repeated burp cloths, garments, stretch seams, topstitching, and anything with long or repeated seams.
- Use both when the machine handles construction and hand stitching gives you cleaner control at the final opening or small detail.
The better method is the one that lets you finish the project neatly and securely without rushing.
Best Fabrics for Baby Sewing Projects
For a first project, I prefer fabric that is soft, washable, and predictable under the presser foot. Smooth woven cotton is easy to cut and press, while flannel and terry add softness or absorbency. Knit fabrics work well for hats and clothing but require more attention to stretch and needle choice.
I prewash and dry fabric using the same method I expect the finished item to receive. I also avoid scratchy trims, loose glitter, fragile embellishments, and anything that sheds or becomes rough after washing.
- Quilting cotton. Easy to cut, press, and sew; good for bib backs, fabric books, simple toys, and decorative layers.
- Cotton flannel. Soft and absorbent; useful for burp cloths, blankets, and cozy accessories.
- Terry cloth. Highly absorbent for burp cloths, bibs, and wash-friendly utility pieces.
- Jersey knit. Soft and stretchy for hats and simple clothing, but it needs the correct needle and a stretch-friendly seam.
- Minky or plush fabric. Very soft but slippery; I use extra clips and often a walking foot to control the layers.
- Muslin or double gauze. Lightweight and breathable for supervised-use blankets or cloths, though it can shift and fray while sewing.
If layers keep creeping while you sew, MariaSew’s walking foot guide explains how the attachment helps move the top and bottom layers more evenly.
8 Easy Baby Sewing Projects for Beginners
I arranged these projects from simple utility sewing toward items that add curves, fitting, stretch, elastic, or toy construction. You do not have to follow the order exactly, but the sequence gives you a sensible skill progression.
For every project, I make one sample before cutting a full matching set. That first version tells me whether the size, fabric, seam allowance, closure, and washing method actually work.
1. Simple Burp Cloths
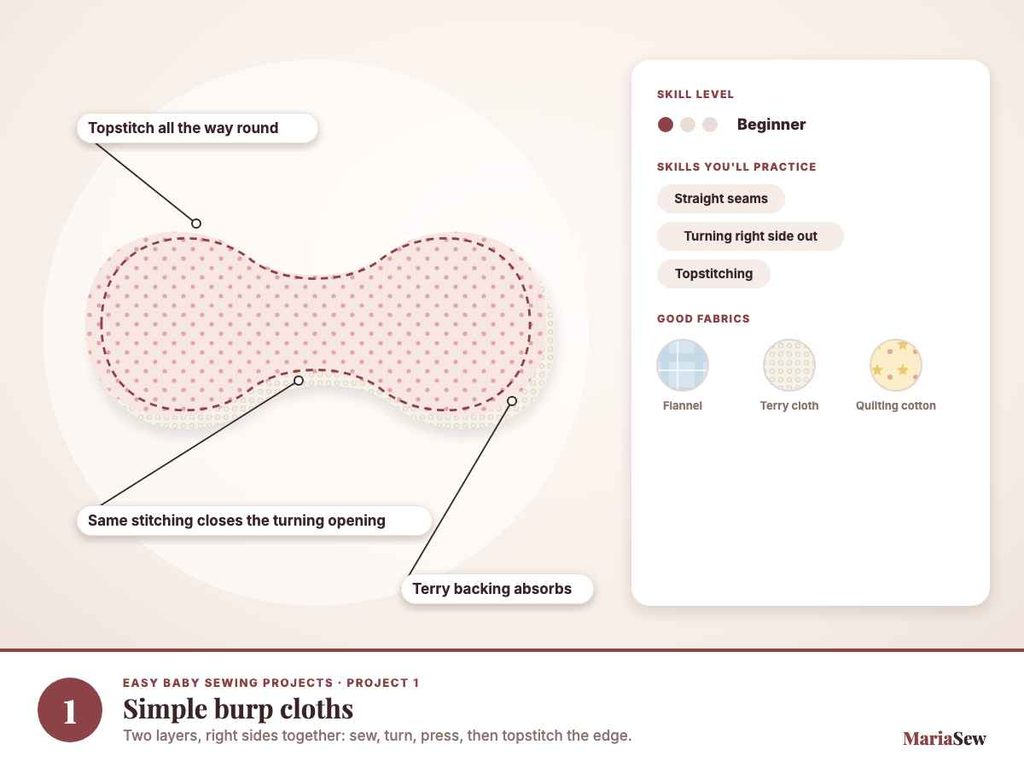
Burp cloths are my favorite first baby sewing project because the shape is simple and the finished item gets used constantly. I cut two rectangles or a contoured burp-cloth shape, place the right sides together, sew around the edge, leave a turning opening, turn it right side out, press, and topstitch the perimeter.
Flannel, terry cloth, cotton, or a combination of soft woven fabric and absorbent backing works well. I make one test cloth first, wash it, and check whether the size, absorbency, seam finish, and fabric feel are still right before I cut a full stack.
Best for: Absolute beginners • Skills: straight seams, turning, topstitching • Good fabrics: flannel, terry, quilting cotton
2. Receiving or Stroller Blankets
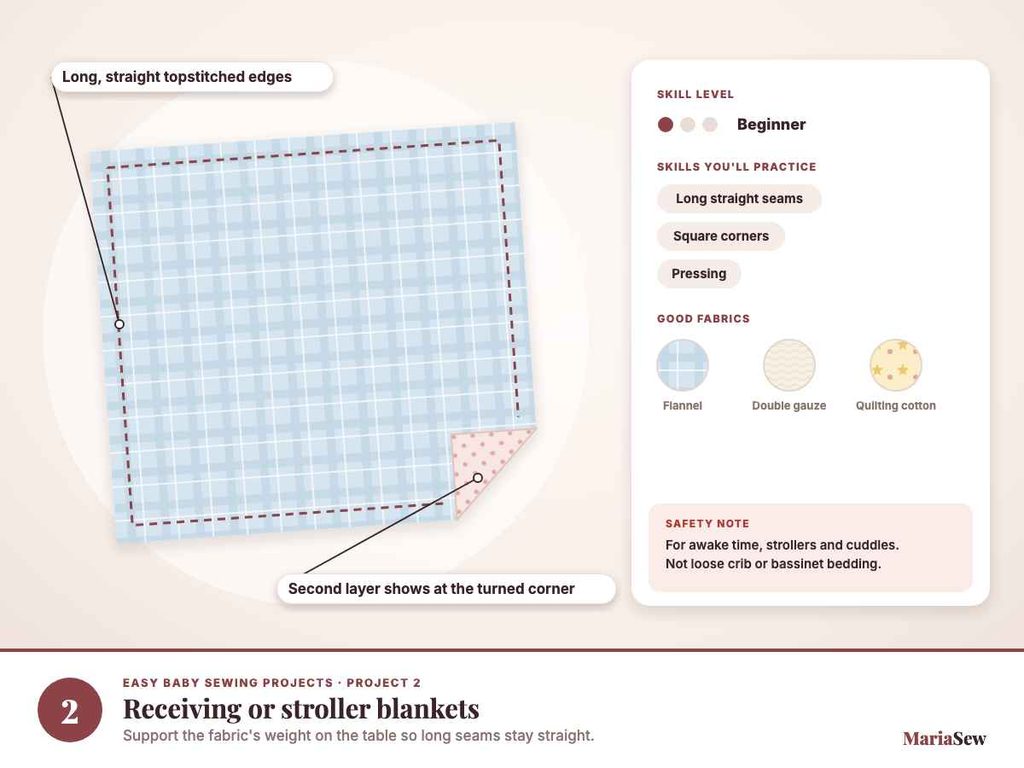
A simple blanket can be a neatly hemmed single layer or a two-layer turned rectangle. It teaches accurate cutting, long straight seams, pressing, corner control, and topstitching without complicated pattern pieces. I support the fabric on the table so its weight does not pull the seam out of alignment.
I use handmade blankets for supervised awake time, stroller use, feeding, cuddling, or as a gift. I do not place loose blankets in an infant crib or bassinet in an infant crib or bassinet because current AAP safe-sleep guidance recommends keeping the sleep surface free of loose bedding and soft objects.
Best for: Beginners • Skills: long seams, corners, pressing • Good fabrics: flannel, cotton, double gauze, compatible fleece
3. Baby Bibs
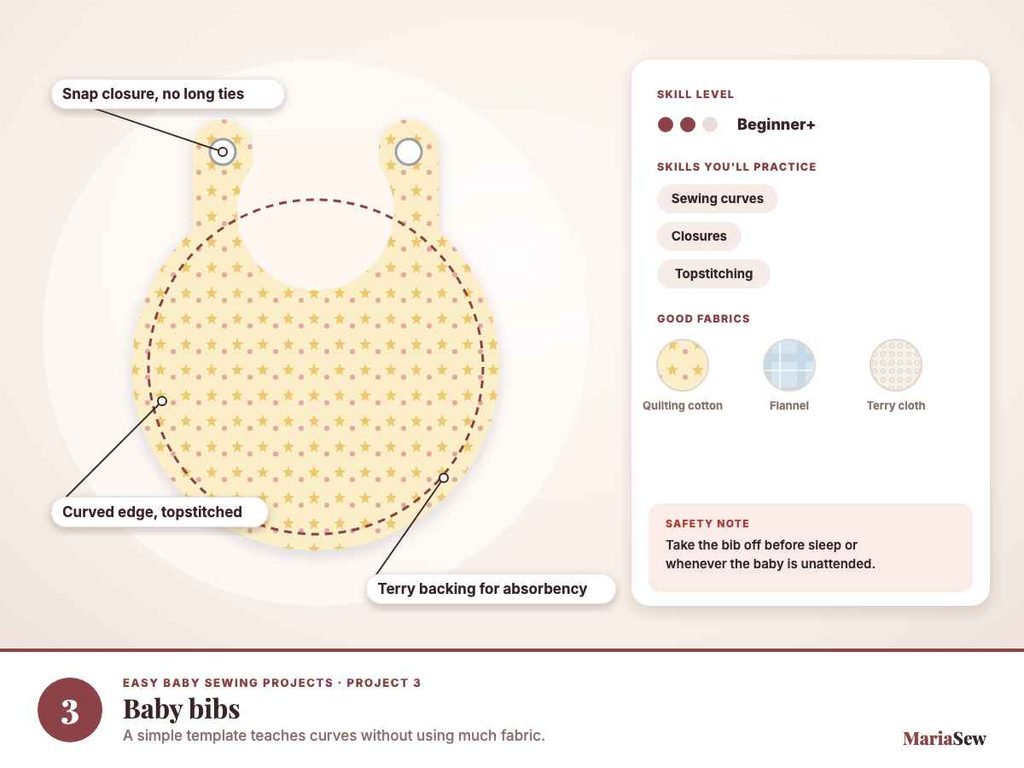
Bibs add a gentle pattern shape and curved sewing without using much fabric. I cut the front and backing from a simple template, stitch the layers right sides together, turn, press, and topstitch. For an absorbent bib, I may add terry or another washable backing layer.
I prefer a secure snap or other age-appropriate closure specified by the pattern and avoid long neck ties for infant use. Before giving the bib to a baby, I check the neckline, closure, edge stitching, and any appliqué. Bibs should be removed before sleep or when the baby is unattended.
Best for: Confident beginners • Skills: curves, closures, topstitching • Good fabrics: cotton, flannel, terry
4. Soft Stuffed Animal
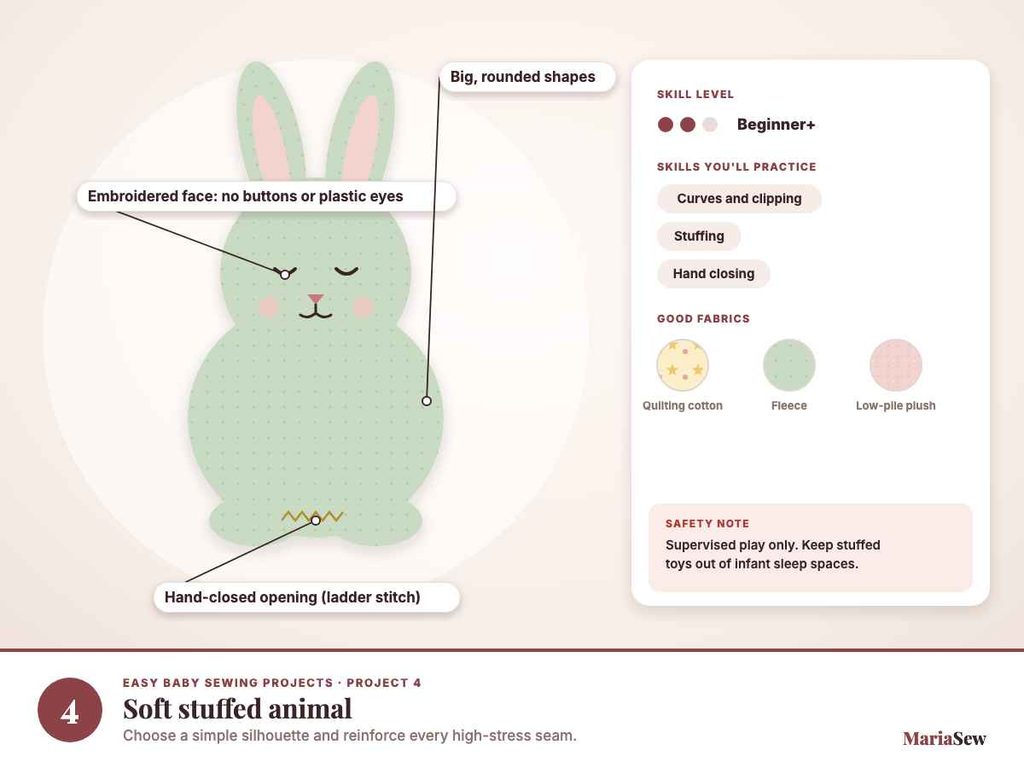
A simple stuffed animal teaches curves, clipping, turning, stuffing, and ladder-stitch or edge closing. I choose a silhouette with large rounded shapes rather than narrow limbs or lots of tiny components, then sew slowly and reinforce any high-stress seam.
For babies, I avoid buttons, beads, plastic safety eyes, bells, or other detachable small parts and use securely embroidered facial details instead. I also keep stuffed toys out of an infant sleep space and treat them as supervised-use play items or nursery decoration.
Best for: Confident beginners • Skills: curves, clipping, stuffing, hand closing • Good fabrics: cotton, fleece, low-pile plush
5. Simple Knit Baby Hat
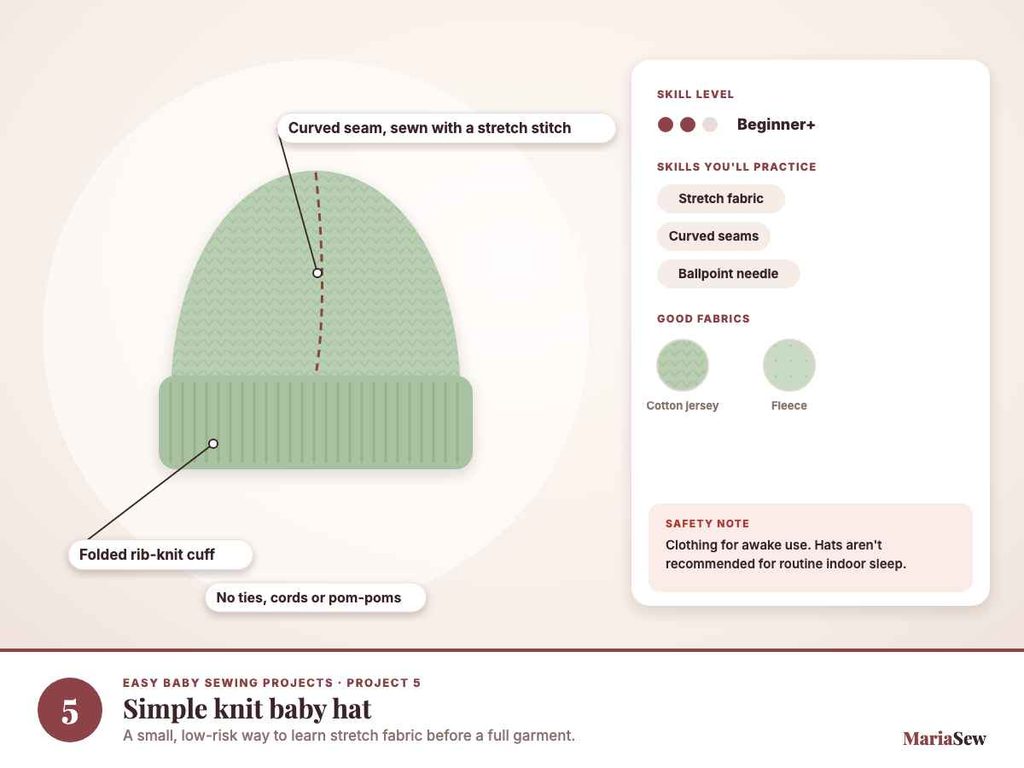
A basic knit hat is a good introduction to stretch fabric because the project is small and the seam lines are easy to inspect. I use a stretch or ballpoint needle when appropriate, test the seam on a scrap, and avoid stretching the fabric as it passes under the presser foot.
For babies, I keep the design simple and avoid long ties, cords, pom-poms, or loose decorations. I also treat the hat as clothing for awake use rather than sleepwear; current AAP safe-sleep guidance does not recommend hats for routine indoor infant sleep.
Best for: Beginner-to-intermediate • Skills: stretch fabric, curved seams • Good fabrics: cotton jersey, rib knit
6. Fitted Changing Pad Cover
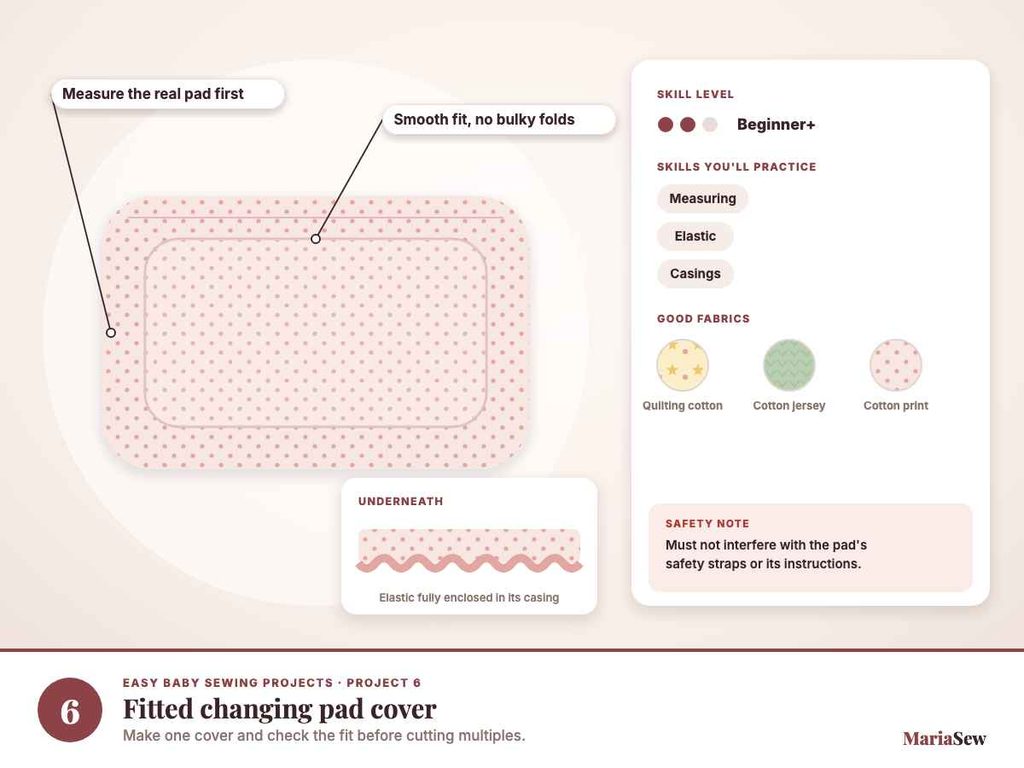
A fitted changing pad cover teaches accurate measuring, corner shaping, elastic, and sewing around a larger loop. I measure the actual pad rather than guessing, compare those measurements with the pattern, and make one cover before cutting multiples.
The cover should fit smoothly without bulky folds and should not interfere with any safety straps or the changing pad manufacturer’s instructions. I choose fabric that tolerates frequent washing and keep the elastic casing securely enclosed.
Best for: Confident beginners • Skills: measuring, elastic, casing • Good fabrics: cotton, jersey, woven cotton blends
7. Fabric Book or Crinkle Toy
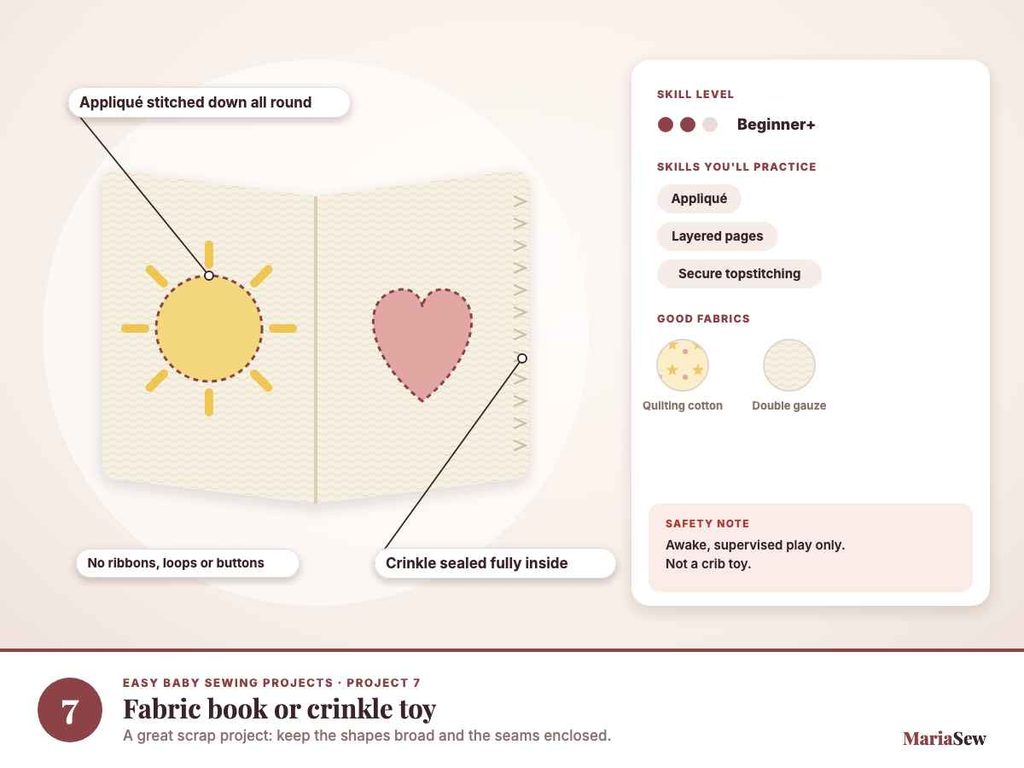
A fabric book or crinkle toy lets me practice appliqué, layered pages, turning, and secure topstitching while using small fabric scraps. I keep the shapes broad, the seams enclosed, and the page layout simple enough to inspect after every wash.
For infant use, I avoid small detachable pieces, long ribbons, loose loops, buttons, beads, or anything that could become a choking or strangulation hazard. If I use crinkle material, I follow the material supplier’s instructions and seal it completely inside the project. This is an awake, supervised-play item, not a crib toy.
Best for: Confident beginners • Skills: appliqué, layers, turning • Good fabrics: quilting cotton, felt details that are fully stitched down
8. Simple Baby Clothes: Bodysuit, Pants, or T-Shirt
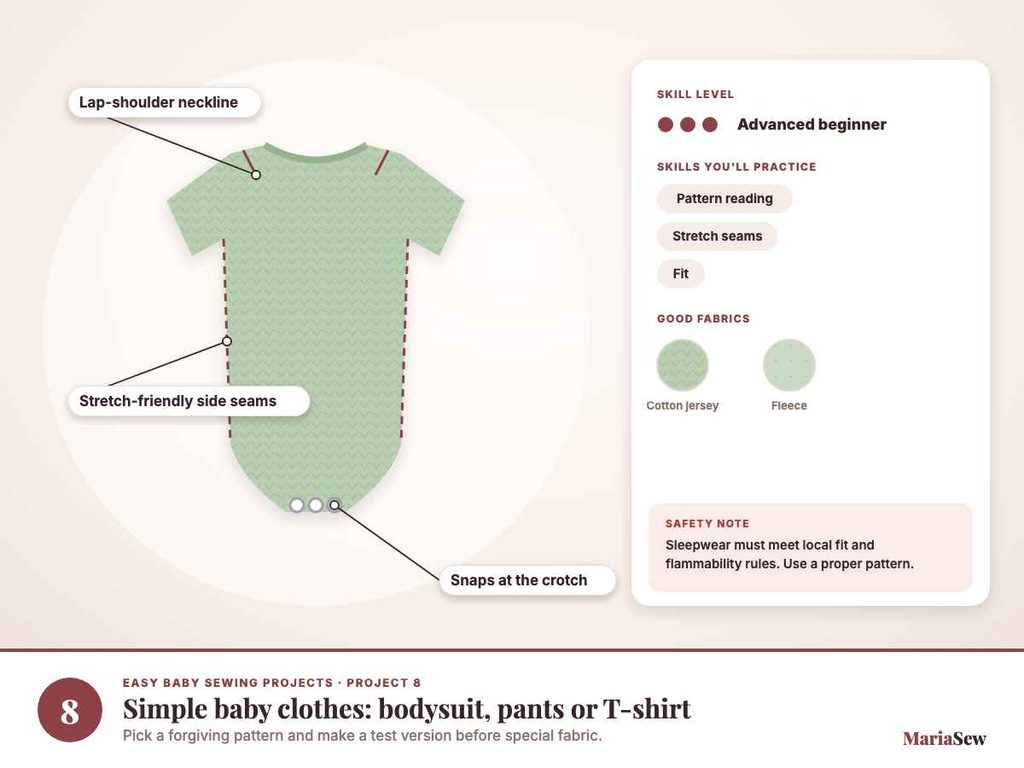
A simple baby garment brings several beginner skills together: reading a pattern, matching notches, sewing curves, handling stretch, finishing seams, and checking fit. I choose a forgiving pattern with clear instructions and make a test version before cutting special fabric.
For my first garment, I prefer a simple bodysuit, elastic-waist pants, or T-shirt over complicated pajamas. If I sew sleepwear, I use a pattern and fabric that meet the applicable local sleepwear fit and flammability requirements rather than adapting an ordinary clothing pattern without guidance.
Best for: Advanced beginner • Skills: pattern reading, stretch seams, fit, elastic or binding • Good fabrics: cotton jersey, rib knit
Which Baby Sewing Project Should You Start With?
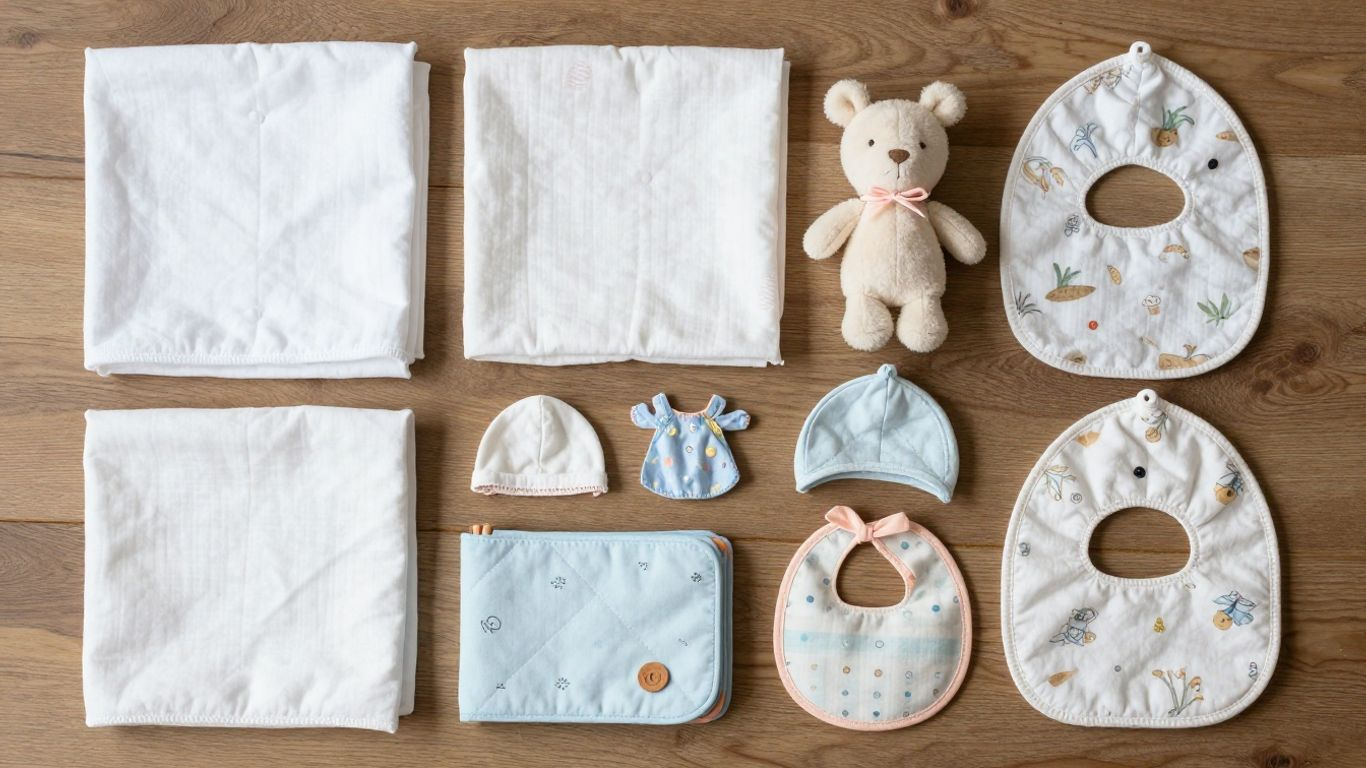
The easiest first project depends on which skill you want to practice. If you want straight seams and instant usefulness, start with a burp cloth. If you want curves, choose a bib. and if you want to learn stretch fabric, try the knit hat before a full garment.
I also consider how forgiving the fit is. A blanket can be slightly different in size and still work perfectly, while a hat, changing-pad cover, or bodysuit needs more accurate measurements. That is why I save fitted projects until I am comfortable cutting and holding a consistent seam allowance.
- Easiest first project. Burp cloth or simple blanket.
- Best for learning curves. Baby bib or simple stuffed animal.
- Best for learning elastic. Changing pad cover or simple baby pants.
- Best for learning stretch fabric. Simple knit baby hat.
- Best creative scrap project. Fabric book or crinkle toy.
- Best skill-building final project. Simple baby garment.
| Project | Skill Level | Good Fabric | Main Skill You Practice |
|---|---|---|---|
| Burp cloth | Beginner | Flannel + terry | Straight seams, turning, topstitching |
| Receiving/stroller blanket | Beginner | Flannel, cotton, double gauze | Long seams, corners, pressing |
| Bib | Beginner+ | Cotton + terry | Curves, closures, topstitching |
| Soft stuffed animal | Beginner+ | Cotton or fleece | Curves, clipping, stuffing |
| Knit baby hat | Beginner+ | Cotton jersey | Stretch seams, curves |
| Changing pad cover | Beginner+ | Cotton or jersey | Measuring, elastic, casing |
| Fabric book/crinkle toy | Beginner+ | Quilting cotton | Appliqué, layers, secure finishing |
| Simple baby clothes | Advanced beginner | Cotton jersey/rib knit | Pattern reading, stretch, fit |
Use the table as a progression guide rather than a strict order. If you already know how to sew curves or stretch fabric, skip ahead to the project that teaches the next skill you actually want.
Tips for Successful Baby Sewing Projects
My best results usually come from slowing down before I sew. Reading the complete pattern, checking the seam allowance, testing the stitch, and pressing the fabric can prevent more problems than trying to fix a finished project later.
I also build a small quality-control routine into the end of every baby project. I turn the item over, inspect the underside, tug gently at stress points, trim thread tails, check closures, and wash the item if the materials allow before I consider it finished.
- Prewash fabric before cutting. This reveals shrinkage, texture changes, and color bleeding before the item is assembled.
- Label pattern pieces. Small baby garment pieces can look similar once they are cut.
- Test stitches and tension on scraps. Use the same fabric layers and thread as the real project.
- Press as you go. Pressed seams, hems, and turning edges are easier to sew accurately.
- Use clips or extra pins on shifting layers. This is especially helpful with terry, minky, gauze, or mixed fabric weights.
- Slow down at curves and bulky seams. Accuracy matters more than maximum machine speed.
- Wash and inspect the finished item. Look for loose seams, stretched elastic, detached decorations, or exposed filling.
These habits are simple, but they make beginner sewing feel more predictable and make the finished item easier to trust in everyday use.
Common Baby Sewing Mistakes to Avoid
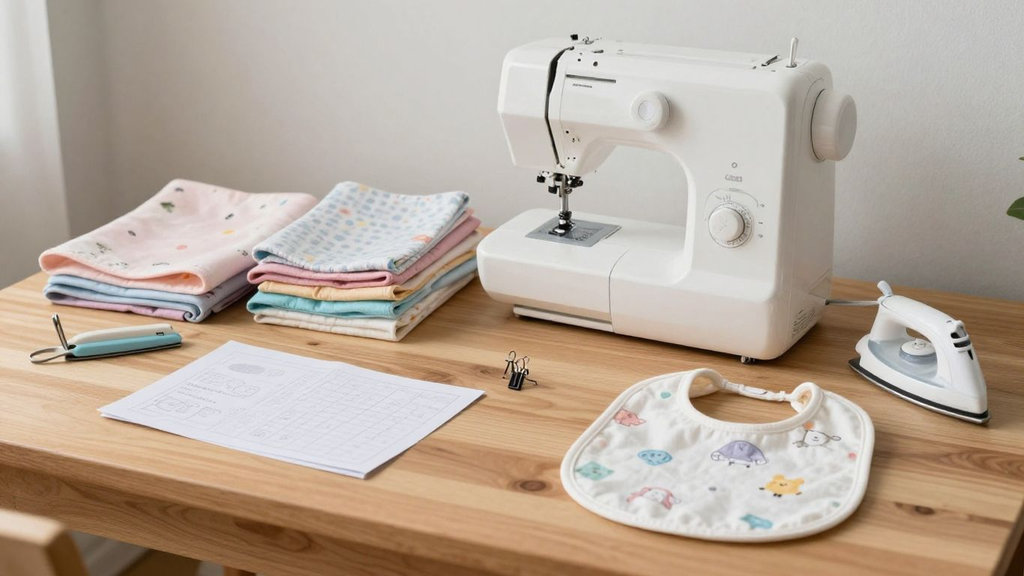
Most beginner mistakes are not dramatic. They are small shortcuts that make the project harder to sew, less washable, or less appropriate for a baby. I try to catch them before the fabric goes under the needle.
- Skipping prewashing. A finished item can shrink, twist, or change texture after the first wash.
- Choosing fabric only because it looks cute. Baby items need appropriate softness, washability, stretch, absorbency, and durability for their actual use.
- Using loose embellishments. Buttons, beads, bells, plastic eyes, or poorly secured appliqué can become hazards if they detach.
- Adding long ties or cords. Keep cords, ribbons, and neck ties away from infant items unless a specific age-appropriate pattern and use case calls for them.
- Treating a handmade blanket as crib bedding. Loose blankets and soft objects should stay out of an infant sleep space.
- Forcing stretch fabric through a woven-fabric setup. Use the correct needle, compatible stitch, and test scrap rather than pulling the fabric.
- Ignoring the turning opening. Close openings securely with topstitching or a strong hand stitch so filling and seam allowances stay enclosed.
- Making a fitted item from guessed measurements. Measure the real changing pad, pattern size, or garment reference before cutting.
- Sewing sleepwear without checking safety requirements. Use an appropriate sleepwear pattern and compliant fabric/fit for your location.
- Giving the item away without a final wash-and-inspect check. A laundering cycle can expose loose stitching or distorted elastic that was not obvious at the machine.
I would rather simplify a project than add a decorative feature I cannot secure confidently. Baby sewing is one place where practical finishing matters more than visual complexity.
Quick Troubleshooting for Beginner Baby Sewing
If a seam starts looking uneven, I stop before changing several settings at once. Most beginner problems come from threading, needle choice, tension, fabric feeding, or pulling the fabric instead of letting the feed dogs do the work.
- Loops underneath the fabric. Rethread the upper thread with the presser foot raised and check the bobbin before adjusting tension.
- Skipped stitches on knit fabric. Try the correct stretch or ballpoint needle and confirm the stitch is suitable for the fabric.
- Layers shift while sewing. Use more clips, reduce speed, support the fabric, or add a walking foot if appropriate.
- Wavy knit seams. Avoid stretching the fabric, reduce presser-foot pressure if your machine allows it, and test a stretch-friendly stitch.
- Corners look bulky. Trim or grade seam allowances carefully before turning, leaving enough fabric to protect the stitching.
- Topstitching looks uneven. Use an edge guide, presser-foot reference point, or slower speed instead of watching the needle alone.
For thread-balance problems, see MariaSew’s sewing machine tension guide.
Where to Find Baby Sewing Patterns and Project Ideas
I look for patterns that show the finished project clearly, list the exact fabric type and yardage, identify the seam allowance, explain the skill level, and include safety or age guidance when the item is intended for a baby or toddler. Good diagrams matter more to me than a beautiful cover photo.
Free tutorials are fine for simple rectangles and basic bibs, while a professionally drafted paid pattern can be worth it for fitted hats, changing-pad covers, toys, or garments. I read the full instructions before cutting so I know whether I need stretch fabric, elastic, snaps, interfacing, specialty feet, or a seam finish I have not practiced yet.
I also save inspiration by skill rather than only by appearance. If I want to practice elastic, I look for a cover or pants pattern. If I want to learn stretch fabric, I choose a hat or simple knit garment. That makes each project part of a useful progression instead of a random craft list.
Final Thoughts: Start With One Useful Baby Project
I would start with one project I know will be used, not the most complicated item on the list. A burp cloth, bib, or simple blanket gives me enough repetition to learn cutting, seam allowance, pressing, turning, and topstitching without making the project feel endless.
From there, I can move naturally into curves, elastic, stretch fabrics, toys, and simple garments. The best baby sewing projects are not the ones with the most decoration. They are the ones that are soft, washable, securely finished, appropriate for their intended use, and simple enough that I want to sit down and sew the next one.
Frequently Asked Questions
What is the easiest baby sewing project for a beginner?
A simple burp cloth is one of the easiest places to start because it uses basic shapes, mostly straight seams, a turning opening, and topstitching. A single-layer receiving blanket is another beginner-friendly option.
What can I sew for a baby as a beginner?
Good beginner choices include burp cloths, receiving or stroller blankets, bibs, simple knit hats, changing-pad covers, soft toys, fabric books, and uncomplicated baby clothes.
What fabric is best for baby sewing projects?
Soft, washable fabrics such as quilting cotton, cotton flannel, terry cloth, double gauze, and cotton jersey can work well depending on the project. Prewash first and match the fabric weight and stretch to the pattern.
Do I need a sewing machine for baby projects?
No. Small projects and finishing details can be sewn by hand, but a sewing machine makes long seams, repeated pieces, garments, and topstitching much faster and more consistent.
Should I prewash fabric before sewing baby items?
Yes for most washable baby projects. Prewashing reveals shrinkage and texture changes before you cut, which helps the finished item keep its shape after laundering.
Can a handmade baby blanket be used in a crib?
For infants, current AAP safe-sleep guidance recommends keeping loose blankets and other soft objects out of the crib or bassinet. Use handmade blankets for supervised awake time, stroller use, feeding, or other age-appropriate uses instead.
Are buttons safe on handmade baby toys?
For babies and children under 3, detachable small parts can create a choking hazard. I avoid buttons, beads, plastic eyes, and similar small attachments on infant toys and use securely stitched or embroidered details instead.
Can I sew a baby bonnet with ties?
I prefer tie-free baby hats for beginners. Cords and ties around an infant’s neck can create a strangulation hazard, so any tied design should follow an age-appropriate pattern and be used only as intended under close supervision.
What needle should I use for baby clothes?
Use a needle that matches the fabric. A universal needle often works for woven cotton, while jersey or stretch fabrics usually sew better with a ballpoint or stretch needle recommended for that material and machine.
Why does my knit fabric stretch while I sew?
The fabric may be getting pulled, the presser-foot pressure may be too high, or the stitch and needle may not suit the knit. Test on scraps, support the fabric, and use a compatible stretch stitch and needle.
What should I sew after burp cloths?
A bib or simple blanket is a natural next step. After that, try a changing pad cover or knit hat before moving into toys and fitted baby garments.
How do I make handmade baby items safer?
Use appropriate washable fabric, strong seams, no loose small parts, no long cords, and inspect the item after washing. Follow the pattern’s age and use guidance, and keep loose blankets and stuffed toys out of infant sleep spaces.