
Why Does My Sewing Machine Keep Jamming? 10 Causes & Easy Fixes
If your sewing machine keeps jamming, the cause is usually somewhere in the thread path, bobbin area, needle, feeding system, or the way the machine is set up for the fabric. The most common pattern is loose thread collecting under the fabric because the upper thread is not seated correctly in the tension system, but an incorrectly installed bobbin, damaged needle, lint, wrong thread-and-needle combination, or a nicked bobbin case can create similar symptoms.
I troubleshoot jams in a fixed order so I do not hide the real cause by changing several settings at once: power off, clear the tangle, rethread, check the bobbin, install a fresh correct needle, clean accessible lint, then test slowly on matching scrap fabric. This guide explains the 10 causes I see most often, what each symptom means, which fixes are safe to try at home, and when repeated jamming is a sign that the machine needs professional service.
Quick Answer: Why Does My Sewing Machine Keep Jamming?
Start by turning the machine off and unplugging it before putting your fingers near the needle, hook, bobbin case, or needle plate. Remove tangled thread without forcing the fabric or handwheel, then rethread the upper path with the presser foot raised, reinstall the correct bobbin, replace a bent or dull needle, and brush lint from the bobbin and feed-dog area.
Do not adjust the bobbin-tension screw or add oil unless your machine manual specifically tells you to. If the handwheel stays stiff, the needle or hook repeatedly strikes another part, or the jam returns immediately after a correct setup, stop sewing and arrange service.
Key Takeaways
A sewing-machine jam is a symptom, not a diagnosis. The same thread nest can be caused by several different setup problems, so the order of your checks matters.
- Rethread the upper path and bobbin carefully before changing settings.
- Match the needle type and size to the fabric and thread.
- Remove lint and loose thread from the bobbin area and feed dogs.
- Check tension, presser foot pressure, and the condition of the needle.
- Unplug the machine before clearing a jam, then test slowly on scrap fabric.
What Does a Sewing Machine Jam Actually Mean?
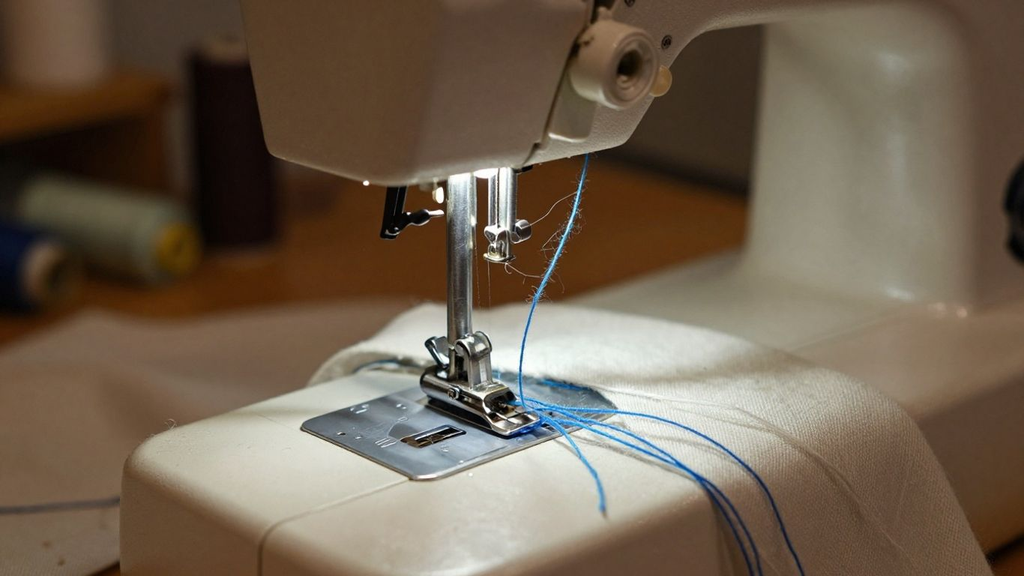
I consider a machine jammed when the needle stops moving normally, the handwheel becomes unusually difficult to turn, the fabric will not advance, the motor stalls, or thread packs tightly around the hook or beneath the needle plate. Thread bunching, repeated thread breakage, skipped stitches, or a needle strike can happen at the same time, but those symptoms do not always share the same cause.
The most important distinction is between a soft thread nest and mechanical resistance. A soft nest often clears after rethreading and bobbin correction. Mechanical resistance that remains after visible thread is removed can point to a bent needle, displaced bobbin case, damaged needle plate, hook interference, or an internal timing or drive problem.
How a Sewing Machine Forms a Stitch and Why Jams Happen
During a normal stitch, the needle carries the upper thread through the fabric and forms a loop below the needle plate. The rotating or oscillating hook catches that loop and carries it around the bobbin thread. As the stitch tightens, the feed dogs advance the fabric and the presser foot holds the layers against the feed system.
A jam develops when that sequence is interrupted. Too much loose upper thread can wrap around the hook, a poorly seated bobbin can interfere with thread release, a bent needle can miss the hook or strike the plate, and lint or damaged surfaces can snag the thread. Understanding this sequence is why I check threading, bobbin, needle, and hook area before I start turning tension screws.
If the upper path is still confusing, use my step-by-step guide to threading a sewing machine before changing any tension settings.
How I Test Sewing Machine Jams & Fixes at MariaSew
I personally test the sewing machines I recommend, and I use the same troubleshooting order when a machine starts bunching thread, skipping stitches, or locking up during a test. With more than 12 years of hands-on sewing experience, I do not treat a jam as a reason to start changing every dial.
I reproduce the problem on scrap fabric, note exactly when it happens, then isolate the thread path, bobbin, needle, feed, and fabric variables one by one.
For this kind of troubleshooting, I deliberately test lightweight woven cotton, ordinary quilting cotton, stretch fabric, denim seam crossings, and layered fabric because a setup can look perfect on one fabric and fail on another. I also repeat the same seam after rethreading, installing a fresh needle, reseating the bobbin, and cleaning the hook area so I can tell which correction actually changed the result.
- Thread-path test. I completely unthread and rethread with the presser foot raised, confirm the take-up lever and guides are engaged, and watch for spool snags.
- Bobbin test. I verify the correct bobbin type, winding quality, insertion direction, case seating, and thread path for the exact machine.
- Needle test. I replace the needle rather than trying to judge a tiny bend by eye, then confirm the type and size match the fabric and thread.
- Feed test. I check that feed dogs are raised when they should be, the presser foot is fully lowered, the stitch length is appropriate, and I am not pulling the fabric.
- Tension test. I start from the manufacturer-recommended normal range and change only the upper tension in small steps after threading and bobbin setup are confirmed.
- Service threshold. If the handwheel remains tight or the needle, hook, or bobbin case repeatedly makes contact, I stop testing rather than force the machine.
That approach matches MariaSew’s published standard: machines are tested through real use before a verdict is published.
Safe First Steps Before You Troubleshoot a Jam
Before touching the needle area, I make the machine safe and preserve the evidence of what went wrong. Pulling fabric out immediately can bend the needle, score the plate, pull the bobbin case out of position, or tear the project.
- Turn the machine off and unplug it. Do this before clearing thread near the needle, hook, bobbin case, or feed dogs.
- Stop pressing the foot controller. If the motor is stalled, more power can tighten the thread nest or increase mechanical strain.
- Raise the needle if it moves freely. Use the handwheel only in the direction specified by the manual, which is commonly toward you on domestic machines.
- Cut tangled thread instead of pulling fabric. Small scissors or a seam ripper can release the fabric without forcing the hook or needle.
- Remove the bobbin and loose thread. Clear only the parts the manual allows you to access.
- Replace a damaged needle before testing. A needle that was involved in a hard jam may be bent even if the bend is difficult to see.
- Test on scrap fabric first. Do not return directly to the project until the machine turns freely and makes a clean test seam.
If the machine remains locked after the visible thread is removed, stop there. Forcing the handwheel is not a troubleshooting shortcut; it can turn a serviceable jam into a damaged hook, shaft, gear, or timing problem.
Sewing Machine Jam Troubleshooting Reference
This table is the most useful equivalent of a feature/specification chart for a troubleshooting guide. It connects the symptom you can see with the area I would inspect first, but it does not replace the manual for your exact machine.
Use it after the safe first steps above. Start with the least invasive check, make one correction, then sew a short line on matching scrap fabric before moving to the next possibility.
| What You Notice | Most Likely Area to Check | First Safe Fix |
|---|---|---|
| Thread nests underneath fabric | Upper thread path, tension discs, take-up lever | Rethread completely with presser foot raised |
| Thread tangles around bobbin | Bobbin insertion, bobbin type, case seating, lint | Remove bobbin, clean loose thread, reinstall per manual |
| Needle will not move / motor stalls | Hook area, tangled thread, bent needle | Unplug, cut thread nest, remove damaged needle |
| Fabric will not feed | Feed dogs, presser foot, stitch length, fabric handling | Check feed setting and lower presser foot fully |
| Needle breaks repeatedly | Needle type/size, foot, plate, bulky seam | Install correct new needle and slow at thick transitions |
| Upper thread snaps | Thread path, needle eye, tension, spool snag | Rethread, inspect needle and spool, reduce only excessive upper tension |
| Bobbin thread shows on top | Upper tension too high or bobbin setup problem | Verify threading and bobbin before touching bobbin-tension screw |
| Skipped stitches plus jamming | Needle type/condition, threading, fabric feed | Install correct fresh needle and rethread |
| Same snag at same point every stitch | Burr on bobbin case, plate, hook, or presser foot | Inspect for damage; replace or service rather than sand blindly |
| Handwheel stays stiff after cleaning | Internal timing, hook, shaft, drive mechanism | Stop DIY testing and arrange professional service |
The table is intentionally conservative. A jam that persists after the first safe fix should move to the detailed causes below rather than to increasingly aggressive adjustments.
10 Common Reasons Your Sewing Machine Keeps Jamming
I work through these causes in roughly this order because the early checks are common, easy to reverse, and unlikely to damage the machine. The later causes are less common but more likely to need a replacement part or technician.
1. Upper Threading Is Incorrect
Incorrect upper threading is the first thing I check when thread bunches underneath the fabric. A thread can look as though it is following the right path while still missing the take-up lever, a guide, or the tension discs. On many domestic machines, threading with the presser foot lowered prevents the upper thread from seating correctly in the tension system.
I raise the presser foot, bring the needle to the threading position specified by the manual, remove the upper thread completely, and rethread from the spool to the needle. I check the spool cap and spool direction, every thread guide, the take-up lever, and the needle-bar guide. Then I test with the thread tails held behind the foot for the first few stitches.
2. The Bobbin Is Installed, Wound, or Sized Incorrectly
A bobbin that is inserted in the wrong direction, not routed under the bobbin tension spring, unevenly wound, overfilled, or simply the wrong bobbin type can disrupt thread release and create a jam in the hook area. Bobbins that look almost identical can still differ enough in height or shape to cause trouble.
I remove the bobbin and confirm the exact bobbin type in the manual, then reinstall it in the specified direction and follow the printed thread path or case slots. If the bobbin is loosely or unevenly wound, I rewind it rather than trying to compensate with tension. I also make sure the bobbin case or holder is fully seated before replacing the cover.
For a better understanding of the components involved, see this guide to sewing machine parts.
3. The Needle Is Bent, Dull, Damaged, or Installed Incorrectly
A needle that is even slightly bent can miss the hook at the critical moment, strike the needle plate or presser foot, or create irregular loops that tangle underneath. A dull point can also push fabric into the needle-plate opening instead of piercing cleanly, especially on fine or unstable fabric.
What I Actually Keep on Hand
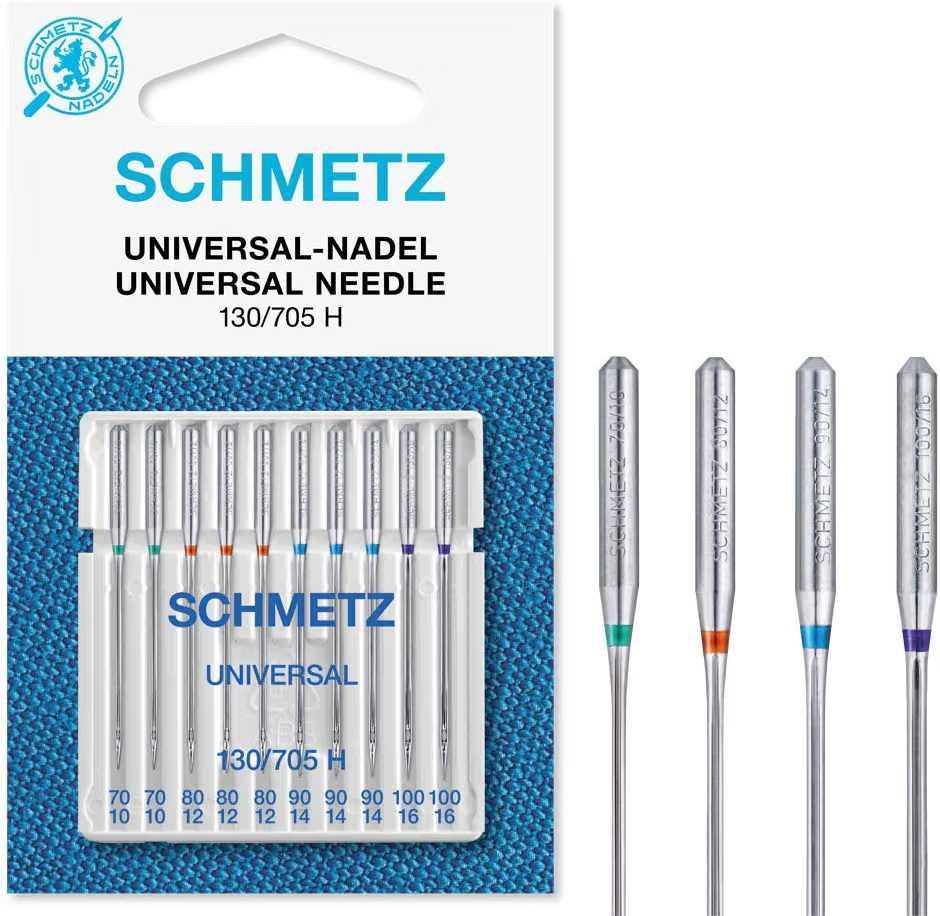
I always have a multi-size SCHMETZ Universal needle pack within reach, real needle quality matters more than people expect, and a cheap, inconsistent needle can cause exactly the kind of jam this guide is troubleshooting. This assortment covers sizes 70/10 through 100/16, handling nearly everything from lightweight cotton to denim.
SCHMETZ Universal Sewing Machine Needles, Three 10-Pack Assortment (30 needles, sizes 70/10, 80/12, 90/14, 100/16)
View on Amazon →
I replace the needle with a new one instead of trying to straighten it. The flat side, insertion depth, and clamp direction vary by machine, so I follow the manual and tighten the needle clamp securely. If the old jam included a hard needle strike, I inspect the plate and foot for a burr before sewing again.
4. The Needle, Thread, and Fabric Do Not Match
A needle that is too small for heavy thread can make the thread drag or shred in the eye, while a needle that is too fine for thick layers can flex and strike the plate. Knit, stretch, denim, leather, microfiber, and woven fabrics also need different needle-point designs for reliable loop formation.
I choose the needle type and size for the fabric first, then make sure the thread weight is appropriate for that needle. I test the combination on a scrap made from the same number of layers as the project. If the problem appears only at a bulky seam, I slow down and level the presser foot rather than pushing the fabric.
For projects involving stretch materials, this guide to how to sew stretch fabric can help with choosing an appropriate sewing approach.
5. Lint or Tangled Thread Is Packed Around the Hook and Feed Dogs
Fabric fibers, broken thread, and tiny thread tails accumulate in the bobbin area and between the feed dogs. Enough buildup can interfere with the bobbin thread, reduce feed movement, or hide a strand of thread wrapped around the hook shaft or race.
I unplug the machine and clean only the accessible areas described in the manual. A small brush or controlled lint tool is usually safer than blasting debris deeper into the mechanism. I remove wrapped thread carefully, inspect the hook and bobbin area under good light, and reassemble before testing.
6. Upper Thread Tension Is Too Loose or Too Tight
Tension problems can look like threading problems, which is why I never adjust tension first. Upper tension that is too loose can leave large loops underneath the fabric; excessive upper tension can pull bobbin thread to the surface, break the upper thread, or make the seam feel tight and unstable.
After confirming correct threading, bobbin setup, needle, and thread, I return the upper tension to the normal range recommended by the machine maker and test a straight seam. I change the upper tension in small increments only. I do not turn the bobbin-case tension screw unless the manual or a qualified technician specifically directs me to.
For a more detailed troubleshooting process, see my guide to sewing machine tension.
7. The Feed Dogs, Presser Foot, or Stitch Length Are Not Set for Normal Feeding
A machine can appear jammed when the fabric is not advancing. Feed dogs may be lowered for free-motion work, the presser foot may not be fully down, lint can fill the feed-dog teeth, or an extremely short stitch can make the fabric seem almost stationary.
I verify that the feed dogs are in the correct position for ordinary sewing, the presser foot is fully lowered, the stitch length is appropriate, and the selected foot matches the stitch. I support the weight of a large project so it does not drag behind the machine, and I guide rather than pull the fabric.
8. The Machine Is Being Forced Through a Bulky Seam or the Fabric Is Being Pulled
Pulling fabric can deflect the needle sideways and increase the chance of a needle strike. Thick seam intersections can also tip the presser foot, reduce feeding, and make the machine hammer the needle into a dense stack at the wrong angle.
I reduce speed, keep the presser foot level with a hump-jumper or folded scrap when appropriate, use the handwheel for a difficult transition if the manual allows, and let the feed dogs move the fabric. If the seam is beyond the machine’s intended capacity, I do not keep forcing it just because the motor still runs.
9. The Bobbin Case, Needle Plate, Presser Foot, or Hook Has a Burr or Damage
A needle strike can leave a tiny sharp burr on the needle plate, presser foot, bobbin case, or hook. Thread can catch on that damaged point every stitch, creating repeated breaks or jams that return even after perfect rethreading.
I inspect the parts under bright light and run a fingertip very carefully along accessible edges without touching a sharp needle. I do not sand or reshape a precision part unless the manufacturer specifically provides a procedure. Replacing a damaged bobbin case, foot, or plate is usually safer than improvising a repair.
10. The Machine Is Out of Time or Has an Internal Mechanical Problem
If the needle and hook are no longer synchronized, the hook may miss the needle loop or collide with the needle. Internal shaft, gear, bearing, motor, or sensor problems can also create stiffness that looks like a thread jam but does not disappear when the thread is removed.
I stop home troubleshooting when the handwheel stays stiff, the needle repeatedly hits the hook or plate, the bobbin case will not remain seated, or the machine immediately locks after a correct clean setup. Timing and internal drive repairs require the correct tools, measurements, and service information, so this is the point where I use a qualified technician.
If tension is the only remaining issue after threading, bobbin, and needle checks, see my sewing machine tension guide for a controlled adjustment process.
Step-by-Step: How to Fix a Jammed Sewing Machine
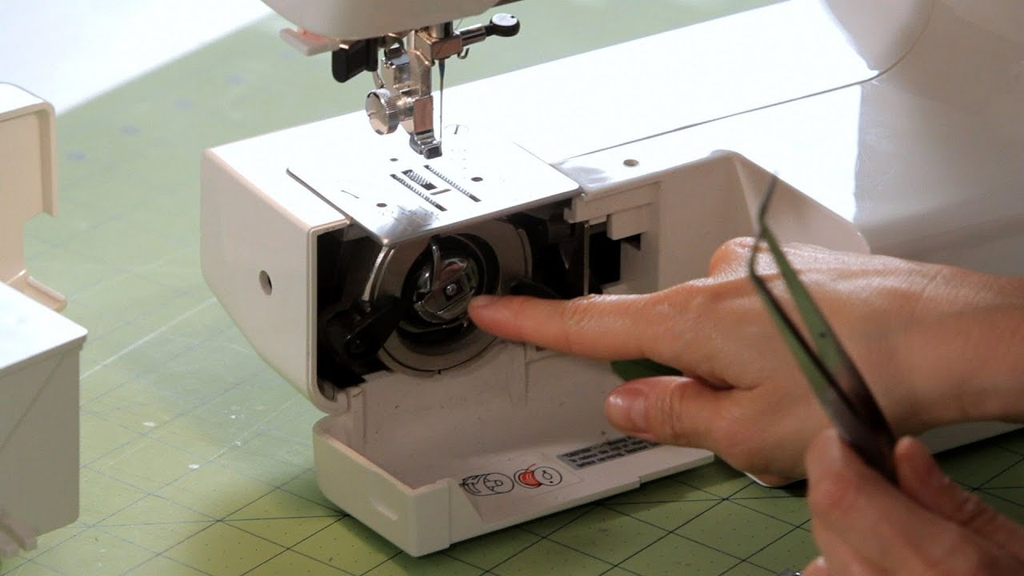
When the machine is already locked, I use a clearing sequence that protects the hook, needle, fabric, and bobbin case. I do not start by pulling the fabric or increasing motor power.
Step 1: Switch off and unplug the machine
Stop the motor and remove power before working near the needle, hook, bobbin case, or needle plate.
Step 2: Raise the needle only if the handwheel moves freely
If the handwheel is locked, do not force it. Cut accessible thread first and reduce the pressure on the mechanism.
Step 3: Cut the thread nest from the outside inward
Use small scissors to release tangled thread gradually instead of tugging the project fabric.
Step 4: Remove the fabric, bobbin, and damaged needle
Once tension is released, lift the fabric away and remove loose thread fragments from the bobbin and hook area.
Step 5: Brush accessible lint and inspect for wrapped thread
Clean the bobbin race, feed dogs, needle plate area, and any accessible hook surfaces according to the manual.
Step 6: Inspect the bobbin case and needle plate
Look for incorrect seating, cracks, scratches, burrs, or evidence that the needle struck a metal or plastic surface.
Step 7: Install a new correct needle and the correct bobbin
Do not reuse a needle that was involved in a hard jam. Verify bobbin type and insertion direction.
Step 8: Rethread the machine completely
Raise the presser foot for upper threading, follow every guide, and confirm the take-up lever is threaded.
Step 9: Turn the handwheel through a full stitch cycle
With power still off, rotate only in the direction specified by the manual and make sure the needle clears the plate and the mechanism moves smoothly.
Step 10: Test slowly on scrap fabric
Hold thread tails behind the foot for the first stitches and stop immediately if resistance, abnormal noise, or another nest appears.
If the machine completes several clean test seams, gradually return to the original fabric and speed. If the jam appears only on the project, the remaining issue is more likely to involve fabric thickness, needle choice, stabilizer, presser foot, or the way the layers are being fed.
Why Is My Sewing Machine Jamming Underneath the Fabric?
Thread bunching underneath the fabric is often called a bobbin problem because the mess appears near the bobbin. In practice, I treat the upper thread path as the first suspect. If the upper thread misses the take-up lever or never seats between the tension discs, the machine can feed too much upper thread into the hook area and form a nest underneath.
I rethread with the presser foot raised, confirm the spool and take-up lever, then check bobbin direction and seating. If the bobbin thread is specifically showing on top rather than nesting underneath, that’s a different, more specific problem, covered in why is my bobbin thread showing on top.
Only after those steps do I evaluate tension. This order prevents me from tightening the upper tension to compensate for a thread that was never seated correctly in the first place.
Why Does My Sewing Machine Jam at the Start of a Seam?
A jam that happens only in the first few stitches often comes from loose thread tails, starting too close to the fabric edge, incorrect upper threading, or an unsuitable stitch length or presser foot. On some fabrics, the needle can push the edge into the needle-plate opening and create a small nest before the feed dogs have enough fabric to move.
I hold both thread tails behind the presser foot for the first few stitches, begin slightly in from a delicate edge when appropriate, and use a leader scrap or stabilizer if the fabric wants to be pulled downward. I also make sure the selected foot provides enough clearance for a dense decorative stitch.
Why Does My Sewing Machine Jam on Thick Fabric or Denim?
If the machine sews normally on two layers of cotton but jams at a denim hem, bulky bag seam, or thick quilt intersection, the machine may not be broken. The needle can deflect as the presser foot climbs the hump, the feed dogs can lose grip, and a needle that is too fine may flex instead of penetrating cleanly.
I use the correct jeans/denim or heavy-fabric needle, choose a suitable thread and stitch length, reduce speed, level the presser foot at the seam crossing, and support the project so its weight does not pull behind the needle. If the machine repeatedly stalls on a thickness beyond its domestic rating, I stop forcing it.
Cleaning and Lubrication: What Actually Helps a Jam?
Cleaning is a normal first-line maintenance step; oiling is not. A machine can jam because lint or thread is packed around the hook or feed system, but adding oil on top of lint can create residue and does not fix incorrect threading, a bent needle, a wrong bobbin, or a damaged part.
I clean accessible lint first and check the manual before adding any lubricant. Some machines have user-oiling points, while others are designed so internal lubrication is handled during professional service. If the manual does not identify a safe oiling point, I leave the oil bottle closed.
For model-specific maintenance principles, use my sewing machine cleaning and oiling guide.
When to Stop DIY Troubleshooting and Call a Technician
A basic thread jam should improve when the tangle is cleared and the machine is correctly threaded, cleaned, and fitted with a new needle. When the machine still has mechanical resistance after those checks, the risk of causing more damage rises quickly.
- The handwheel stays stiff with thread removed. This can indicate hook interference, a seized mechanism, or an internal drive problem.
- The needle repeatedly hits the plate, hook, or presser foot. Repeated metal contact can damage the hook and put the machine out of time.
- The bobbin case keeps jumping out of position. The case, holder, retaining ring, hook, or surrounding parts may be damaged or incorrectly aligned.
- The motor hums or locks without a visible thread nest. Stop using the foot controller and have the drive system inspected.
- Jams return immediately after a complete correct setup. Recurring failure with a new needle, correct bobbin, clean hook area, and proper threading needs deeper diagnosis.
- There is grinding, scraping, or an unfamiliar metal sound. Noise plus resistance is a stronger service signal than a simple tension problem.
I would rather pay for a correct diagnosis than keep replacing needles and thread while a damaged hook, case, gear, or timing relationship gets worse. Service is part of normal machine ownership when the problem has moved beyond setup and cleaning.
How to Prevent Sewing Machine Jams
Most recurring jams become less frequent when setup is consistent. I use a small pre-project routine so I do not start every new fabric combination from a mystery setting.
- Start important projects with a fresh needle. Match the needle type and size to the fabric and thread rather than using one universal needle for everything, our sewing machine needle chart covers the differences between universal, ballpoint, and denim needle types.
- Thread with the presser foot raised. This helps the upper thread seat in the tension system on machines designed that way.
- Use the correct bobbin for the exact model. Near-identical bobbins are not automatically interchangeable.
- Test every new fabric/thread combination. A 20-second scrap test can reveal tension, feeding, and needle issues before the final fabric is under the foot.
- Clean lint on a routine that matches your sewing. Fleece, flannel, batting, and fuzzy fabrics need more frequent cleaning than smooth lightweight cotton.
- Slow down at bulky transitions. Let the needle and feed system work instead of using speed to force the seam.
- Do not sew over pins. A needle strike can bend the needle and damage the plate, foot, or hook.
- Keep the manual with the machine. Bobbin direction, oiling, needle insertion, presser-foot pressure, and maintenance access vary by model.
Prevention is mostly consistency. A clean machine with the right needle, correct bobbin, stable thread path, and sensible fabric handling is much less likely to create the sudden tangles that feel random.
Common Sewing Machine Jam Mistakes to Avoid
The fastest way to turn a small jam into a repair bill is to keep adding force or changing settings without knowing which system is wrong. These are the mistakes I avoid during troubleshooting.
- Pulling the fabric out of a locked machine. This can bend the needle, damage the fabric, displace the bobbin case, or score the needle plate.
- Turning tension immediately. Rethreading, bobbin seating, and needle condition should be checked before tension becomes the main suspect.
- Adjusting the bobbin-tension screw casually. Bobbin tension is usually not the first fix for a general jam and can create a second problem if changed blindly.
- Reusing the same needle after a hard jam. A slight bend can be almost invisible but still cause another strike or skipped stitch.
- Using any bobbin that appears to fit. The wrong height, diameter, or shape can interfere with the bobbin case and hook.
- Adding oil because the machine feels stiff. Thread, lint, a bent needle, damaged case, or internal failure can create resistance; oil is only appropriate where the manual permits it.
- Using compressed air or sharp tools aggressively. Debris can be pushed deeper and polished hook or case surfaces can be scratched.
- Forcing thick layers at full speed. More motor speed does not make an unsuitable needle or poorly supported seam safer.
- Continuing after repeated needle strikes. Repeated contact can damage precision parts and alter timing.
- Changing five things at once. One-change-at-a-time testing is slower for a minute and much faster for actually finding the cause.
A good repair sequence should become simpler as you go. If the troubleshooting gets more aggressive, more uncertain, or more mechanical, that is usually the signal to stop and use the service manual or a qualified technician.
Final Verdict: Why Your Sewing Machine Keeps Jamming
Most sewing-machine jams come back to a small group of causes: incorrect upper threading, a bobbin that is not installed or wound correctly, a damaged or mismatched needle, thread and fabric mismatch, lint or tangled thread around the hook, incorrect tension, feeding problems, or damage caused by a needle strike. The safest fix is a methodical reset, not more force.
I start with power off, clear the tangle, rethread with the presser foot raised, reinstall the correct bobbin, fit a fresh needle, clean accessible lint, and test slowly. If the machine still has mechanical resistance or immediately jams again, I stop there and arrange service. That approach protects both the project and the precision parts inside the machine.
Safety Note: Sewing-machine designs differ. Always use the manual for your exact model for bobbin direction, needle installation, cleaning access, handwheel direction, lubrication, and service limits. Disconnect power before clearing jams or removing covers near moving parts.
Frequently Asked Questions
Why does my sewing machine keep jamming underneath the fabric?
Loose thread underneath often starts with the upper threading path rather than the bobbin. Rethread with the presser foot raised, confirm the take-up lever and guides, then check bobbin direction and seating before changing tension.
Why is my thread bunching around the bobbin?
Common causes include incorrect upper threading, a bobbin installed incorrectly, the wrong bobbin type, lint or loose thread in the hook area, or a damaged bobbin case. Clear the tangle with the machine unplugged and rebuild the setup from the manual.
Can a bent or dull needle cause a jam?
Yes. A bent, dull, damaged, or incorrectly installed needle can miss the hook, strike the plate or foot, break thread, and contribute to a jam. Replace it with the correct new needle rather than trying to straighten it.
Should I change the tension when my machine jams?
Not first. Correct threading, bobbin setup, needle condition, thread choice, and hook-area cleanliness should be confirmed before tension is adjusted. If tension still needs correction, change the upper tension gradually and test on matching scrap fabric.
Should I adjust the bobbin-tension screw?
Usually not for a general jam. Bobbin tension is often factory-set or model-specific. I only change it when the manual provides a procedure or a qualified technician has identified bobbin tension as the problem.
Why does my sewing machine jam at the beginning of a seam?
Loose thread tails, starting too close to the fabric edge, incorrect upper threading, an unsuitable stitch length, or the wrong presser foot can create a nest at startup. Hold the thread tails behind the foot and verify the setup before sewing again.
Why does my sewing machine jam on thick fabric?
A needle that is too fine, a tilted presser foot at a bulky seam, excessive speed, project drag, or a fabric stack beyond the machine’s capacity can cause stalls and needle deflection. Use the correct needle, slow down, level the foot, and support the project.
Can lint cause a sewing machine to jam?
Yes. Lint and broken thread can accumulate around the bobbin race and feed dogs and interfere with thread movement or feeding. Clean the accessible areas according to the manual before assuming the machine needs oil.
Should I oil a sewing machine that keeps jamming?
Only if the manual for that exact model tells you to oil a specific point. Oiling is not a universal jam fix, and some newer machines restrict user lubrication. Clean first and follow the manufacturer’s maintenance instructions.
Why is the handwheel hard to turn after I clear the thread?
Persistent resistance can indicate remaining wrapped thread, a bent needle, a displaced bobbin case, hook interference, or an internal mechanical problem. Do not force the wheel; inspect the accessible area and arrange service if it remains stiff.
How can I stop my sewing machine from jamming repeatedly?
Use the correct needle and bobbin, thread carefully with the presser foot raised, clean lint regularly, test new fabric/thread combinations on scrap, slow down at bulky seams, and stop sewing over pins. Repeated jams after a correct setup need service.
When should I take a jammed sewing machine for repair?
Arrange service when the handwheel remains stiff after thread is removed, the needle or hook repeatedly strikes another part, the bobbin case will not stay seated, grinding continues, or jams return immediately after correct threading, cleaning, and a new needle.

4 Comments