How to Use a Walking Foot on a Sewing Machine: Beginner’s Guide
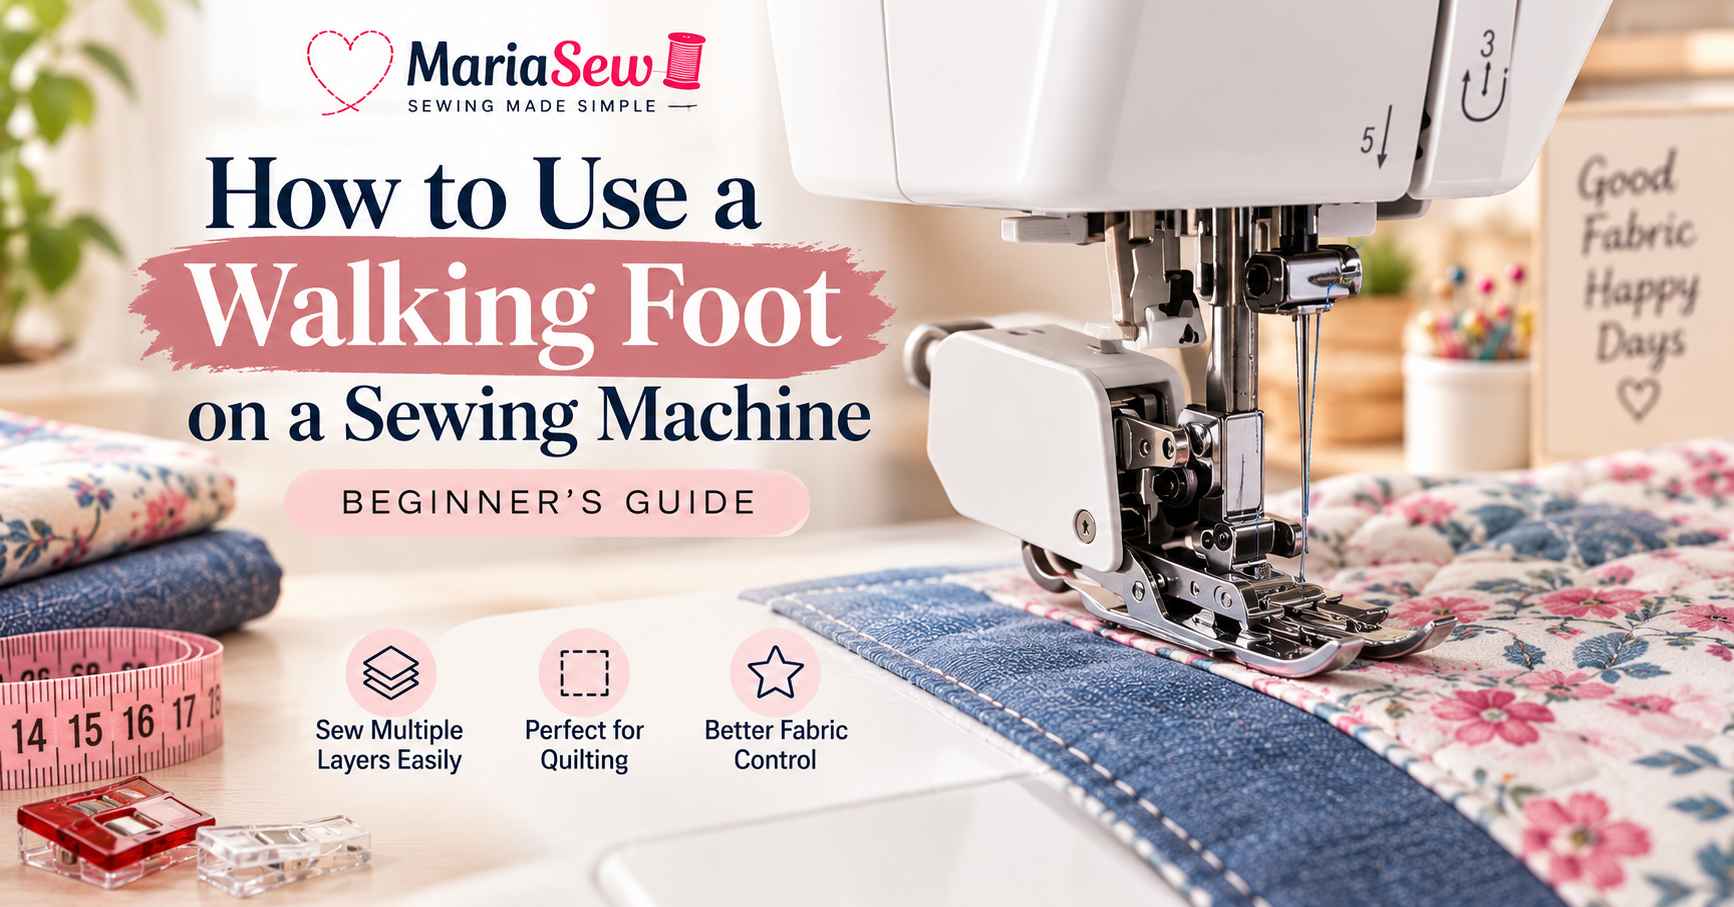
The first quilt I ever tried straight-line quilting on came out with rippled, shifted layers, not because I did anything wrong with my stitching, but because I didn’t know a walking foot existed yet. A walking foot is one of the easiest sewing machine upgrades for beginners who struggle with shifting fabric, uneven seams, puckering, or bulky quilt layers. Instead of letting only the lower feed dogs move the fabric, a walking foot helps guide the top layer as well, creating smoother, more controlled stitching.
This guide walks through how to choose, attach, and use a walking foot step by step, whether you’re quilting, hemming knits, sewing denim, or managing slippery materials, based on real, hands-on use across several machines. You’ll also learn the best settings, common mistakes, troubleshooting fixes, and when a walking foot genuinely isn’t the right tool for the job.
Key Takeaways
- A walking foot helps prevent fabric layers from shifting, stretching, dragging, or puckering during sewing.
- It is especially useful for straight-line quilting, thick fabric, denim, canvas, vinyl, knits and slippery materials.
- Compatibility matters: check low-shank, high-shank, slant-shank or brand-specific requirements before buying one.
- Always attach the fork arm correctly around the needle clamp screw and turn the handwheel manually before stitching.
- A walking foot is excellent for controlled feeding, but it is not designed for free-motion quilting or highly detailed curves.
What Is a Walking Foot and Why Use One?
A walking foot, also called an even-feed foot, is a sewing machine attachment designed to help move multiple fabric layers through the machine at the same pace. Standard presser feet hold fabric down while the lower feed dogs move the material from underneath. A walking foot adds a top-feeding motion, which reduces layer shifting and gives the stitch line a cleaner, flatter finish.
This makes the tool valuable for projects where fabric drag is a common problem. Quilt sandwiches, stretch knits, fleece, denim, canvas, vinyl, and slippery fabric can all behave unpredictably under a regular foot. The walking foot does not make the machine stronger, but it helps the machine feed difficult materials more evenly, which often improves seam accuracy and finished appearance.
How a Walking Foot Works
Most walking feet have a lever or fork that connects to the needle clamp screw, one of the sewing machine parts worth knowing by name if you’re troubleshooting attachments regularly. As the needle bar moves up and down, that lever activates the walking foot mechanism.
The foot then lifts and advances in a small synchronized motion, helping the top fabric layer move along with the bottom layer.
This is different from an industrial walking-foot sewing machine. A domestic walking foot is an attachment added to a home sewing machine, while an industrial walking-foot machine is built with a stronger feed system from the start. For home sewing, the attachment is usually enough for quilting, garments, bags, and household projects when used within the machine’s limits.
When Should You Use a Walking Foot?
Use a walking foot whenever the fabric layers are likely to move at different speeds. This includes bulky quilts, napped fabric, slippery materials, stretch fabric, thick hems, bag-making layers, and long, straight seams where even feeding matters. It is especially helpful for beginners because it reduces the need to manually control every layer with your hands.
Before reaching for a walking foot, first think about what problem you are trying to solve. If the fabric is stretching, puckering, or creeping out of alignment, the walking foot is likely a good choice. If the project requires tight curves, embroidery-style movement or free-motion quilting, another presser foot may be more suitable.
Best Uses in Simple Points
- Use it for straight-line quilting when the quilt top, batting and backing need to stay aligned.
- Use it for denim, canvas and layered bags where bulky seams can shift under a regular presser foot.
- Use it for knits when a standard foot stretches the top layer and creates wavy seams.
- Use it for slippery fabrics when the top layer slides ahead of the bottom layer.
- Use it for matching stripes, plaids, and seam intersections where precision matters.
The table below summarizes the best situations for a walking foot after you understand the simple use cases above. It is meant as a quick decision guide, not a replacement for testing on scrap fabric. Every machine and fabric combination behaves slightly differently, so test first before sewing the final project.
For thick or layered projects, also remember that a walking foot cannot compensate for the wrong needle, dull thread, incorrect tension, or forcing the fabric. The best results come from combining the right presser foot with a suitable needle, stable stitch length, and a slow, controlled sewing speed.
| Project or Fabric | Why a Walking Foot Helps | Best Setting Tip |
|---|---|---|
| Straight-line quilting | Keeps quilt layers moving together | Use a longer straight stitch and sew slowly |
| Denim or canvas | Reduces drag over bulky seams | Use a stronger needle and test tension |
| Stretch fabric | Helps prevent wavy seams | Use a stretch stitch or narrow zigzag when needed |
| Slippery fabric | Controls top-layer shifting | Use clips, basting, or tissue support if needed |
| Plaids and stripes | Keeps pattern lines aligned | Pin or baste before stitching |
How to Choose the Right Walking Foot for Your Sewing Machine
The most important buying step is checking your sewing machine’s shank type. Many domestic machines are low-shank, but not all of them are. Some brands and models require proprietary attachments or an adapter. Buying the wrong walking foot can cause poor feeding, needle strikes, skipped stitches, or an attachment that simply does not fit the presser bar.
You should also consider the type of projects you sew most often. A standard closed-toe walking foot is fine for general seams and quilting. An open-toe walking foot gives better visibility around the needle, which is useful for stitch-in-the-ditch work, applique edges, or aligning decorative stitching. A walking foot with a guide bar helps keep parallel quilting lines even without marking every row.
Compatibility Checklist Before Buying
After reviewing the points above, use this table as a quick shopping reference. A walking foot that technically attaches to your machine is not always the best choice if it limits visibility or does not support your preferred stitch width. When in doubt, check your manual or buy the foot recommended by the machine manufacturer.
| Walking Foot Type | Best For | Watch Out For |
|---|---|---|
| Standard closed-toe | General quilting, thick seams, bags | Less visibility around the needle |
| Open-toe walking foot | Decorative alignment and stitch visibility | May offer slightly less front support |
| Walking foot with guide bar | Parallel quilting lines and channel quilting | Guide must be installed securely |
| Brand-specific walking foot | Best fit for certain models | Usually costs more than generic feet |
| Wide-mouth walking foot | Limited zigzag or decorative stitches | Still test needle clearance by hand |
Generic walking feet can work well, but brand-specific feet may be smoother on certain machines. The safer option is to match the shank type first, then select features based on your project needs. This avoids the common mistake of buying a walking foot because it looks universal, only to discover that it does not align with your needle clamp or throat plate.
Walking Foot vs Regular Presser Foot
A regular presser foot is ideal for everyday sewing when the fabric is stable, and only one or two layers are moving cleanly. It is lighter, easier to maneuver, and better for curves, zipper work, edgestitching, and general construction. However, it relies mostly on the machine’s bottom feed dogs, so the top fabric layer can creep forward on long seams or thick stacks.
A walking foot is better when fabric control matters more than speed or tight movement. It adds bulk around the needle area, so it is not the best tool for every stitch. But when you are quilting straight lines, sewing slippery layers or matching fabric patterns, the extra feeding control can make the finished seam look far more professional.
Simple Decision Points
- Choose a regular presser foot for basic seams, curves, zippers and lightweight woven fabric.
- Choose a walking foot for layered, bulky, slippery or stretchy fabric that shifts under the needle.
- Choose a regular presser foot when you need tight turns or detailed shaping.
- Choose a walking foot when you need the top layer and bottom layer to stay aligned over a long seam.
- Do not use a walking foot for free-motion quilting because it restricts multidirectional movement.
The comparison below is useful after you already understand the practical decision points. Most sewists keep both options available and switch feet depending on the task. That habit gives you more control and prevents frustration caused by forcing one presser foot to do every job.
| Feature | Regular Presser Foot | Walking Foot |
|---|---|---|
| Feeding control | Mostly bottom feed only | Top and bottom fabric control |
| Best for | Basic seams and general sewing | Quilts, bulky seams, slippery layers |
| Curves and tight turns | Better control | Less flexible |
| Speed | Usually faster | Best at slower speeds |
| Free-motion quilting | Requires darning/free-motion foot | Not recommended |
A walking foot should be seen as a precision-feeding tool, not a universal upgrade that replaces all other feet. It makes difficult fabric easier, but it does not eliminate the need for proper needle size, thread quality, stitch choice, and test seams.
How to Attach a Walking Foot Step by Step
Attaching a walking foot is simple once you know which parts to remove. Many beginners only remove the snap-on presser foot and forget that the presser foot holder or ankle may also need to come off. A walking foot usually attaches directly to the presser bar with the presser foot screw.
Before you start, turn the machine off, raise the needle to its highest position, and lift the presser foot lever. These small safety habits prevent accidental needle movement while your fingers are near the needle plate. They also make it easier to align the walking foot fork with the needle clamp screw.
The most important detail is the fork position. If the fork is not around the needle clamp screw, the walking mechanism will not move with the needle bar. The foot may still appear attached, but it will not feed the top layer properly, which defeats the purpose of using it.
After installation, always do a handwheel test before pressing the pedal. This catches alignment problems before they break a needle or damage the foot. If you plan to use a zigzag stitch, turn the handwheel through the full needle swing to confirm the needle does not touch the foot.
| Step | What to Check | Why It Matters |
|---|---|---|
| Remove holder | The ankle is off if required | Walking feet usually screw directly to the bar |
| Set fork correctly | Fork sits around needle clamp screw | This drives the walking action |
| Tighten screw | Foot does not wobble | Prevents skipped stitches and needle strikes |
| Handwheel test | Needle clears the foot opening | Avoids broken needles |
| Scrap test | Fabric feeds evenly | Confirms settings before final sewing |
Best Sewing Machine Settings for a Walking Foot
The best settings depend on your fabric, thread, and project thickness, but the general rule is to slow down and give the walking foot time to feed. A medium stitch length often works well for quilting and thick fabric because tiny stitches can perforate the fabric or make bulky seams stiff. For knits, use a stitch that can stretch rather than a standard straight stitch.
Do not start by making large tension adjustments. First confirm the machine is threaded correctly, the needle is fresh, the bobbin is inserted properly, and the walking foot is installed securely. If the test seam still shows loops, puckering, or skipped stitches, then make small setting changes one at a time so you can identify the real cause.
Simple Setup Points
- Use a fresh needle that matches the fabric weight and fiber type.
- Use a stitch length around 2.5 mm to 3.5 mm for many straight-line quilting and medium-weight projects.
- Use a slower speed so the walking foot can feed evenly without jerking the fabric.
- Use quality thread and test tension on the same number of fabric layers as the final project.
- Support heavy fabric on the table so the project weight does not pull against the needle.
The settings table below should be treated as a starting point. Sewing machine models vary, and fabric thickness can change across seams, hems, and intersections. Always test with a sample that matches the real project, especially for quilts, bags and garments with multiple layers.
For stretch fabric, remember that a walking foot helps with feeding, but the seam still needs elasticity. Our guide on how to sew stretch fabric covers this in more depth, use a narrow zigzag, lightning stitch or stretch stitch when the seam must stretch during wear. A straight stitch may pop if used on areas such as T-shirt side seams, leggings, or cuffs.
| Fabric or Project | Needle Suggestion | Stitch Suggestion | Extra Tip |
|---|---|---|---|
| Cotton quilting | 80/12 universal or quilting | Straight stitch 2.5-3.0 mm | Baste layers well |
| Denim or canvas | 90/14 or 100/16 denim | Straight stitch 3.0-3.5 mm | Use strong thread and go slow over seams |
| Knit fabric | Ballpoint or stretch needle | Narrow zigzag or stretch stitch | Do not pull the fabric |
| Fleece or plush fabric | 90/14 universal or stretch as needed | Longer straight or slight zigzag | Test for bulk and reduce pressure if possible |
| Slippery fabric | 70/10 sharp or Microtex | Short to medium straight stitch | Use tissue paper or stabilizer if needed |
How to Prepare Fabric Before Using a Walking Foot
A walking foot works best when the fabric is already prepared properly. If quilt layers are wrinkled, knits are stretched, or slippery fabric is cut unevenly, the foot can reduce shifting, but it cannot fully correct poor preparation. Smooth, stable layers give the attachment the best chance to feed evenly.
Preparation also helps avoid false tension problems. Many issues blamed on thread tension actually come from unsupported fabric weight, uneven cutting, insufficient basting, or a dull needle. Taking a few extra minutes before sewing can save time later because you will not need to rip out long seams.
For quilt sandwiches, the layers should be flat and secured from the center outward. If the backing fabric has ripples before stitching, the walking foot may sew those ripples permanently into the quilt. Smooth basting is just as important as the foot itself.
For garments, avoid hanging the fabric off the table while sewing. The weight of a knit dress, fleece jacket, or denim panel can pull the seam and create uneven stitches. Keeping the full project supported allows the walking foot to feed rather than fight the fabric weight.
How to Sew with a Walking Foot
Once the walking foot is installed and your fabric is prepared, start slowly. If your machine tends to nest thread underneath at the start of a seam, it’s worth revisiting how to thread a sewing machine, a missed thread guide is often the real cause.
The goal is not to force the project through the machine but to guide it gently while the foot handles the feeding. Keep your hands relaxed on either side of the stitching path and avoid pushing or pulling from behind the presser foot.
The best technique is controlled consistency. Sew a few inches, stop with the needle down when you need to adjust, and smooth the fabric ahead of the foot. If you are quilting, work from the center outward whenever possible so extra fabric has somewhere to move instead of bunching in the middle.
When sewing thick intersections, such as denim hems or bag straps, slow down even more. You can use a height-compensation tool or folded scrap behind the foot to keep it level as it climbs over a bulky seam. A level foot feeds better and reduces needle deflection.
For straight-line quilting, use the seam guide or guide bar to maintain even spacing. Marking a few reference lines with a removable fabric marker can help the first rows stay straight. Once those anchor lines are in place, the guide bar can follow previous stitching for parallel lines.
Best Sewing Machines for Walking Foot Use
Not every machine handles a walking foot attachment the same way. Some models have wider throat space and stronger motors that make bulky, layered sewing genuinely comfortable, while others handle it but feel more strained. Based on real testing and shank compatibility, these are solid choices if walking foot work, quilting, denim, bags, is a regular part of your sewing.
Before buying a walking foot for any of these, or any machine, confirm the exact shank type in your manual. Even models within the same brand can differ, and a walking foot bought for the wrong shank simply won’t attach correctly, regardless of how well-reviewed the machine itself is.
Common Projects Perfect for a Walking Foot
A walking foot is most valuable on projects where alignment and fabric control matter. Quilters use it for straight-line quilting, stitch-in-the-ditch, and attaching binding; if you’re shopping specifically for a quilting-focused machine, our best quilting sewing machine guide covers what to look for.
Bag makers use it for layered canvas, straps, and interfacing. Garment sewists use it when knits or slippery fabrics need help feeding evenly.
The key is matching the tool to the project. A walking foot will not replace a zipper foot, free-motion foot or buttonhole foot, but it can make difficult seams much easier. Many beginners discover that projects they avoided before become manageable once fabric layers stop creeping under the needle.
Project Ideas
- Quilted table runners, baby quilts and simple lap quilts.
- Tote bags, zipper pouches and canvas organizers.
- Denim hems, jacket seams and thick repair patches.
- Knit hems, sweatshirt seams and soft stretch garments.
- Home decor projects such as cushion covers, placemats and quilted pillow fronts.
Use the table below to choose beginner-friendly walking foot projects. Start with straight seams before attempting large quilts or bulky bags. This helps you learn the feel of the attachment without fighting a complicated project at the same time.
As your confidence grows, you can use the walking foot for more precise work such as matching stripes, quilting diagonal lines, or sewing layered binding. The tool rewards patience, so a slow and deliberate pace usually produces better results than trying to sew at maximum speed.
Troubleshooting Walking Foot Problems
Most walking foot problems come from installation, compatibility, needle choice, or sewing too fast. Before changing tension, confirm that the foot is attached firmly and the fork is moving with the needle bar. If the walking foot does not move when you turn the handwheel, it is not installed correctly.
If the foot is installed correctly but stitches still look uneven, check the basics before touching the tension dial; our guide to sewing machine tension covers exactly this order of operations. Rethread the machine with the presser foot raised, replace the needle, clean lint from the feed dog area, and test on scrap fabric.
These steps fix many issues without unnecessary tension changes.
The troubleshooting table below is placed after the simple steps so you can quickly diagnose the likely cause. Do not change several settings at once. Make one change, test again, and then decide whether another adjustment is needed.
If the needle hits the walking foot, stop immediately. That usually means the wrong foot is installed, the foot is misaligned, or the selected stitch is too wide for the foot opening. Continuing to sew can break the needle or damage the machine.
| Problem | Likely Cause | Best Fix |
|---|---|---|
| Foot does not move | Fork not engaged with needle clamp screw | Reinstall foot correctly |
| Skipped stitches | Wrong or dull needle | Use fresh needle matched to fabric |
| Puckering | Tension too tight or fabric unsupported | Test tension and support project weight |
| Fabric still shifting | Insufficient basting or sewing too fast | Baste better and slow down |
| Needle hits foot | Wrong stitch width or misalignment | Stop, handwheel test, and use correct stitch |
Common Mistakes to Avoid
A walking foot makes sewing easier, but beginners can still run into problems if they treat it like a regular presser foot. The attachment is bulkier and needs a slower rhythm. Rushing, forcing the fabric, or ignoring compatibility can create broken needles, uneven stitches, and damaged fabric.
- Do not pull the fabric from behind the needle while sewing.
- Do not use a walking foot for free-motion quilting.
- Do not assume every walking foot fits every machine.
- Do not use a wide zigzag without checking needle clearance by hand.
- Do not sew over thick pins or clips near the foot.
- Do not skip scrap testing when working with expensive fabric or a quilt top.
The biggest mistake is assuming a walking foot fixes every fabric issue automatically. It improves feeding, but it cannot replace accurate cutting, correct basting, a suitable needle, or the correct stitch. Treat it as one part of a complete sewing setup.
When Not to Use a Walking Foot
Avoid a walking foot when the project requires tight curves, dense decorative stitching, zipper insertion, buttonholes, free-motion quilting, or detailed maneuvering. In those cases, a specialized foot will usually give better control. A walking foot is strongest when the fabric needs to move forward evenly in a controlled line.
| Task | Better Foot Choice | Why |
|---|---|---|
| Free-motion quilting | Darning/free-motion foot | Allows movement in all directions |
| Zippers | Zipper foot | Gets closer to zipper teeth |
| Buttonholes | Buttonhole foot | Controls buttonhole shape and length |
| Tight curves | Standard or applique foot | Better visibility and maneuvering |
| Small patchwork piecing | Quarter-inch foot | More precise seam allowance |
It is also not the best option for very tiny pieces where the bulky body blocks visibility. If you are piecing small patchwork units, test whether a quarter-inch foot gives better accuracy. For long seams, large blocks, and layered construction, the walking foot becomes more useful.
How to Care for a Walking Foot
A walking foot has moving parts, so it should be handled more carefully than a simple presser foot. After use, remove lint and thread bits from around the teeth and moving arm. Store it in a small box or pouch so the guide bar, screw area, and plastic components do not get bent or damaged.
- Brush away lint after each quilting or heavy-fabric project.
- Store the foot with its guide bar and screw together so parts do not get lost.
- Avoid dropping the foot because the fork arm can bend out of alignment.
- Replace damaged or loose walking feet instead of risking needle strikes.
- Check that the teeth move smoothly before starting an important project.
Do not oil the walking foot unless the manufacturer specifically instructs you to do so. Some attachments are not designed for user lubrication, and excess oil can transfer to fabric. If the foot becomes noisy, stiff, or uneven, check the manual or replace it rather than forcing it.
Final Verdict: Is a Walking Foot Worth It?
A walking foot is absolutely worth using if you sew quilts, bags, thick seams, stretch fabric, or slippery materials. It gives a basic home sewing machine better control over fabric layers and helps reduce common beginner problems such as shifting, drag lines, puckering, and mismatched edges.
The best results come from using it intentionally. Choose a compatible foot, install it correctly, test your needle clearance, and sew at a steady pace. Once you understand how it works, a walking foot becomes one of the most useful attachments in a beginner’s sewing toolkit.
Frequently Asked Questions
Do I need a walking foot for every sewing project?
No. A walking foot is best for layered, bulky, slippery, or stretchy materials. For simple seams on stable woven fabric, a regular presser foot is usually faster and easier.
Can I use a walking foot on any sewing machine?
Not automatically. Many home machines can use one, but you must match the shank type, attachment style, and needle opening to your specific model.
Is a walking foot the same as dual feed?
They solve similar feeding problems, but they are not the same. Dual feed is built into some machines, while a walking foot is usually an add-on attachment.
Can I use a walking foot with a zigzag stitch?
Some walking feet allow limited zigzag stitching, but not all do. Always turn the handwheel manually to confirm the needle clears the foot opening before using a zigzag stitch.
Why is my fabric still puckering with a walking foot?
Puckering can still happen if the tension is too tight, the stitch length is wrong, the fabric is unsupported, or the needle is not suitable for the fabric.
Can I free-motion quilt with a walking foot?
No. A walking foot is designed for controlled forward feeding, not free movement in every direction. Use a darning or free-motion quilting foot for that technique.
What stitch length should I use with a walking foot?
For many quilting and medium-weight projects, start around 2.5 mm to 3.0 mm. For thicker materials, test a slightly longer stitch to avoid dense, stiff seams.
Does a walking foot help sew stretch fabric?
Yes, it can reduce stretching and rippling by feeding the top layer more evenly. However, stretch seams still need a zigzag, lightning stitch, or another stretch-friendly stitch.
Should beginners buy a walking foot?
Yes, if they want to sew quilts, bags, denim, knits, or layered projects. It is beginner-friendly once installed correctly and tested slowly.
Why does my walking foot make noise?
A walking foot has more moving parts than a regular foot, so some sound is normal. Loud clicking, grinding, or uneven movement may indicate poor installation or a damaged attachment.