
Hemming Tape: How to Use Fusible Hem Tape for a Clean No-Sew Hem
Hemming tape is one of the easiest no-sew ways to shorten pants, finish curtains, repair loose hems, and create clean fabric edges without a sewing machine. This heat-activated or pressure-sensitive adhesive sits between two layers of fabric and helps create a smooth, stitch-free hem when it is chosen and applied correctly.
The best results come from matching the right hemming tape to your fabric weight, testing it on a hidden area, pressing the fold carefully, and following the product’s heat and care instructions. In this guide, you will learn what hemming tape is, how fusible hem tape works, which type to use for different fabrics, how to apply it step by step, and how to avoid common problems like lifting, stiffness, scorching, and adhesive residue.
Key Takeaways
- Hemming tape can create a neat no-sew hem for garments, curtains, crafts, and home decor when used on suitable fabrics.
- Fusible hemming tape uses heat to melt adhesive into the fabric fibers, while peel-and-stick tape is usually better for temporary fixes.
- The right tape depends on fabric weight, heat tolerance, washability, and whether you need a permanent or temporary hem.
- Always test the tape on a hidden area or fabric scrap before applying it to the full hemline.
- Pressing, cooling time, and product-specific instructions matter because different brands require different heat settings and bonding times.
Quick Answer: What Is Hemming Tape Used For?
Hemming tape is used to bond folded fabric layers together without sewing. It is commonly used to shorten pants, fix dress hems, finish curtains, secure table linens, reinforce fabric edges, and make quick clothing alterations. Fusible hem tape is best when you want a stronger, longer-lasting bond and your fabric can safely handle heat. No-iron or peel-and-stick hem tape is better for quick temporary adjustments, travel fixes, costumes, or garments you may want to alter again later.
What Exactly Is Hemming Tape?
Hemming tape is a thin strip or web of adhesive that sits inside a folded fabric edge. Instead of using thread, the tape bonds the layers together so the hem stays in place. It is popular because it saves time, requires very few tools, and can give pants, skirts, curtains, napkins, and home decor projects a clean finished edge.
The most common version is fusible hemming tape, which activates with heat from an iron. There are also pressure-sensitive no-iron tapes that stick when pressed into place. The important thing to remember is that hemming tape is not suitable for every fabric or every garment. Heat-sensitive fabrics, highly textured materials, and very delicate textiles may need hand sewing or professional tailoring instead.
Heat-sensitive fabrics, highly textured materials, and very delicate textiles may need hand sewing techniques or professional tailoring instead.
The Science Behind Hemming Tape: How It Works
Fusible hemming tape works through a heat-activated adhesive. When the tape is placed between two fabric layers and pressed with an iron, the adhesive softens and flows into the fabric surface. As it cools, the adhesive hardens again and creates a bond that holds the fold in place.
This bond can look similar to a clean sewn hem from the outside, but it is not the same as stitching. A stitched hem uses thread to physically hold the fabric layers together, while hemming tape relies on adhesive. That is why product choice, fabric compatibility, heat setting, and cooling time are all important for long-lasting results.
Types of Hemming Tape and Their Best Uses
Different hemming tapes are made for different fabrics and repair goals. Choosing the wrong type can lead to a stiff hem, weak bond, visible adhesive, or fabric damage. Before buying, check the packaging for fabric compatibility, heat level, washability, and whether the tape is intended to be permanent or temporary.
| Type of Hemming Tape | Best For | Important Note |
|---|---|---|
| Fusible hem tape | Pants, skirts, curtains, cotton, linen, medium-weight fabrics | Requires heat from an iron and usually creates a stronger bond. |
| Extra-light fusible tape | Lightweight cotton, thin blends, delicate-looking hems | Use low heat if the fabric allows it and test first. |
| Heavy-duty fusible tape | Denim, canvas, thicker curtains, heavier home decor | Needs more heat or longer pressing, only if the fabric label allows it. |
| Peel-and-stick hem tape | Temporary hems, travel fixes, costumes, last-minute adjustments | Usually less durable after washing than fusible tape. |
| Washable fabric adhesive tape | Quick repairs on washable garments | Check the product label because wash durability varies by brand. |
Fusible vs. Non-Fusible Hemming Tape
Fusible hemming tape is the stronger option for most long-term garment and home decor hems because heat helps the adhesive bond with the fabric. It is commonly used on pants, curtains, skirts, and cotton projects where the material can tolerate ironing.
Non-fusible or peel-and-stick hemming tape is easier to apply because it does not require an iron, but it is usually better for temporary fixes. It can be helpful for events, travel, costumes, photoshoots, or quick clothing adjustments, but it may not hold as well through washing, heat, or repeated movement.
Choosing the Right Hemming Tape for Your Fabric
The best hemming tape for your project depends on fabric weight, fiber type, heat tolerance, and how often the item will be washed. A tape that works well on denim may feel too stiff on a lightweight dress, while a delicate tape may not be strong enough for heavy curtains.
| Fabric Type | Recommended Tape | Heat / Care Tip |
|---|---|---|
| Lightweight cotton | Extra-light or regular fusible tape | Use moderate heat and a pressing cloth if needed. |
| Medium cotton or blends | Regular fusible hem tape | Press in sections and let the adhesive cool before moving. |
| Denim or canvas | Heavy-duty fusible tape | Use a denim-safe heat setting if the care label allows it. |
| Curtains and home decor fabric | Regular or heavy-duty fusible tape | Work on a large flat surface to keep the hem straight. |
| Polyester or synthetic blends | Low-heat compatible tape only | Test first because some synthetics can melt or shine. |
| Silk, lace, chiffon, velvet, or coated fabric | Avoid unless the product clearly says it is safe | Hand sewing is often safer for delicate or textured fabrics. |
Tools and Supplies You Need
You do not need a full sewing setup to use hemming tape, but preparation tools make a big difference. A clean workspace, accurate measuring tools, and a reliable iron help the hem look neat instead of rushed.
If you are just getting started, a sewing kit for beginners can provide many of these basic tools in one package.
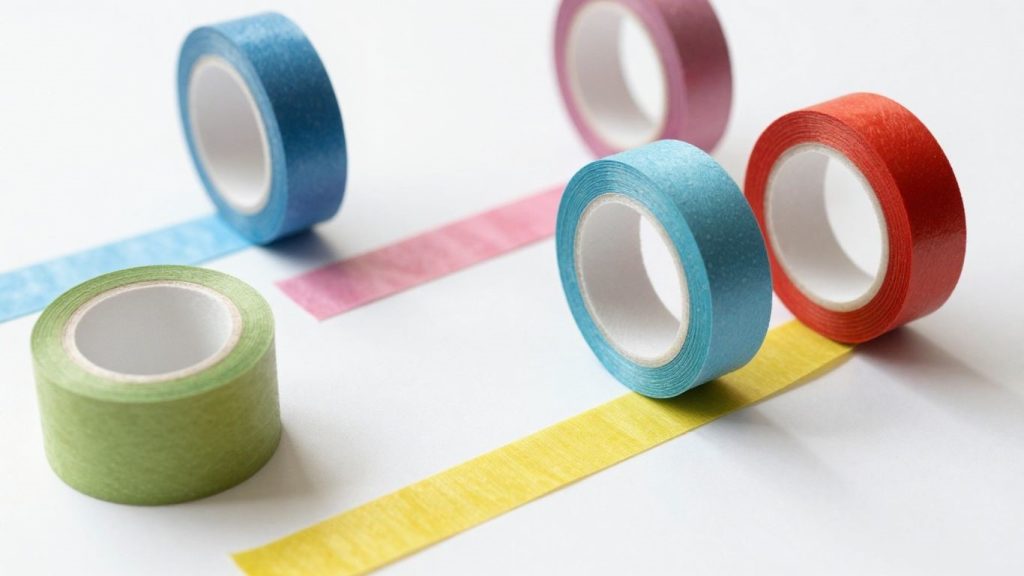
- Hemming tape suited to your fabric weight
- Iron with adjustable heat settings
- Ironing board or flat heat-safe surface
- Pressing cloth, thin cotton towel, or parchment paper if recommended
- Measuring tape, ruler, or hem gauge
- Fabric chalk, washable marker, or pins/clips
- Fabric scissors for trimming excess fabric
- Scrap fabric or hidden hem area for testing
How to Use Hemming Tape: Step-by-Step Guide
The best hemming tape results come from careful preparation. Rushing the fold or sliding the iron can shift the adhesive and create wrinkles, uneven hems, or visible glue marks. Follow these steps for a cleaner no-sew hem.
Step 1: Read the Fabric Care Label and Tape Instructions
Before applying heat, check the garment’s care label and the hemming tape package. Some fabrics cannot handle high heat, steam, or direct contact with an iron.
Do not assume one heat setting works for every project. The safest approach is to match the iron setting to the fabric and follow the tape manufacturer’s pressing time.
Step 2: Test the Tape on a Hidden Area
Test a small piece of tape on scrap fabric or an inside seam allowance before applying it to the full hem. This helps you check for discoloration, stiffness, shine, melting, or weak bonding.
This step is especially important for polyester, rayon blends, satin, silk, lace, chiffon, velvet, and other delicate fabrics. If the test looks bad, choose hand sewing instead.
Step 3: Measure and Mark the Hemline
Try on the garment or hang the curtain before deciding on the final length. Mark the new hemline evenly using fabric chalk, a washable marker, pins, or clips.
Measure from the floor or from the original edge at several points. Consistent measuring prevents crooked hems, which are one of the most common no-sew alteration mistakes.
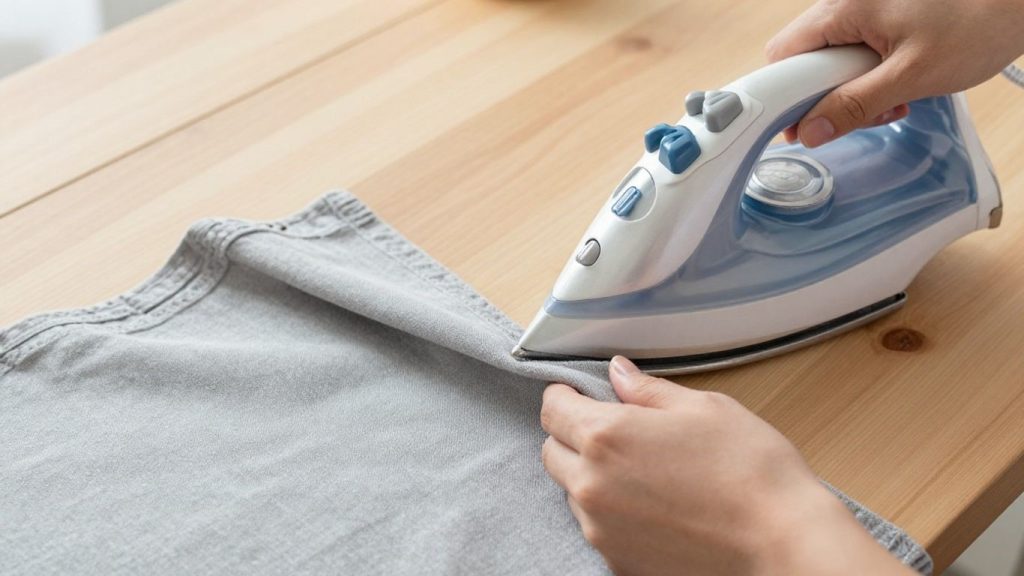
Step 4: Fold and Press the Hem First
Fold the fabric to the marked length and press the fold flat before adding tape. A crisp fold keeps the hem straight and helps the adhesive sit evenly between the layers.
Do not skip this step. Hemming tape works best when the fabric is flat, smooth, and wrinkle-free before the adhesive is introduced.
Do not skip this step. Hemming tape works best when the fabric is flat, smooth, and wrinkle-free before the adhesive is introduced. Using a mini iron for sewing or one of the best clothing irons can make pressing small hems much easier.
Step 5: Cut and Position the Hemming Tape
Cut tape strips to fit inside the folded hem. Place the tape fully between the layers so no adhesive sticks out beyond the fabric edge.
If the tape touches the iron directly, it may melt onto the soleplate. Leave a small margin inside the fold and work in short sections for better control.
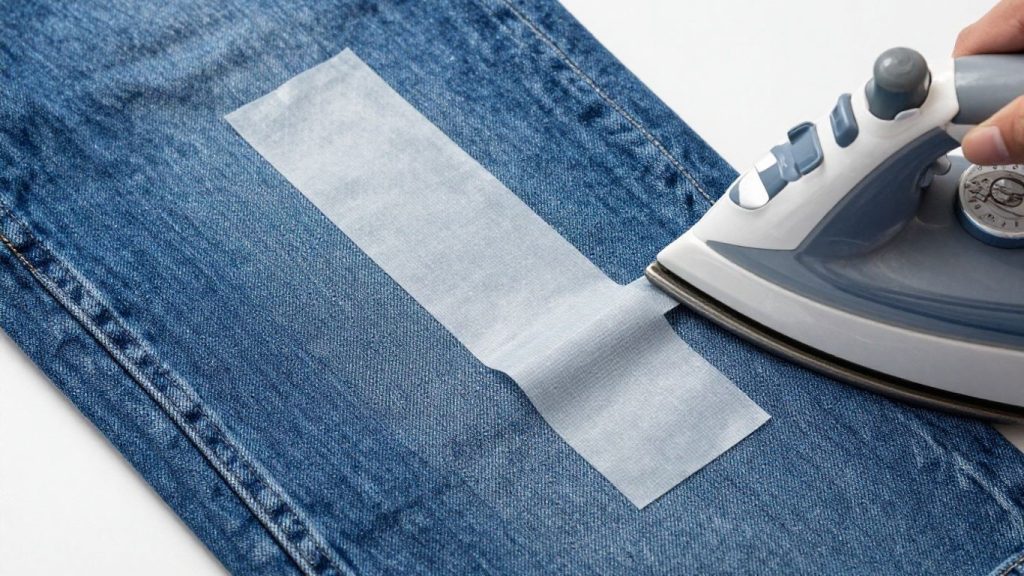
Step 6: Press, Do Not Slide the Iron
Place the iron straight down over the hem section and apply steady pressure for the time recommended by the product instructions. Avoid sliding the iron because movement can shift the tape.
Use a pressing cloth if your fabric is prone to shine, scorching, or heat marks. Only use steam or a damp cloth if the tape instructions allow it.
Step 7: Let the Hem Cool Before Testing the Bond
After pressing, let the fabric cool completely before lifting, moving, or wearing the garment. The adhesive continues to set as it cools.
Once cool, gently check the bond. If an area lifts, press again according to the product directions instead of pulling the fabric apart forcefully.
Troubleshooting Common Hemming Tape Problems
Even good hemming tape can fail if the fabric is dirty, the iron is too cool, the pressure is uneven, or the tape is too light for the fabric. Use this guide to fix common issues before replacing the entire hem.
| Problem | Likely Cause | How to Fix It |
|---|---|---|
| Hem lifts after washing | Not enough heat, pressure, or bonding time | Re-press the area using the product’s recommended heat and let it cool fully. |
| Fabric looks shiny or scorched | The iron was too hot, or no pressing cloth was used | Lower the heat, use a pressing cloth, and test before continuing. |
| Hem feels stiff | The tape is too heavy for the fabric | Use a lighter-weight tape or sew the hem by hand. |
| Adhesive shows outside the fold | The tape was placed too close to the edge | Trim carefully if possible or reposition before pressing the next section. |
| Tape sticks to iron | The adhesive was exposed to direct heat | Cool slightly, wipe carefully with a damp cloth, and use a pressing cloth next time. |
| Bond is weak on thick fabric | The tape is too light, or the heat did not reach the adhesive | Use heavy-duty tape and press longer only if the fabric allows it. |
| Wrinkles are locked into the hem | Fabric was not pressed before tape application | Loosen the hem with heat if possible, re-press flat, and reapply. |
Beyond Hems: Creative Uses for Hemming Tape
Hemming tape is useful for more than shortening pants or dresses. It can help finish home decor projects, support temporary craft layouts, and reinforce light fabric edges when you want a clean look without visible stitching. If you later decide to create your own fabric projects, tutorials like how to sew a fabric bag and how to sew an apron are excellent next steps.
- Shortening curtains without sewing a long straight seam
- Making simple table runners, napkins, and fabric panels
- Holding appliques or patches in place before stitching them down
- Repairing a small loose hem before an event
- Reinforcing fabric storage bins, light tote edges, or decorative fabric covers
- Creating quick costumes or theater adjustments that do not need permanent tailoring
When You Should Not Use Hemming Tape
Hemming tape is convenient, but it is not always the best solution. Some fabrics react poorly to heat, some garments need flexibility, and some repairs require the strength of real stitching.
- Avoid heat-activated tape on fabrics that cannot be ironed safely.
- Avoid heavy tape on thin garments where stiffness or adhesive lines may show.
- Avoid using tape as the only repair on high-stress seams that stretch or pull heavily.
- Avoid permanent tape if you may need to adjust the length again later.
- Avoid tape on expensive formalwear unless you test first or consult a tailor.
How to Wash and Care for Hemming Tape Repairs
Care instructions depend on the tape brand and fabric type. Many fusible tapes are washable after the adhesive fully sets, but the bond may last longer when washed gently and dried with lower heat.
For best results, wait at least 24 hours before washing unless the product says otherwise. Turn garments inside out, use a gentle cycle, avoid harsh heat when possible, and inspect the hem after washing. If a small section lifts, it can often be re-fused with careful pressing.
Hemming Tape vs Sewing: Which Is Better?
| Option | Best For | Main Advantage | Main Limitation |
|---|---|---|---|
| Hemming tape | Quick no-sew hems, curtains, temporary fixes, simple repairs | Fast and beginner-friendly | May not suit delicate, stretchy, or high-stress areas. |
| Machine sewing | Durable garments, frequent washing, long-term hems | Strong and reliable | Requires a sewing machine and more skill. |
| Hand sewing | Formalwear, delicate fabrics, invisible hems | More control and a softer finish | Slower than tape or machine sewing. |
Common Mistakes to Avoid
- Using heavy-duty tape on thin fabric.
- Skipping the test patch before applying heat.
- Using the cotton setting on every fabric instead of checking the care label.
- Sliding the iron instead of pressing straight down.
- Moving the fabric before the adhesive cools.
- Placing tape too close to the edge so adhesive leaks out.
- Expecting temporary peel-and-stick tape to perform like permanent fusible tape.
Final Recommendation
For most beginners, regular fusible hemming tape is the best choice for medium-weight cotton, simple pants, skirts, curtains, and home decor projects. Use extra-light tape for lighter fabrics and heavy-duty tape only when the fabric can safely handle the required heat.
The most important rules are simple: test first, measure carefully, press the fold before adding tape, follow product instructions, and let the bond cool before moving the fabric. When used correctly, hemming tape can create a clean, no-sew hem that looks polished and saves time.
If you eventually want more permanent alterations, learning how to hem pants is a natural next skill to add.
Conclusion
Hemming tape is a practical no-sew solution for anyone who wants to shorten garments, finish curtains, repair loose hems, or complete simple fabric projects without using a sewing machine. It works best when the tape weight matches the fabric, the fold is measured and pressed accurately, and the adhesive is activated according to the manufacturer’s directions.
Although hemming tape is not a perfect replacement for every sewn hem, it is a valuable tool for quick alterations and clean fabric finishes. By understanding when to use fusible tape, when to choose temporary tape, and when to avoid adhesive altogether, you can get better results and protect your fabric from damage.
Frequently Asked Questions
What is hemming tape?
Hemming tape is an adhesive strip or web used to bond folded fabric layers together without sewing. It can be heat-activated or pressure-sensitive depending on the type.
Is hemming tape permanent?
Many fusible hemming tapes are intended to be permanent, but durability depends on the fabric, tape quality, heat application, washing routine, and manufacturer’s instructions.
Can hemming tape be washed?
Many fusible tapes are washable after the bond fully sets, but care instructions vary. Washing gently and avoiding excessive heat can help the bond last longer.
Can I use hemming tape on silk or lace?
Use caution. Silk, lace, chiffon, velvet, and many synthetics can be damaged by heat or adhesive. Test first, and consider hand sewing for valuable or delicate garments.
Why is my hemming tape not sticking?
Common reasons include low heat, not enough pressure, dirty fabric, wrong tape weight, moving the fabric before cooling, or using the tape on an incompatible material.
How do I remove hemming tape?
Permanent fusible tape is difficult to remove because the adhesive bonds to the fibers. Heat may soften it, but removal can leave residue or damage fabric.
Can I use a regular iron with hemming tape?
Yes, a household iron usually works, but you must adjust the temperature to the fabric and follow the instructions. Avoid direct contact with exposed adhesive.
Is hemming tape better than sewing?
Hemming tape is faster and easier for simple no-sew hems, but sewing is usually stronger for garments that stretch, pull, or go through frequent washing.
Can I use hemming tape on denim?
Yes, but choose heavy-duty fusible tape and make sure the denim can tolerate the heat required. Press firmly and allow the bond to cool fully.
How do I keep hemming tape off my iron?
Place the tape completely inside the fabric fold and use a pressing cloth or parchment paper if needed. Do not let the exposed adhesive touch the iron plate.