How to Upgrade Your Kitchen Appliances: 10 Smart Upgrades for a Modern Kitchen
Upgrading kitchen appliances works best when you start with the problems in your current kitchen rather than the newest feature list. I look first at reliability, fit, capacity, energy use, noise, installation requirements, and the tasks an appliance needs to handle every day. A thoughtful upgrade can improve cooking, food storage, cleanup, ventilation, and counter space, but the wrong size or utility requirement can turn a good appliance into an expensive installation problem.
This 2026 guide walks through the planning process, the features that matter most, and 10 practical kitchen appliance upgrades so you can modernize the room in the right order.
Quick Answer: How Do You Upgrade Kitchen Appliances Without Remodeling?
Start by replacing the appliance that is unreliable, unsafe, too small, too noisy, or no longer fits the way you cook. Measure the opening and delivery path, confirm electrical, water, gas, drainage, and ventilation requirements, then compare useful features instead of buying by appearance alone. For major appliances, check the EnergyGuide label and ENERGY STAR options where applicable, and include delivery, installation, removal, and any electrical or plumbing work in the real budget.
Key Takeaways
A good kitchen upgrade reduces friction in daily routines. These are the decisions I would settle before comparing brands or finishes.
- Replace or add appliances to solve specific problems, not just because newer models exist.
- Measure openings, clearances, door swings, counter depth, and delivery paths before buying.
- Check electrical, gas, water, drainage, ventilation, and cabinet requirements early.
- Compare EnergyGuide labels and ENERGY STAR options where applicable to assess efficiency.
- Choose appliance capacity and features that match your household size and cooking habits.
- Choose smart features only when they genuinely improve convenience and fit your privacy needs.
- Include delivery, installation, removal, and any utility or cabinet modifications in your budget.
- Plan appliance placement around kitchen workflow, available counter space, and practical everyday use.
The best upgrade plan is usually phased: solve the highest-impact problem first, then add other changes only when they improve the same workflow or can be installed efficiently at the same time.
Why Upgrade Your Kitchen Appliances?
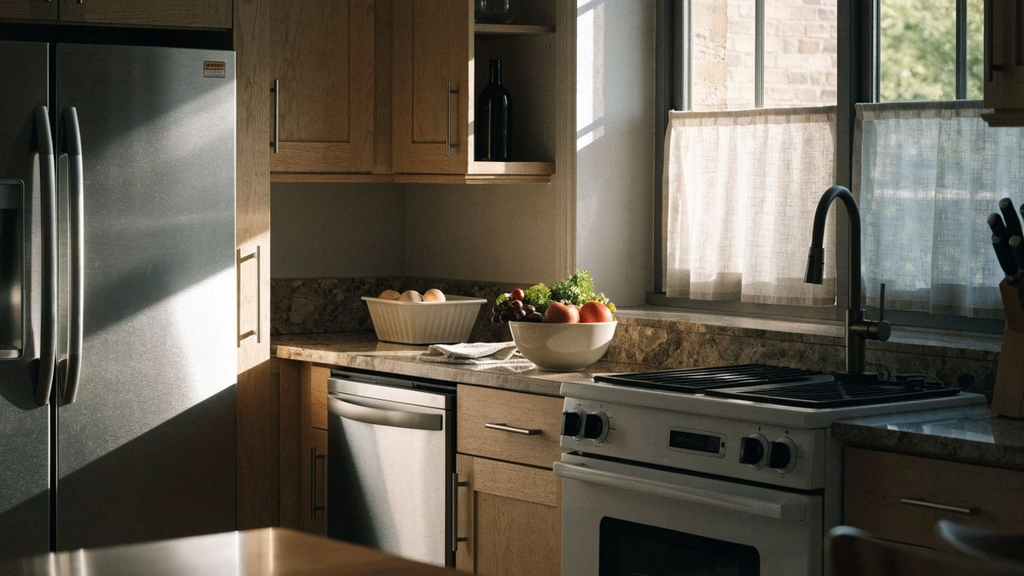
Kitchen appliances shape food storage, meal preparation, cleanup, ventilation, and the amount of time you spend managing routine tasks. I consider an upgrade worthwhile when an appliance has become unreliable, wastes space, is difficult to clean, does not hold the household capacity, or no longer fits the way the kitchen is used.
Newer models can improve energy use, rack layout, temperature control, noise, capacity, safety, or convenience, but those benefits are model-specific. A basic refrigerator with the right shelves can be a better purchase than a connected model with an impressive screen but poor storage for your household.
If you are building a broader shortlist, start with MariaSew’s best kitchen and home appliances guide to see which appliance categories can make the biggest practical difference before you replace everything at once.
Repair or Replace? Decide Before You Upgrade
Not every problem needs a replacement. If the appliance is otherwise suitable and a qualified technician can repair the fault safely at a reasonable cost, keeping it can be the smarter choice. I am more likely to replace when reliability problems keep returning, parts or service are difficult to obtain, the appliance no longer fits the household, or the repair does not address the underlying limitation.
- Repair can make sense when the appliance still fits the kitchen, the failure is isolated, the repair is safe and practical, and the unit otherwise meets your needs.
- Replacement can make sense when breakdowns repeat, important parts are unavailable, the appliance is causing leaks or other safety concerns, or the capacity and features no longer suit the home.
- Get a professional opinion for gas appliances, electrical overheating, repeated breaker trips, refrigerant systems, water leaks, and any fault that could create a fire, shock, gas, or water-damage risk.
I do not use a simple appliance-age chart as a replacement rule. Condition, repairability, installation cost, household needs, and the expected value of the upgrade are more useful than age alone.
How I Test and Evaluate Kitchen Appliance Upgrades at MariaSew
I test kitchen and home appliances around the jobs they are supposed to make easier. I do not rate a product only from a feature list. I look at setup, controls, capacity, noise, cleaning, storage, day-to-day performance, and whether a feature still feels useful after the novelty wears off. For a kitchen upgrade guide, I also compare installation instructions and the physical requirements that determine whether the product actually works in a real kitchen.
When I update a kitchen, I use the same practical approach: measure first, confirm utilities, identify the routine I want to improve, then test whether the appliance earns the space and cost. A product that performs well but is awkward to load, difficult to clean, too loud, or poorly matched to the household is not automatically a good upgrade.
- Fit and installation. I check dimensions, clearances, doors, delivery access, power, plumbing, drainage, gas, ventilation, and any trim or mounting kit.
- Everyday performance. I use the appliance for the routine jobs it will handle most often instead of testing only a showcase feature.
- Controls and learning curve. I check whether core functions are obvious without forcing the user through unnecessary menus or app screens.
- Capacity and layout. I look at usable shelf, rack, cavity, or basket space, not just the headline capacity number.
- Noise and comfort. For dishwashers, disposals, hoods, and countertop appliances, I pay attention to how the sound affects conversation and open-plan living.
- Cleaning and maintenance. I test how easy it is to reach filters, racks, trays, pans, seals, and surfaces that will need routine care.
- Connected features. I test setup, Wi-Fi/app reliability, alerts, privacy controls, and whether the smart function actually saves effort.
- Long-term value. I weigh build, warranty, service access, operating information, and useful features against the installed cost.
This matches MariaSew’s editorial standard for hands-on appliance and product guidance, where recommendations are built around real-world usefulness rather than feature count alone.
How to Plan a Kitchen Appliance Upgrade
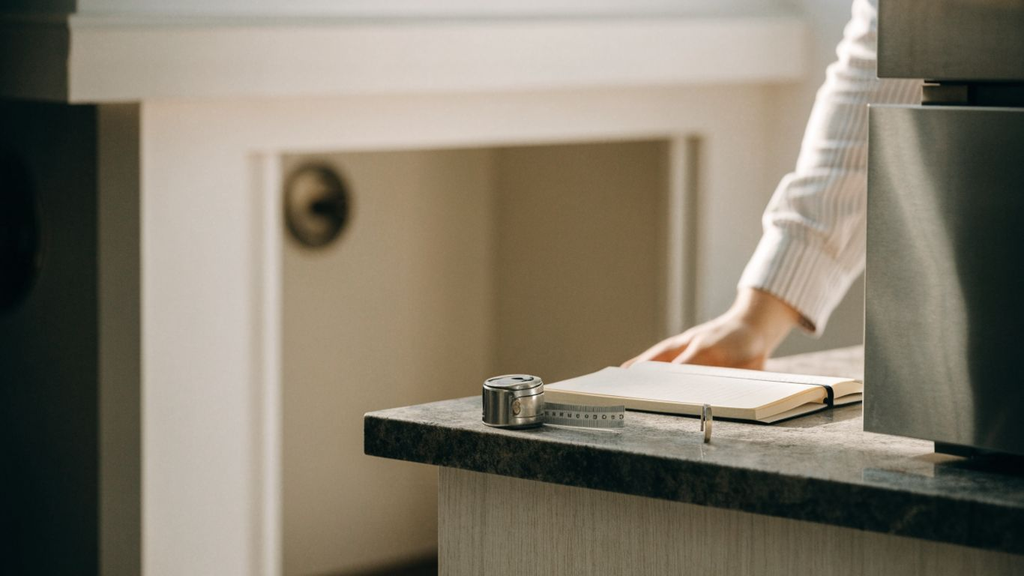
Before shopping, I make a short list of the problems I want to solve and the limits I have to respect. That keeps attractive extras from crowding out basics such as fit, capacity, ventilation, electrical supply, water connections, and the actual installation budget.
Set a Budget and Prioritize the Highest-Impact Upgrade
Set a total budget that includes the product, delivery, installation, removal, accessories, and any electrical, plumbing, gas, ventilation, cabinet, or countertop work. I rank the appliances by urgency and daily impact so a failing refrigerator comes before a working oven that simply lacks a convenience feature.
Measure the Opening, Door Swing, and Delivery Path
Measure width, height, and depth at more than one point, then check manufacturer-required clearances. I also measure the front door, hallways, turns, stairs, islands, and other obstacles because an appliance can fit the opening and still fail to reach the kitchen.
Confirm Electrical, Water, Gas, Drain, and Ventilation Requirements
Before ordering, compare the appliance installation instructions with the existing kitchen. A new induction range, wall oven, built-in microwave, dishwasher, refrigerator ice maker, disposal, or hood may require a circuit, receptacle, shutoff, drain, water line, duct, or connection that is different from the old unit.
Compare Total Ownership Cost, Not Just Purchase Price
Purchase price is only one part of value. I also look at operating information, filters or consumables, warranty, service access, repairability, required accessories, and whether the new appliance will force other remodeling work.
Choose Capacity Around Real Household Use
A larger appliance is not automatically better. I match refrigerator layout to grocery habits, dishwasher racks to the actual dishware, oven cavity to cookware and baking sheets, and countertop appliances to the number of people usually being served.
Plan Installation and Old-Appliance Removal Together
I confirm who disconnects the old unit, who installs the new one, which parts are included, and who handles haul-away before delivery day. Refrigerators, freezers, air conditioners, and other refrigerant-containing appliances also require proper end-of-life handling rather than informal dumping.
Features to Prioritize in Modern Kitchen Appliances
Modern appliances can include dozens of settings, but only a smaller group of features affects daily use across most categories. I would compare these first before paying for specialty modes or premium finishes.
Energy and Water Use
For refrigerators and dishwashers, I compare the EnergyGuide label and look for ENERGY STAR certification when it fits the category. Efficiency is most useful when it comes without sacrificing the capacity, temperature control, cleaning performance, or cycle options you need.
Usable Capacity and Interior Layout
Headline capacity is less important than whether shelves, drawers, racks, door bins, baskets, and cavities fit your normal groceries, cookware, plates, pans, and containers. Adjustable layouts can be more valuable than a slightly larger published volume.
Noise Level
Noise matters in open-plan homes and kitchens near bedrooms or work areas. Dishwashers commonly publish sound ratings in dBA, while disposals, hoods, and countertop appliances may need review-based comparison because testing methods are less standardized across categories.
Automatic and Sensor Modes
Soil sensors, temperature probes, automatic defrost, humidity control, convection, and other automated modes can improve consistency when they respond to a real task. I prefer automation that reduces adjustment rather than creating another menu to manage.
Cleaning and Maintenance Access
Removable racks, washable filters, accessible drain screens, smooth interiors, easy-to-remove trays, and clear maintenance instructions often matter more over five years than a feature you use twice.
Smart Controls and Connectivity
Remote status, alerts, preheating, diagnostics, and voice control can be useful, but I check app support, account requirements, Wi-Fi compatibility, update policy, and privacy settings before treating connectivity as a benefit.
Safety and Lockout Features
Control locks, automatic shutoff, hot-surface indicators, leak detection, flame-failure protection, and child-control options are worth comparing when relevant to the appliance and household.
Service, Warranty, and Parts Support
A premium appliance is less attractive if authorized service is hard to find. I check warranty coverage, service network, common replacement parts, and whether filters or accessories are proprietary and expensive.
Kitchen Appliance Upgrade Feature & Specification Checklist
This is the one table I use as a cross-category planning checklist. It does not replace the manufacturer installation guide, but it keeps the most important measurements and specifications in one place while you compare models.
Fill the actual numbers from the appliance manual and your kitchen rather than copying the old appliance dimensions. A replacement model can have a different hinge, plug, duct, water connection, or clearance even when the nominal width looks identical.
| Check | What to Confirm | Why It Matters |
|---|---|---|
| Opening dimensions | Width, height, depth | Confirms physical fit |
| Required clearances | Sides, top, rear, door/drawer swing | Prevents blocked ventilation or doors |
| Delivery path | Doorways, hallways, stairs, turns | Confirms the appliance can reach the kitchen |
| Power | Voltage, amperage, plug/receptacle, dedicated circuit if specified | Avoids electrical surprises |
| Gas, if applicable | Fuel type, shutoff, connector, local installation requirements | Supports safe professional installation |
| Water/drain | Supply line, drain location, shutoff, pressure requirements | Relevant to refrigerators, dishwashers and disposals |
| Ventilation | Duct size, outlet location, recirculating vs ducted setup | Critical for hoods and some microwaves |
| Capacity | Usable interior/rack/cavity space | Matches household and cookware |
| Energy/water data | EnergyGuide and ENERGY STAR where applicable | Helps compare operating performance |
| Noise | Published dBA or manufacturer noise information | Important for open-plan spaces |
| Smart requirements | Wi-Fi band, app/account, ecosystem, updates | Avoids compatibility problems |
| Warranty/service | Coverage, service network, parts availability | Affects long-term ownership |
| Installation parts | Hoses, cords, trim kits, mounting hardware | Prevents last-minute purchases |
| Removal/recycling | Haul-away and proper refrigerant handling if needed | Completes the upgrade responsibly |
Once I have this information, I compare only appliances that genuinely fit the kitchen. That prevents the common mistake of falling in love with a model first and discovering the installation problem after delivery.
10 Smart Kitchen Appliance Upgrades for a Modern Kitchen
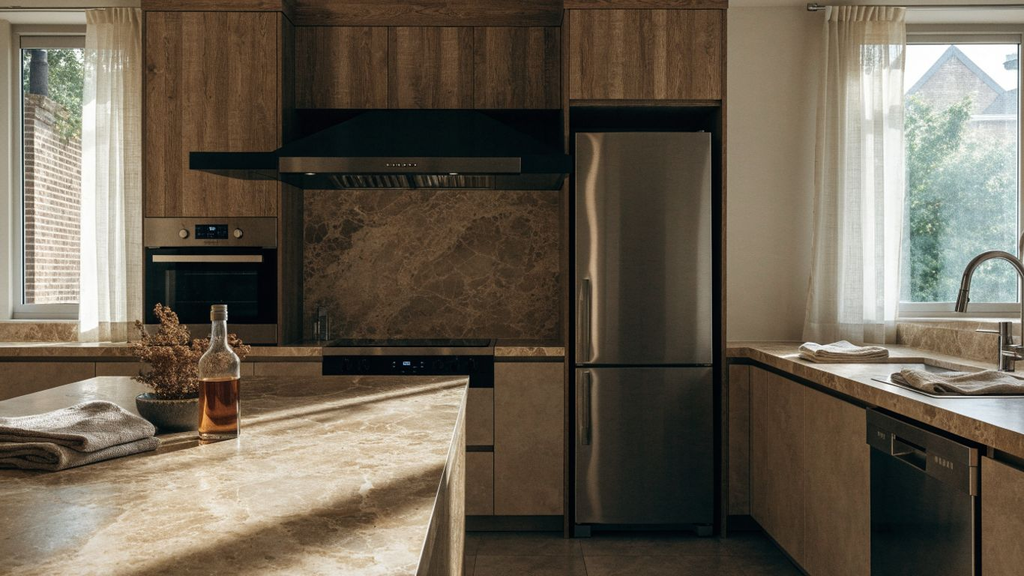
There is no reason to buy all 10 at once. I treat these as upgrade paths: choose the one that solves the clearest problem now, then make sure the next change works with the same layout, utilities, and daily routine.
1. Upgrade to an Energy-Efficient Refrigerator
Start with capacity, shelf and drawer layout, door swing, depth, ventilation clearances, and the way you buy food. I also compare the EnergyGuide label and ENERGY STAR models where appropriate rather than assuming a smart screen or premium finish means lower operating use. Counter-depth can improve circulation in a narrow kitchen, but it can reduce interior depth, so compare usable storage before choosing by appearance.
2. Choose a Quieter, Better-Organized Dishwasher
A dishwasher upgrade is most noticeable when the racks fit your real dishes, the cycle options are simple, and the machine is quiet enough for the room. Compare published dBA ratings, third-rack usefulness, adjustable tines, filter or disposer design, drying method, EnergyGuide data, and ENERGY STAR certification where relevant. Check the opening, water supply, drain, electrical connection, and floor height before assuming every 24-inch model is interchangeable.
3. Switch to an Induction Cooktop or Range
Induction creates a magnetic field that heats compatible cookware directly, giving fast response and precise control. Test cookware with a magnet: a flat pan base that attracts a magnet is generally induction-compatible. Before switching from gas or conventional electric, confirm the required electrical service and circuit because the kitchen may need electrical work before the appliance can be installed safely.
4. Install a Convection or Smart Oven
Convection uses a fan to circulate heated air around the oven cavity, which can improve heat distribution and change cooking time or browning. Smart controls can add remote status, preheating, or alerts, but I would not pay extra unless the connected functions fit the way you cook. Compare cavity size, rack positions, temperature modes, cleaning method, electrical or gas requirements, and whether the door swing works with nearby cabinetry.
If you are deciding between cooking formats, see MariaSew’s air fryer vs. convection oven comparison for a practical explanation of airflow, capacity, and use cases.
5. Refresh the Range Hood and Ventilation
A good range hood manages smoke, steam, grease, heat, and cooking odors more effectively when it is correctly sized and installed for the cooking surface. I check the cooktop or range manufacturer guidance, hood mounting height, duct path, make-up-air or local code considerations where applicable, filter access, lighting, and noise. If a hood will recirculate instead of vent outdoors, confirm the manufacturer supports that configuration and understand that odor and moisture performance will differ.
6. Add the Right Built-In or Over-the-Range Microwave
A built-in or over-the-range microwave can free counter space, but it must be installed in a location and cabinet arrangement approved by the manufacturer. Do not enclose a countertop-only microwave in cabinetry unless its instructions specifically allow it. Compare cavity size, controls, ventilation, trim-kit requirements, power, mounting height, and whether the door remains comfortable and safe to access.
7. Upgrade to a Quieter Garbage Disposal
If your kitchen uses a disposal, compare grind system, sound insulation, motor size, sink compatibility, electrical setup, plumbing, and manufacturer cleaning guidance. I would repair a simple jam or replaceable component when practical rather than upgrading only for looks. Before adding a disposal to a kitchen that did not have one, confirm local plumbing rules, septic guidance, and the sink/drain arrangement.
8. Add a Beverage or Wine Refrigerator Only If You Will Use It
Dedicated drink storage can free the main refrigerator and make entertaining easier, but it costs floor or cabinet space and electricity. Check ventilation requirements carefully because freestanding and built-in models handle airflow differently. For wine, choose the temperature range and shelf layout around the bottles you actually store rather than buying multiple zones by default.
9. Replace Several Countertop Appliances With One Multi-Function Model
A multi-function appliance can reclaim counter space when it truly replaces several devices you use. Air fryers, countertop convection ovens, bread machines, multicookers, and powerful blenders can each be excellent upgrades, but only when the capacity and cleanup fit your routine. I would rather own one appliance that performs three weekly jobs well than a large “12-in-1” machine that is awkward for every task.
For tested countertop options, compare the best air fryers of 2026, best bread machines, and MariaSew’s best kitchen appliances for baking.
10. Add Smart Controls and Connected Kitchen Features
Connected appliances can provide alerts, remote monitoring, diagnostics, recipe integration, voice control, or limited remote operation. I test whether those features reduce actual work and whether the app is easy to maintain. Before buying, check the Wi-Fi requirement, account setup, smart-home ecosystem, software-support expectations, privacy controls, and what functions still work if the internet or cloud service is unavailable.
If you want appliances to work with a broader connected-home setup, use the 2026 smart home setup guide before choosing an ecosystem.
If your upgrade is focused on breakfast and beverage workflow rather than built-in appliances, MariaSew also has a current guide to the best coffee makers for home.
How to Choose Kitchen Appliances That Work Together
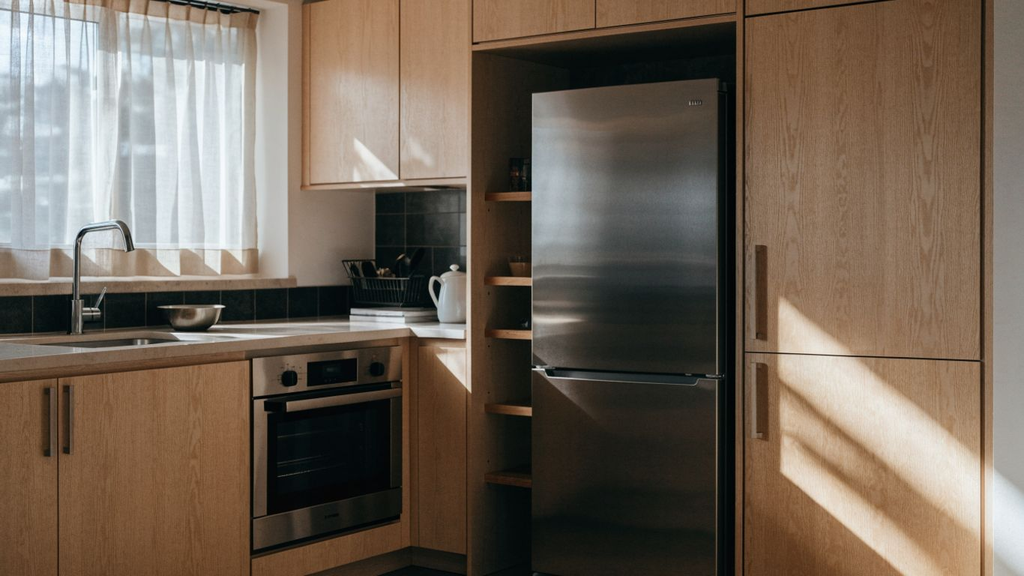
A coordinated kitchen does not require every appliance to come from the same brand or collection. I start with physical and functional compatibility: each appliance has to fit the opening, use the available utilities, open without colliding with doors or drawers, and support the same cooking and cleanup workflow.
Next, I look at the work zones. The refrigerator should support food prep, the cooktop or range should have useful landing space, the hood should match the cooking setup, and the dishwasher should be easy to load from the sink without blocking a walkway. Matching finishes are useful only after the layout works.
- Keep door and drawer paths clear. Check refrigerator doors, dishwasher racks, oven doors, microwave doors, and cabinet drawers at the same time.
- Match cooking and ventilation. Choose the cooktop or range first, then size and install the hood around the manufacturer and local requirements.
- Protect counter workflow. Avoid placing tall appliances or open doors where they cut off the main prep area.
- Coordinate controls only when useful. Using one ecosystem can simplify apps, but the best-performing appliance should not be rejected only because another brand is already in the kitchen.
- Use finishes to unify, not dictate. Stainless, panel-ready, black, white, or mixed finishes can all work when proportions and placement feel intentional.
For me, the best kitchen looks coordinated because the workflow is coherent, not because every logo matches.
Installation, Maintenance, and Responsible Disposal
Installation planning starts before the old appliance is removed. I confirm the installer scope, required parts, shutoff access, flooring and cabinet condition, utility changes, and who is responsible for disposal. Gas, high-voltage electrical, plumbing, duct, refrigerant, and built-in work should be handled by appropriately qualified professionals when required.
- Keep installation manuals. Save digital or printed instructions, model and serial numbers, receipts, and warranty information.
- Follow the maintenance schedule. Clean filters, seals, drain screens, condenser areas, racks, trays, grease filters, and other service points as the manufacturer specifies.
- Use correct cleaners. Abrasive products or harsh chemicals can damage stainless finishes, glass tops, coatings, gaskets, and appliance interiors.
- Address leaks, overheating, gas odors, or electrical faults immediately. Stop using the appliance when a condition could create a safety or property-damage risk and contact the appropriate service professional.
- Arrange responsible disposal. Retailers, municipal programs, and recyclers can often collect old appliances. Refrigerant-containing appliances require proper refrigerant handling rather than informal disposal.
For refrigerators and other refrigerant-containing appliances, the EPA requires refrigerant to be recovered before final disposal. I arrange haul-away or recycling with a retailer or local program instead of leaving that step until delivery day.
How to Upgrade Kitchen Appliances Without Remodeling Your Kitchen
Upgrading your kitchen appliances without remodeling is a practical way to improve your kitchen’s appearance, energy efficiency, and everyday functionality without replacing cabinets, countertops, flooring, or the entire layout. By choosing appliances that fit your existing space and work with your current electrical, plumbing, and ventilation systems, you can achieve a modern look while keeping renovation costs under control.
The key is to identify which appliances need replacing, compare features that suit your household, and plan each upgrade around your existing kitchen setup.
Step 1: Assess Your Existing Kitchen Appliances
Before purchasing new appliances, evaluate the condition, performance, and efficiency of the appliances you already own. Replacing everything at once may be unnecessary if some units still work well and meet your needs.
- Check appliance performance: Look for recurring breakdowns, inconsistent temperatures, excessive noise, poor cleaning results, or unreliable controls.
- Review energy and water use: Older refrigerators, dishwashers, and other frequently used appliances may consume more resources than comparable newer models.
- Identify your biggest frustrations: Consider whether you need more refrigerator storage, faster cooking, quieter dishwashing, or easier-to-clean surfaces.
- Prioritize essential replacements: Start with appliances that frequently malfunction, have high running costs, or no longer meet your household’s needs.
Create a shortlist of appliances that genuinely need upgrading. This helps you allocate your budget to improvements that will make the biggest difference.
Step 2: Measure Your Existing Appliance Spaces
Choosing replacement appliances that fit your existing kitchen is essential when you want to avoid remodeling. Even appliances with the same advertised width can differ in depth, height, door clearance, and installation requirements.
Measure the following before shopping:
- Width, height, and depth: Measure the available opening and compare it with the manufacturer’s installation dimensions.
- Door and drawer clearance: Make sure refrigerator doors, oven doors, and dishwasher doors can open fully without hitting nearby cabinets or walkways.
- Ventilation clearance: Follow the manufacturer’s requirements for airflow and spacing around the appliance.
- Connection locations: Check where electrical outlets, water lines, drainage connections, and gas connections are located.
- Delivery access: Measure doorways, hallways, staircases, and turns along the delivery route.
Do not rely solely on the dimensions shown on a product listing. Check the installation guide for the exact model, including any required side, rear, or overhead clearance.
Step 3: Upgrade to Energy-Efficient Kitchen Appliances
Replacing an inefficient appliance with a suitable energy-efficient model can reduce electricity or water consumption over time. Actual savings depend on the appliance’s efficiency, usage frequency, local utility rates, and purchase price.
Refrigerator
Compare annual energy consumption on the EnergyGuide label where available. Choose a capacity suited to your household rather than paying for a larger model you do not need.
Dishwasher
Look for efficient water use, suitable wash cycles, and a capacity that matches your daily dishwashing needs. A quiet operating rating may also be valuable in an open-plan kitchen.
Cooktop or Range
Consider an induction cooktop for responsive heating and efficient energy transfer. Check cookware compatibility and electrical capacity before replacing a gas or conventional electric unit.
Microwave
Choose the right capacity and power level for your cooking habits. A compact countertop model can refresh your setup without requiring cabinet modifications.
For U.S. purchases, compare eligible models using the ENERGY STAR website. If you live elsewhere, check the energy labels and product standards used in your region.
Step 4: Match New Appliances to Your Existing Kitchen Design
You do not need new cabinets or countertops to create a coordinated kitchen. Selecting appliances that complement your existing finishes can make the space feel more intentional and updated.
- Choose consistent finishes: Stainless steel, black stainless, white, and black appliances can each work well when coordinated with your kitchen’s existing colors.
- Consider handle styles: Matching or visually compatible handles can help appliances from different brands look cohesive.
- Keep proportions balanced: Avoid choosing an oversized refrigerator or range that overwhelms a compact kitchen.
- Coordinate visible controls: Similar control styles and understated designs can create a cleaner appearance.
- Check finish compatibility: Stainless steel finishes can vary between brands, so compare them in person or review accurate product images when possible.
You do not necessarily need to buy every appliance from one brand. Prioritize fit, performance, reliability, and a coordinated appearance over matching logos.
Step 5: Upgrade One Appliance at a Time
Replacing appliances in stages can make the cost more manageable and prevent unnecessary spending. A planned sequence also allows you to identify which improvements offer the greatest value before moving on to the next purchase.
- Refrigerator: Prioritize it if it is failing, consuming excessive energy, or no longer provides sufficient storage.
- Range or cooktop: Replace it if cooking performance, reliability, or safety is a concern.
- Dishwasher: Consider an upgrade if the existing unit leaks, cleans poorly, or uses excessive resources.
- Microwave: A countertop model is often relatively easy to replace without changing the kitchen layout.
- Range hood: Consider upgrading if your current ventilation is inadequate for your cooking habits.
This is a flexible order, not a rule. A leaking dishwasher, unsafe range, or failing refrigerator should take priority over an appliance that is simply outdated.
Step 6: Choose Smart Features That Solve Real Problems
Smart kitchen appliances can offer remote monitoring, maintenance alerts, flexible scheduling, and integration with other connected devices. However, extra features are worthwhile only when they support your actual routine.
Consider these options:
- Smart refrigerators: Inventory tools, temperature alerts, and remote diagnostics on selected models.
- Smart dishwashers: Remote cycle monitoring, scheduling, and maintenance notifications.
- Connected ovens: Remote preheating or cooking notifications where supported.
- App-enabled appliances: Usage tracking and troubleshooting features that may help with maintenance.
Before paying more for connectivity, check whether essential functions work without an app or subscription, whether the appliance supports your phone and home network, and how long software support is expected to last.
Step 7: Check Electrical, Plumbing, Gas, and Ventilation Requirements
An appliance may fit physically but still require expensive changes to operate safely. Confirm installation requirements before ordering, especially when switching to a different appliance type.
- Electrical supply: Verify voltage, circuit capacity, outlet type, and any dedicated-circuit requirements.
- Water connections: Check supply valves, hose connections, drainage, and leak protection for refrigerators and dishwashers that use water.
- Gas connections: Have a qualified professional inspect the connection when replacing or relocating gas appliances.
- Ventilation: Confirm that range hoods and other vented appliances can use the existing ductwork or an approved alternative.
- Installation rules: Follow manufacturer instructions and applicable local codes.
If an upgrade requires new wiring, gas work, plumbing changes, or duct modifications, get an installation quote before finalizing your budget. Use qualified professionals for work that requires specialized knowledge or licensing.
Step 8: Compare Total Costs Before Buying
The purchase price is only one part of an appliance upgrade. Delivery, installation, removal of old appliances, accessories, and possible connection changes can significantly affect the final cost.
Use this checklist when comparing models:
- Purchase price and applicable taxes
- Delivery and installation charges
- Old appliance removal or recycling fees
- Required hoses, connectors, mounting kits, or accessories
- Electrical, plumbing, gas, or ventilation modifications
- Warranty coverage and service availability
- Estimated operating costs and replacement-part availability
Compare the total cost of ownership rather than choosing the lowest advertised price. A more efficient appliance may offer savings over time, but the payback depends on its upfront premium and actual usage.
Step 9: Install and Test Each New Appliance
Once the appliance arrives, inspect it before installation and confirm that the delivered model matches your order. Check for visible damage, missing parts, and installation requirements that may have been overlooked during planning.
After installation:
- Confirm that the appliance is level, stable, and correctly connected.
- Follow the manufacturer’s setup and first-use instructions.
- Check for leaks, unusual noises, error messages, or unexpected movement.
- Test the essential functions using the recommended initial cycle or procedure.
- Register the product if required for warranty benefits, and save the receipt and installation documents.
- Keep the user manual and model number available for future maintenance.
Do not use a new appliance if you notice a gas smell, exposed wiring, water leaking near electrical components, or another potentially dangerous installation issue. Shut it down when safe to do so and contact a qualified professional.
Step 10: Maintain Your Upgraded Appliances
Regular maintenance helps protect your investment and can prevent avoidable performance problems. Follow the maintenance schedule provided by each manufacturer rather than applying the same cleaning method to every appliance.
- Clean refrigerator door seals and follow the recommended condenser-coil maintenance instructions.
- Clean dishwasher filters and inspect spray arms as directed by the manufacturer.
- Remove cooking residue from ranges and cooktops using approved cleaners.
- Clean or replace range-hood filters according to the filter type and manufacturer’s instructions.
- Inspect accessible hoses and connections periodically for wear or leaks.
- Install software updates for connected appliances when appropriate and supported.
Avoid abrasive cleaners or unapproved chemicals that can damage finishes, seals, sensors, or cooktop surfaces.
Final Tips for Upgrading Kitchen Appliances Without Remodeling
The most effective appliance upgrade plan begins with your existing kitchen layout, household needs, and budget. Measure carefully, prioritize appliances that are failing or inefficient, compare operating costs, and confirm installation requirements before buying.
Choose finishes and features that work with your current cabinets and countertops, and upgrade in stages if that helps manage expenses. With thoughtful planning, you can improve your kitchen’s appearance, convenience, and efficiency without committing to a full renovation.
Common Kitchen Appliance Upgrade Mistakes to Avoid
Most expensive upgrade mistakes happen before the appliance is ever switched on. They come from incomplete measurements, assumed utility compatibility, feature-driven buying, or installation details that were never checked.
- Buying before measuring. Nominal width is not enough; check height, depth, required gaps, door swing, and the delivery path.
- Assuming the old connection works for the new appliance. A replacement can need a different circuit, plug, water line, vent, trim kit, gas connector, or mounting setup.
- Ignoring the manufacturer installation guide. Retail listings rarely include every clearance or utility detail needed for a safe installation.
- Choosing by feature count. Extra modes have little value if the racks, capacity, controls, or daily workflow are wrong.
- Buying smart features without checking the ecosystem. A connected appliance can become frustrating if the app, Wi-Fi requirement, account, or platform does not fit your home.
- Using a countertop microwave as a built-in without approval. Only install the appliance in a cabinet or enclosed configuration if the manufacturer specifically permits it with the required clearances or kit.
- Forgetting operating and service costs. Filters, proprietary accessories, repairs, energy, water, and service availability affect long-term value.
- Replacing everything at once without a plan. A phased upgrade can protect the budget and reduce unnecessary changes when only one or two appliances are actually limiting the kitchen.
- Skipping haul-away planning. Large appliances, especially refrigerant-containing products, need an appropriate removal or recycling route.
- Letting finishes override function. A perfectly matched suite is not a good deal if the refrigerator layout, dishwasher racks, or oven controls do not suit the household.
I avoid these problems by treating the kitchen as an installation project first and a shopping project second. Once fit, utilities, and workflow are correct, choosing the appliance becomes much easier.
Final Verdict: Upgrade Kitchen Appliances Around the Way You Actually Live
The best kitchen appliance upgrade is the one that makes a repeated task easier without creating a new installation, maintenance, or space problem. I would start with the clearest need, verify the opening and utilities, compare the features that affect everyday use, and budget for the full installed cost rather than the sticker price alone.
A modern kitchen does not need every appliance to be smart, premium, or brand-matched. It needs reliable food storage, practical cooking, effective ventilation, manageable cleanup, and appliances that fit the household. Upgrade one problem at a time, and the kitchen becomes more useful without turning every replacement into a full remodel.
Frequently Asked Questions
What kitchen appliance should I upgrade first?
Start with the appliance that is unreliable, unsafe, too small, too noisy, expensive to repair, or causing the most daily frustration. If everything works, upgrade the category where a new feature will save the most time or space.
Should I replace all my kitchen appliances at the same time?
Not necessarily. Replacing in stages spreads out cost and lets you evaluate each change. Replacing multiple units together can make sense when cabinetry, counters, flooring, electrical work, or finishes are being changed at the same time.
What should I measure before buying a refrigerator or dishwasher?
Measure the opening width, height, and depth, plus required ventilation clearances, door or drawer swing, surrounding cabinets, and the complete delivery path. Then compare those measurements with the manufacturer installation guide.
How do I know whether an appliance is energy efficient?
Use the EnergyGuide label to compare estimated energy use and operating cost, and look for ENERGY STAR certification where that product category is covered. Compare models of similar size and function.
Do I need special cookware for an induction cooktop?
Yes. Induction requires cookware that works with a magnetic field. A simple check is whether a magnet sticks firmly to the flat base of the pan, although you should still follow the cooktop and cookware manufacturer guidance.
Will I need an electrical upgrade for induction?
Possibly. Full-size induction cooktops and ranges can require a higher-capacity circuit than the kitchen currently has. Check the exact installation instructions and have a qualified electrician confirm the circuit and panel capacity before ordering.
Are smart kitchen appliances worth it?
They can be if remote status, alerts, diagnostics, voice control, or automation solve a real need. I would not pay extra for connected features unless the app, platform, privacy settings, and long-term software support are acceptable.
Is a convection oven the same as an air fryer?
They both use moving hot air, but an air fryer usually uses a smaller cooking chamber and more concentrated airflow. A full-size convection oven handles larger meals and bakeware, while an air fryer is often faster for smaller crisping tasks.
Can I put a countertop microwave inside a cabinet?
Only if the microwave manufacturer specifically approves that installation and the required clearances or trim kit are used. Countertop-only models need the airflow described in their instructions and should not simply be enclosed.
How do I choose a quieter dishwasher?
Compare the published sound rating in dBA, but also look at cycle performance, drying, rack layout, filter design, and the sound character reported by reliable testing. Lower dBA generally means quieter operation when measurements are comparable.
What should I do with an old refrigerator?
Arrange collection through a retailer, municipal program, utility program, or qualified recycler. Refrigerant must be properly recovered before final disposal, so do not treat the refrigerator like ordinary bulky trash.
How can I upgrade a kitchen without a full remodel?
Start with the appliance causing the most friction, keep the existing openings and utilities when practical, improve ventilation or lighting where needed, and use one or two countertop appliances only when they replace jobs you already do regularly.