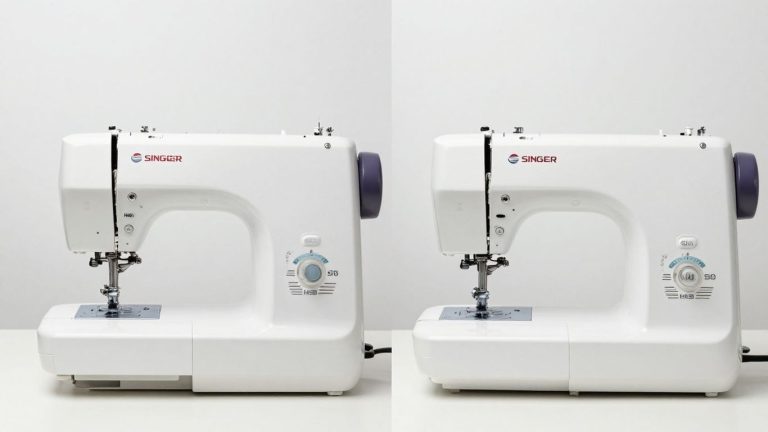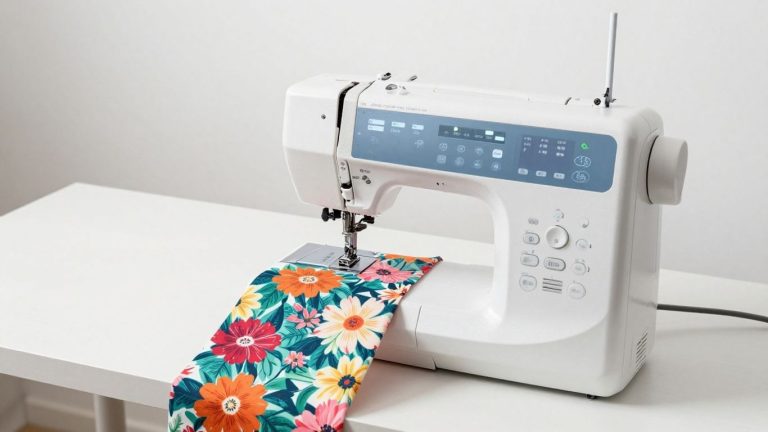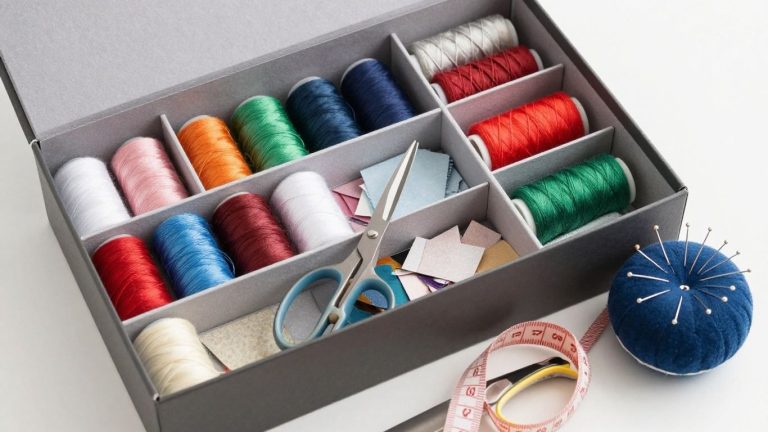
How to Wind a Bobbin on a Sewing Machine: Step-by-Step Guide
Learning how to wind a bobbin on a sewing machine is one of the first setup skills that makes every later seam easier. A correctly wound bobbin should use the exact bobbin style specified for your machine, follow the model-specific winding path, pass through the bobbin-winding tension guide, and fill evenly without loose loops or a heavy buildup on one side.
The overall process is similar on most home sewing machines, but the spool direction, bobbin-winder engagement, thread-tail method, speed control, and automatic stop can vary by model. In this guide, I show the safe general sequence I use, explain what each bobbin-winding part does, and troubleshoot the problems that cause uneven winding, loose thread, wobbling bobbins, and poor stitch quality later.
Key Takeaways
Bobbin winding is simple once the thread path and bobbin type are correct. Most problems I see start before the machine ever begins winding.
- Use the exact bobbin type specified for your sewing machine.
- Follow the machine’s dedicated bobbin-winding thread path.
- Seat the thread properly in the winding tension guide.
- Engage the bobbin winder exactly as the manual instructs.
- Start slowly and watch the first layers for even winding.
- Stop at the machine’s recommended fill level to avoid overfilling.
- Check that the finished bobbin is even, firm, and free of loose loops or tangles.
If the bobbin does not look right, rewind it before sewing. Tension adjustments are rarely the correct way to compensate for a badly wound bobbin.
Why Correct Bobbin Winding Matters
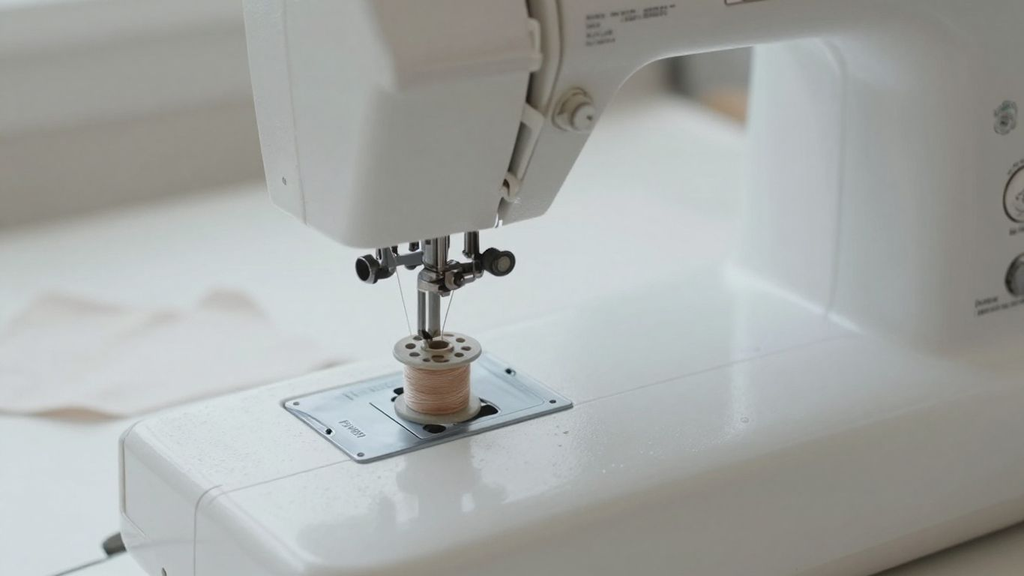
A standard lockstitch sewing machine forms each stitch by interlocking the upper thread with the bobbin thread below the needle plate. The bobbin does not create good stitches by itself, but it must release lower thread smoothly and predictably while the hook carries the upper-thread loop around it.
An uneven or loosely wound bobbin can create changing resistance as it unwinds. That can contribute to inconsistent stitch balance, thread breakage, noisy feeding, or tangles in the bobbin area. Before changing tension settings, I always confirm that the machine is threaded correctly and that the bobbin itself is the right type, properly wound, and inserted as the manual specifies.
If your finished stitches are already unbalanced, use my sewing machine tension guide after you have ruled out threading and bobbin setup problems.
Bobbin Winding Parts and Setup You Need to Know
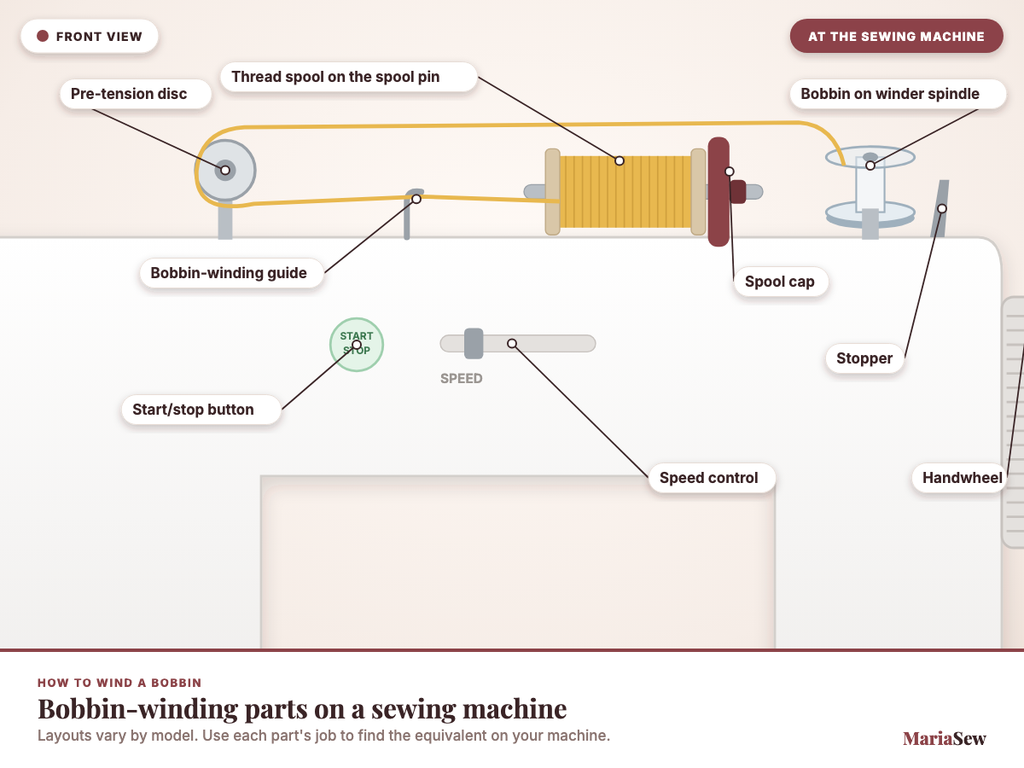
The exact layout changes from machine to machine, but the same group of parts appears on most domestic models. I identify these before I wind anything because it makes the instructions much easier to follow.
The Correct Sewing Machine Bobbin
Use the bobbin class, size, material, and style specified by the manufacturer. Two bobbins can look nearly identical and still sit differently on the winder or inside the bobbin case, so I never substitute a metal or plastic bobbin simply because it appears to fit.
Thread Spool and Spool Pin
The spool pin holds the thread supply while the bobbin fills. I fit the spool and spool cap the way the machine manual shows so the thread can unwind freely without snagging, jumping off the pin, or catching under an oversized cap.
Bobbin-Winding Thread Guide
The winding guide routes thread away from the spool and toward the tension area. I follow the arrows, numbers, or diagram printed on the machine rather than assuming the normal sewing path is correct.
Pre-Tension Disc or Bobbin-Winding Tension Guide
This part creates the controlled drag that helps the thread wind firmly and evenly onto the bobbin. If the thread only skims the disc instead of seating in it, the bobbin may fill with loose layers that later feed inconsistently.
Bobbin-Winder Spindle
The empty bobbin sits on this shaft during winding. I press it fully into position and engage the spindle exactly as directed so the bobbin rotates securely instead of wobbling or slipping.
Bobbin-Winder Stopper or Automatic Stop
Many machines use a stopper or sensor to end winding near the correct fill level, while others require the sewist to stop manually. I treat the manual as the final authority because overfilling can make the bobbin difficult to remove or insert.
Foot Controller, Start/Stop Button, or Speed Control
Machines start the winding motor in different ways. I begin at a controlled speed unless the manual specifies another method, watch the first several layers, and stop immediately if the thread piles up, loosens, or slips out of the winding path.
Bobbin Winding Parts & Setup Reference
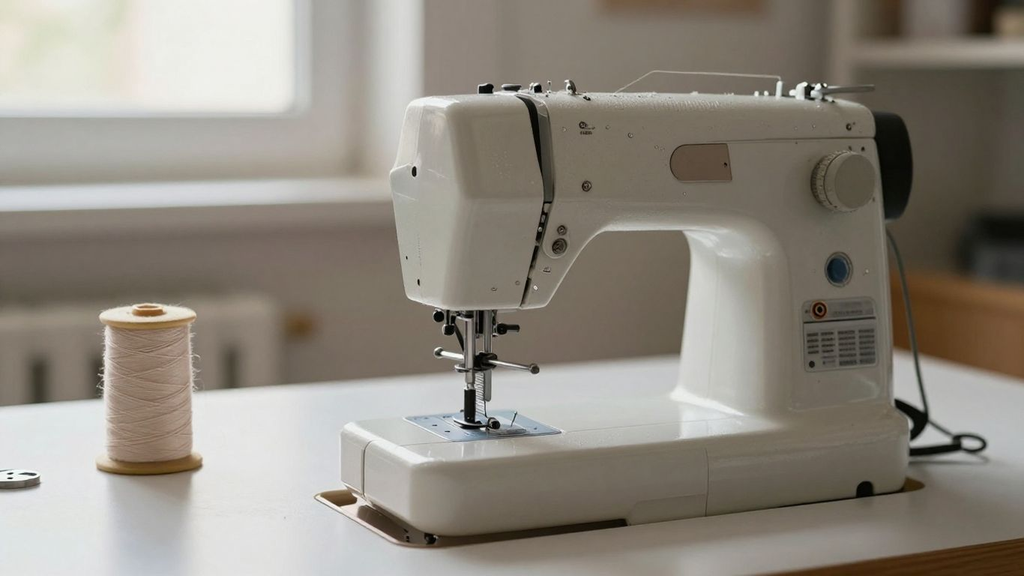
The sections above explain what each part does. This single reference table is useful when you are standing at the machine and need a quick checklist before winding.
Because machine layouts differ, use the function column to identify the equivalent part on your model rather than expecting every manufacturer to use the same name or position.
| Part / Feature | What It Does | What I Check Before Winding |
|---|---|---|
| Bobbin | Holds the lower thread | Correct class/style; clean; not cracked or warped |
| Thread spool | Supplies thread for winding | Mounted securely; thread unwinds without snagging |
| Spool cap / holder | Stabilizes the spool | Correct size and orientation for the spool |
| Winding thread guide | Routes thread toward the winder | Thread follows the printed/manual path |
| Pre-tension / winding tension disc | Controls winding tension | Thread is seated firmly in the guide/disc |
| Bobbin-winder spindle | Rotates the bobbin | Bobbin is fully seated and engaged |
| Winder stopper / sensor | Limits fill level on many machines | Moves freely; not forced past normal stop |
| Foot controller / start-stop | Starts winding | Use the method specified for the model |
| Speed control, if equipped | Limits or sets winding speed | Use a controlled speed unless manual directs otherwise |
Once those parts are identified, the actual winding process becomes much more predictable. The next section follows the common sequence while keeping model-specific differences explicit.
How I Test Sewing Machines and Bobbin Winding at MariaSew
I have more than 12 years of hands-on sewing experience, and I personally use the sewing machines and techniques I write about before I recommend them. When I test bobbin winding, I do not stop at whether the spindle turns. I look at how easy the thread path is to follow, how securely the bobbin seats, whether the tension guide controls the thread correctly, and whether the finished bobbin feeds cleanly during real sewing.
I wind several bobbins rather than one, using ordinary all-purpose thread first and then repeating the test after rethreading from scratch. I watch the first layers closely, check for side-heavy winding, loose loops, thread snags, premature stopping, and wobble, then sew test seams on stable cotton to see whether the bobbin releases thread consistently in the machine.
- Setup repeatability. I unwind and rethread the bobbin-winding path to see whether the guides are easy to identify and repeat correctly.
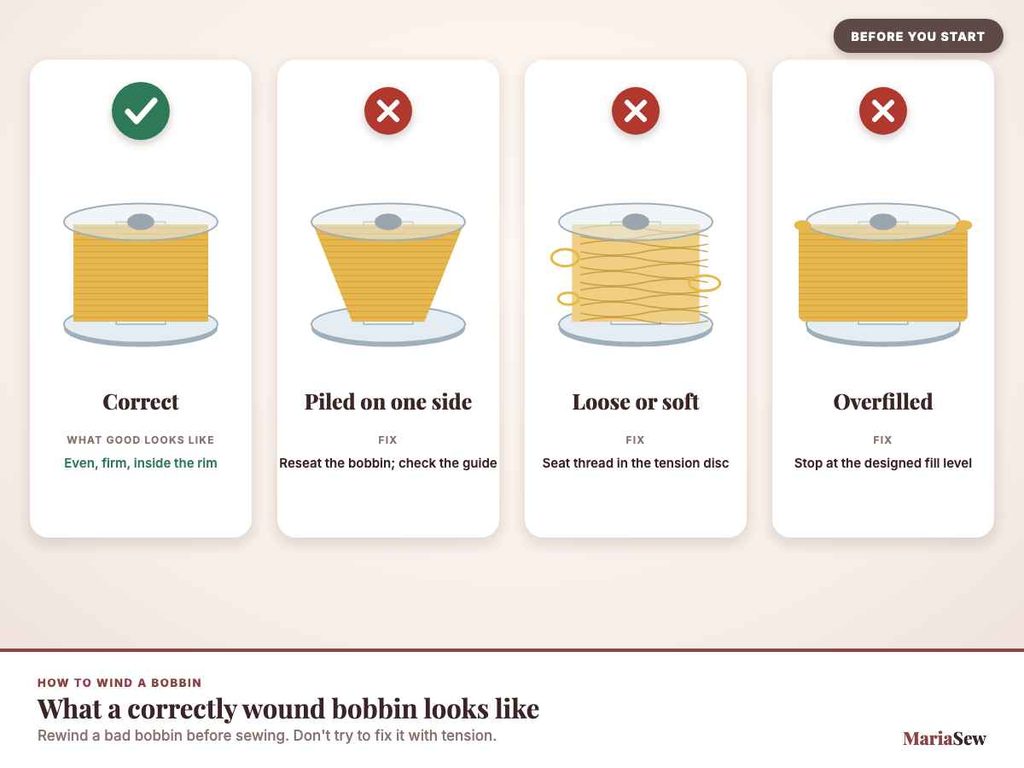
- Winding evenness. I check whether the thread fills across the bobbin evenly instead of building a cone or heavy band at one flange.
- Thread firmness. The winding should be secure without loose loops, crushing, or obvious distortion of the bobbin.
- Winder engagement. I check whether the spindle, clutch, switch, or on-screen mode engages and disengages cleanly.
- Stop behavior. If the machine has an automatic stop, I verify that it leaves the bobbin within the intended fill level rather than packed past the rim.
- Sewing follow-up. I insert the bobbin using the model-specific direction, sew a test seam, and confirm that any stitch problem is not being caused by a bad wind or incorrect bobbin.
MariaSew’s published editorial standard explains that techniques are tested under real conditions and recommended machines are personally used before publication.
How to Wind a Bobbin on a Sewing Machine: Step by Step
These steps describe the common process used by many home sewing machines. Your manual always takes priority for the exact spool direction, winding path, bobbin orientation, start method, speed setting, and stopping procedure.
Step 1: Confirm the Correct Bobbin Type
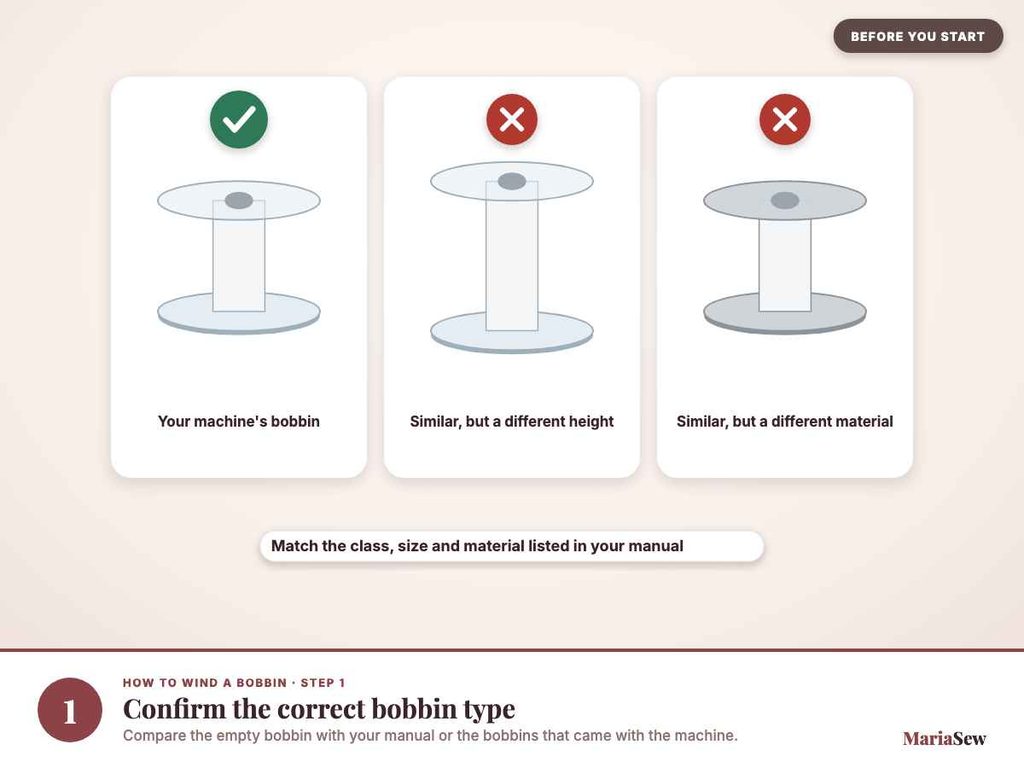
Before threading anything, I compare the empty bobbin with the machine manual or the bobbins supplied with the machine. I do not substitute by appearance alone because the wrong height, shape, or material can affect both winding and the way the bobbin fits in the machine.
Step 2: Place the Thread Spool on the Spool Pin
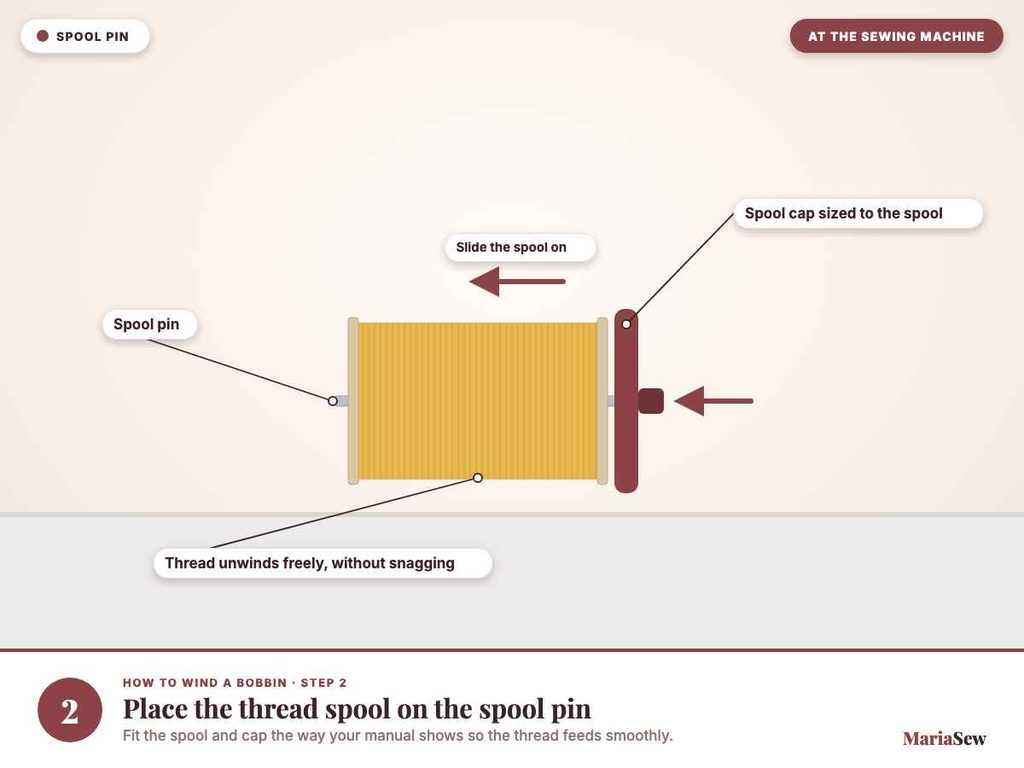
I install the spool in the direction the manual shows and use the correct spool cap or holder if the model requires one. The thread should unwind freely without catching on the spool edge, cap, pin, or nearby machine parts.
Step 3: Follow the Bobbin-Winding Thread Path
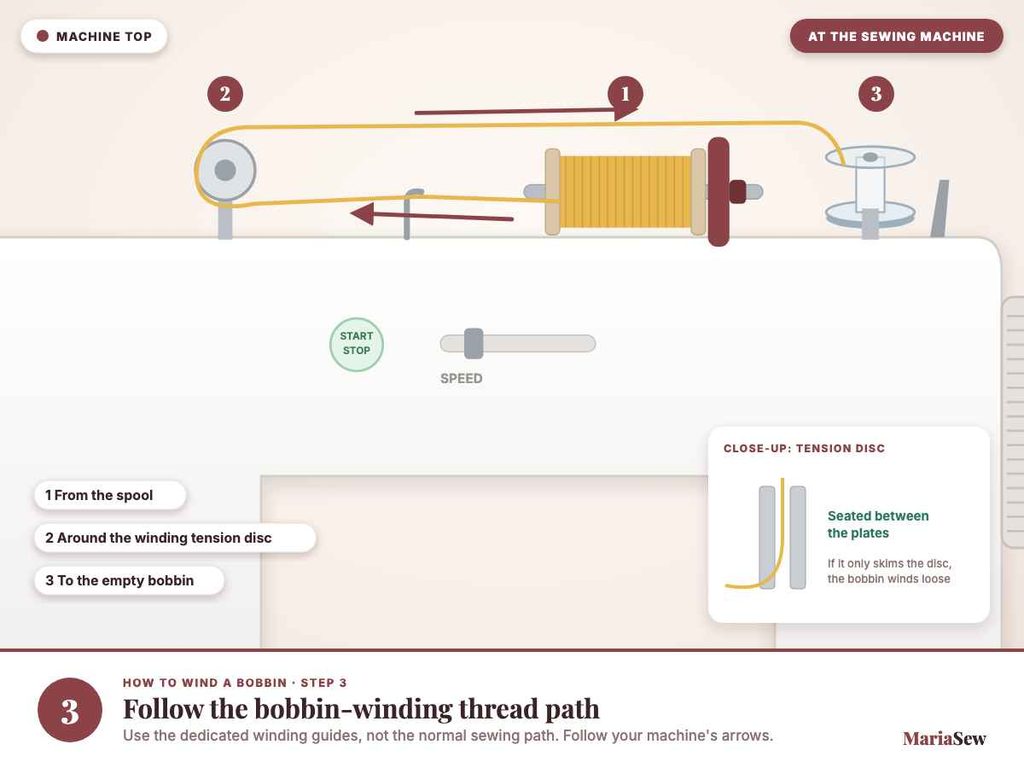
I route the thread through the dedicated bobbin-winding guide and around or through the pre-tension disc exactly as marked. This is the most important setup step for an even, firm wind, so I stop and reseat the thread if it feels loose in the guide.
Step 4: Put the Empty Bobbin on the Winder Spindle
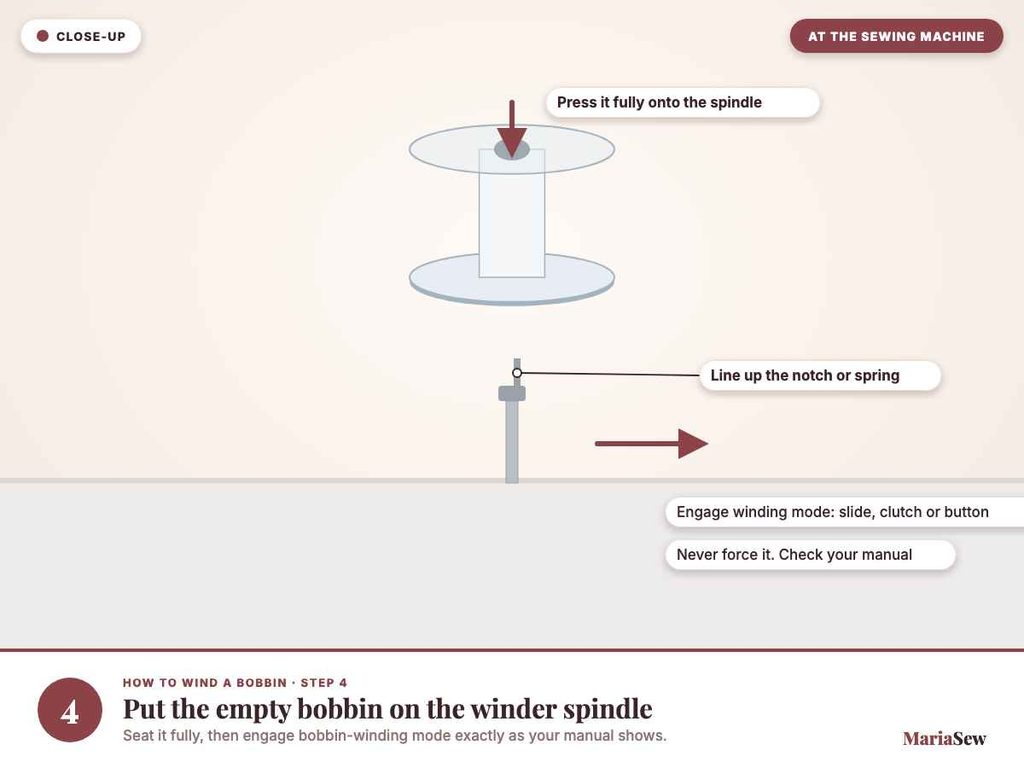
I place the bobbin fully onto the winder shaft, line up any notch or spring if the design uses one, and engage bobbin-winding mode according to the manual. I never force a spindle or clutch that does not move easily into its normal position.
Step 5: Secure the Starting Thread Tail
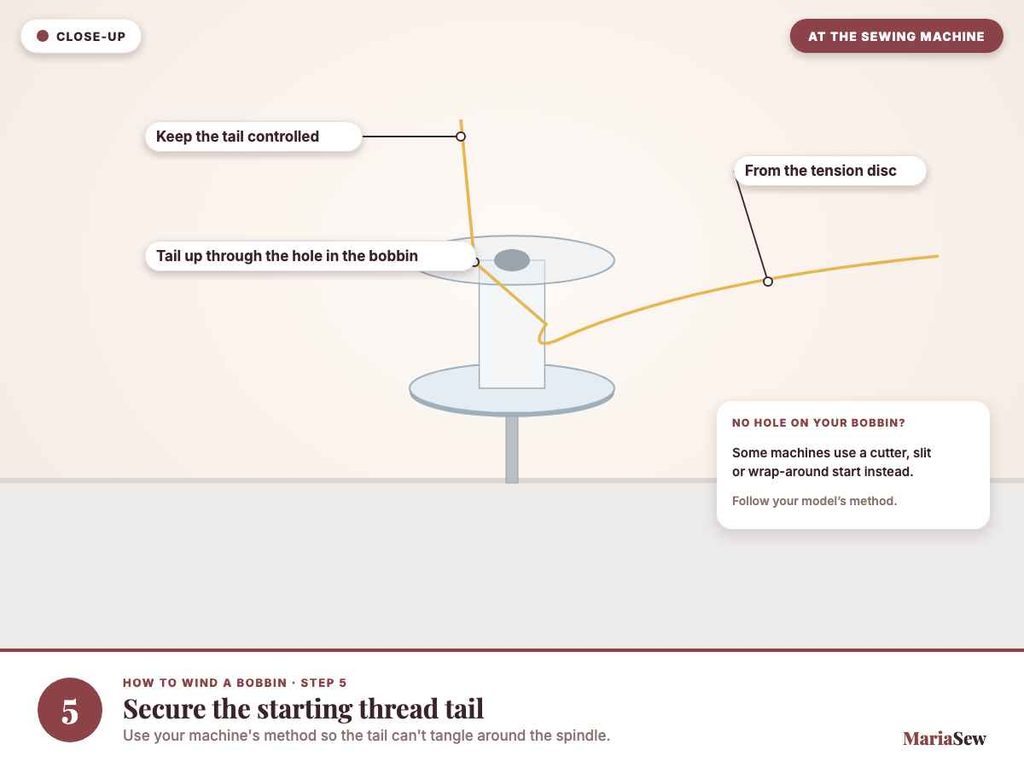
Some machines instruct me to pass the thread through a hole in the bobbin, while others use a cutter, slit, or wrap-around method. I follow the model-specific method and keep the starting tail under control so it cannot tangle around the spindle.
Step 6: Wind the First Few Layers Slowly and Check the Fill
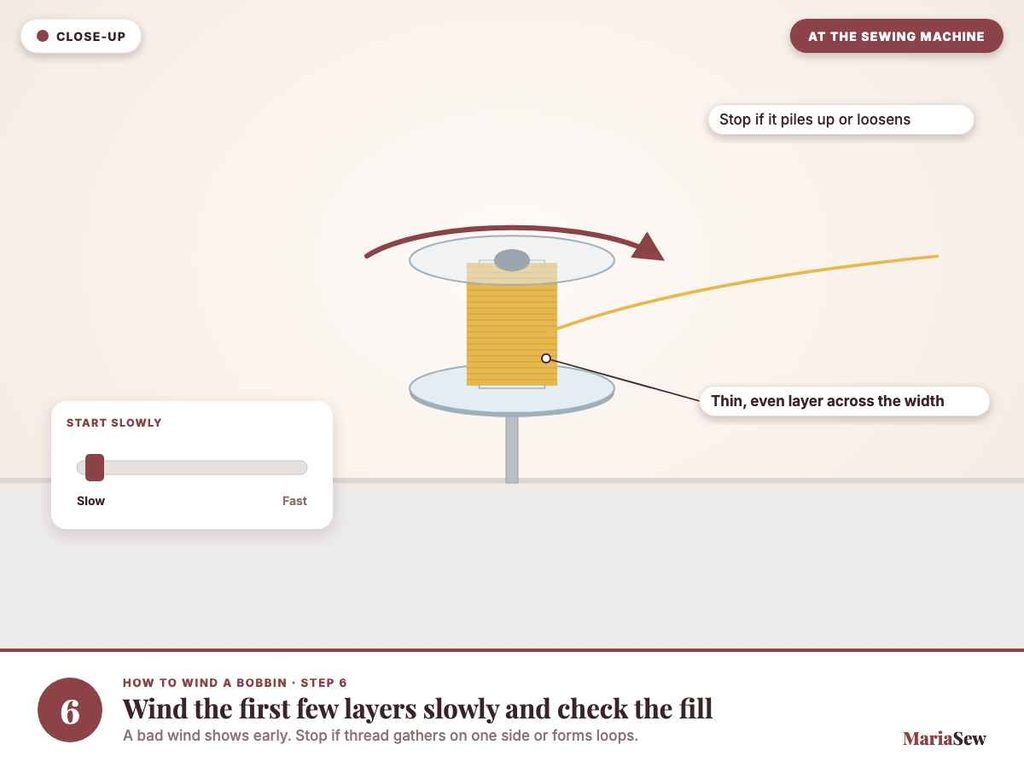
I start winding at a controlled pace and watch the first several turns. The thread should begin stacking evenly across the bobbin rather than gathering against one side, forming loose loops, or riding outside the bobbin flange.
Step 7: Continue Winding to the Correct Fill Level
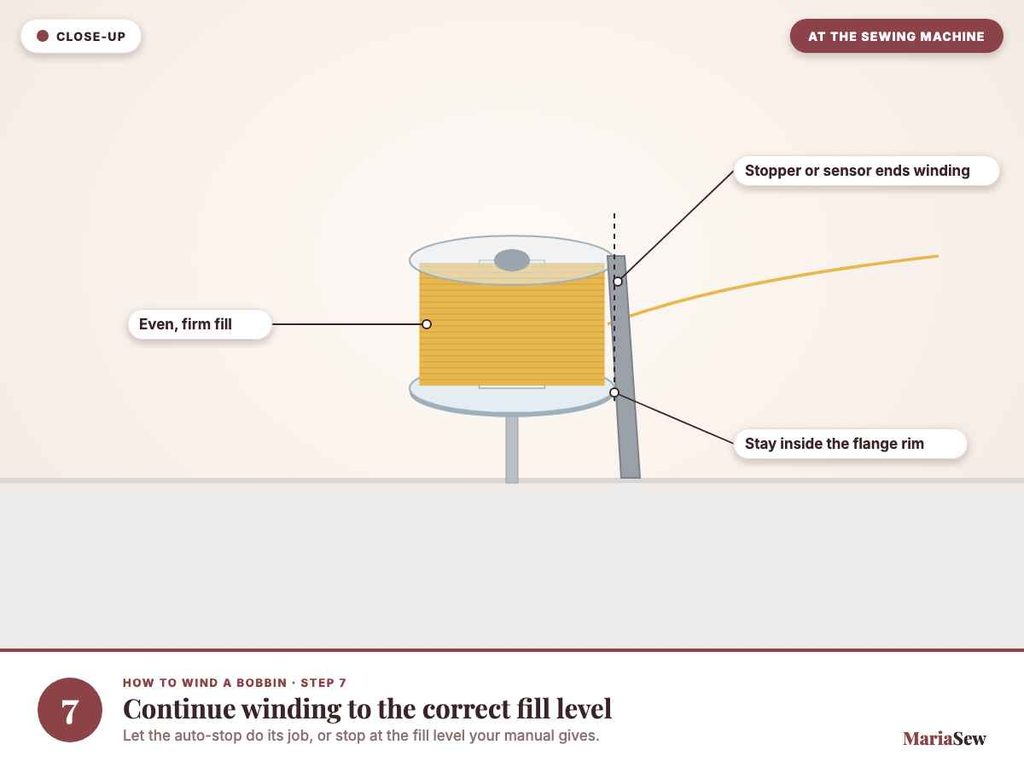
Once the winding looks stable, I continue at the speed recommended by the manufacturer. If the machine has an automatic stop, I let that mechanism do its job; otherwise I stop at the fill level stated in the manual and avoid winding past the bobbin rim.
Step 8: Stop, Trim, Remove, and Inspect the Bobbin
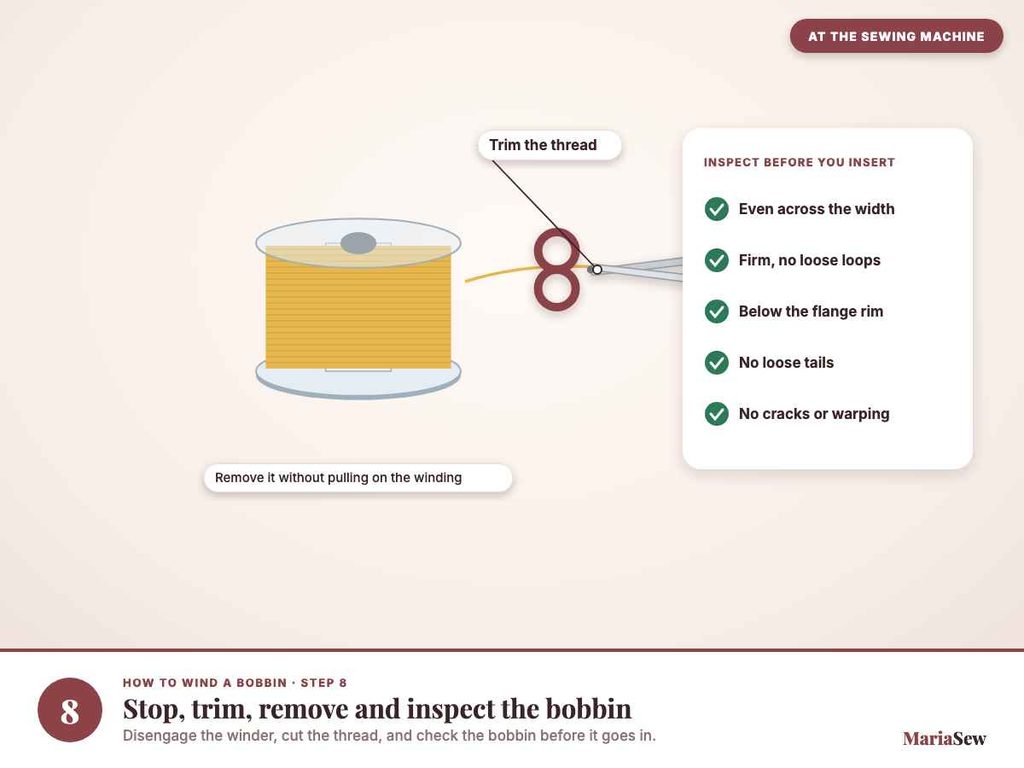
I disengage the bobbin winder as directed, cut the thread, and remove the bobbin without pulling on the winding. Before inserting it, I check for an even cylindrical fill, firm layers, no loose tails, no cracks, and no obvious bulge on one side.
What to Do After Winding the Bobbin
A well-wound bobbin is only half of the lower-thread setup. The bobbin still has to be inserted in the correct direction and routed through the bobbin-case or drop-in tension path exactly as the machine requires.
Top-loading and front-loading machines often use different insertion directions and thread paths, so I do not rely on a universal clockwise or counterclockwise rule. I check the arrows on the machine or the manual, then pull the thread through the specified slot or tension spring before bringing the lower thread up if the model requires it.
If you are setting up the whole machine from scratch, continue with my step-by-step guide to threading a sewing machine. If you are unfamiliar with the winder, case, hook, or feed area, the sewing machine parts guide explains what each component does.
Does Bobbin Winding Differ on Mechanical and Computerized Sewing Machines?
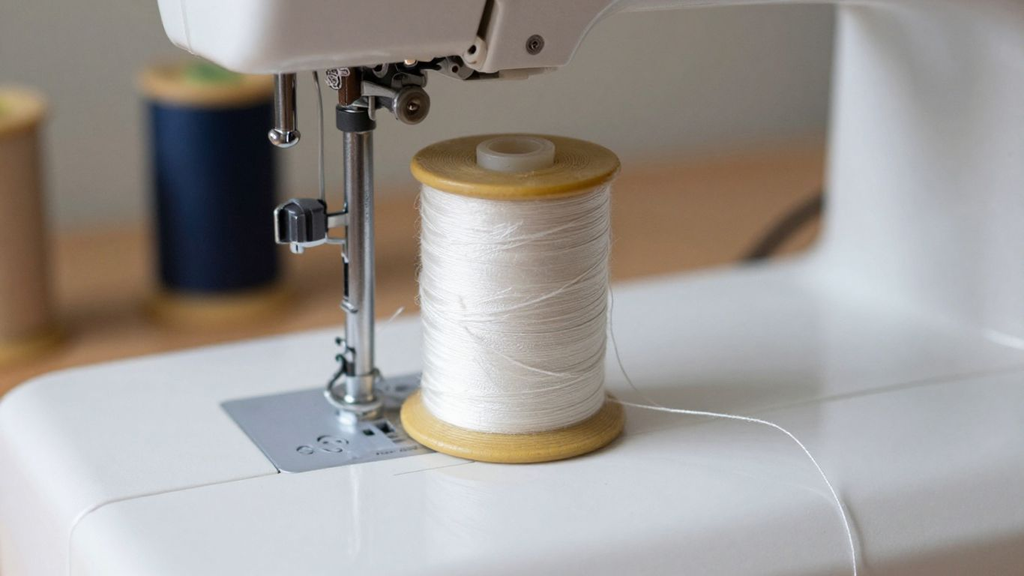
The core principle is the same on both: the correct spool supplies thread, the thread passes through a winding tension path, and the bobbin rotates on a dedicated winder spindle. The main differences are how winding mode is engaged, how speed is controlled, and how the machine stops when the bobbin is full.
A mechanical machine may use a sliding spindle, handwheel clutch, or foot controller, while a computerized model may automatically disable the needle drive, use a start/stop button, show a winding message, or control speed electronically. None of those differences changes the need to use the correct bobbin and follow the exact winding path.
If you are choosing between machine types, my mechanical vs. computerized sewing machine guide explains how the control systems differ beyond bobbin winding.
Common Bobbin Winding Problems and How to Fix Them
When a bobbin winds badly, I correct the setup before I touch sewing tension. The fastest approach is to stop, identify what the winding looks like, and recheck the few parts that actually control the winding process.
Thread piles up on one side of the bobbin.
Stop and confirm that the bobbin is fully seated, the winder guide is being used correctly, and the thread is actually inside the pre-tension area rather than sliding beside it.
The bobbin winds loosely or feels soft.
Rethread the winding path and make sure the thread is seated firmly in the winding tension guide. Do not tighten the sewing-machine tension dial to fix a winding problem unless the manual specifically instructs it.
The bobbin wobbles while winding.
Check that it is the correct bobbin type and that it is pressed fully onto the spindle. A cracked, warped, or incorrect bobbin should be replaced rather than forced.
Thread breaks during winding.
Inspect the spool for snags, confirm the spool cap is appropriate, recheck the guide path, and look for rough edges on the bobbin. Restart at a controlled speed.
The thread slips out of the tension guide.
Stop the machine and re-seat the thread. The guide must control the thread consistently for the bobbin to fill firmly and evenly.
The bobbin winder will not start.
Confirm the machine is in bobbin-winding mode, the spindle is fully engaged, and the start/stop or foot-controller method matches the manual. Do not force the handwheel or winder mechanism.
The machine stops before the bobbin looks full.
Check whether the bobbin is seated correctly and whether the stopper or sensor is being triggered early. A different-looking but incorrect bobbin can also confuse the fill position.
The wound bobbin causes tangles when sewing.
Recheck bobbin type, winding evenness, insertion direction, thread path, and upper threading before changing tension. A problem that looks like a bobbin issue can originate in the upper thread path.
If the winder spindle is bent, the mechanism grinds, the handwheel stays unusually stiff, or the machine repeatedly fails after a correct setup, I stop testing and use the manufacturer’s service guidance rather than forcing the mechanism.
For sewing-stage tangles after a bobbin is installed, use my sewing machine jamming troubleshooting guide. If the lower thread is pulling visibly onto the top surface, see why bobbin thread shows on top and how to fix it.
What Thread Should You Use in a Bobbin?
For normal garment sewing, repairs, quilting cotton, and everyday seams, the same good-quality all-purpose thread used on top is often a practical bobbin choice. The important point is that the thread suits the machine, needle, fabric, and project, and that it feeds smoothly through the winding path.
Embroidery and specialty machines can be different. Some manufacturers specify dedicated bobbin thread, a particular thread weight, or pre-wound bobbins for certain applications, so I follow the machine and project instructions instead of assuming the upper and lower threads must always match.
How Full Should a Sewing Machine Bobbin Be?
A bobbin should be filled to the level intended by the machine, not packed past the flange. On machines with an automatic bobbin-winder stop, I let the mechanism stop the winding and then inspect the fill. On manual-stop machines, I follow the fill level shown in the manual.
Overfilling can make the bobbin difficult to remove or prevent it from seating correctly in the bobbin area. Underfilling is not dangerous, but it simply gives you less sewing time before the lower thread runs out.
Can You Use Pre-Wound Bobbins Instead?
Sometimes. Pre-wound bobbins can save time, especially for embroidery or repetitive sewing, but only when the bobbin class, dimensions, material, and thread specification are compatible with the machine. A pre-wound bobbin that physically fits is not automatically approved for the model.
I check the manufacturer’s manual or accessory information before using pre-wound bobbins. If the machine specifies only a particular proprietary or class-type bobbin, I stay with that requirement.
Common Bobbin Winding Mistakes to Avoid
Most bobbin winding mistakes happen because the setup looks simple enough to improvise. I get better results by treating the winding path as its own threading system and checking it before the motor starts.
- Using a bobbin that only looks compatible. Match the exact bobbin type specified for the machine instead of substituting by diameter alone.
- Skipping the bobbin-winding tension guide. A missed pre-tension disc is one of the easiest ways to end up with loose, uneven winding.
- Using the normal upper-thread path automatically. Many machines use a separate route for winding, so follow the dedicated arrows or manual diagram.
- Starting too fast without watching the first layers. A bad wind becomes obvious early. Stop before the bobbin fills incorrectly.
- Holding or guiding the thread with your fingers near moving parts. Use the machine’s guides and keep hands clear of the rotating spindle unless the manual instructs a specific starting-tail method.
- Overfilling the bobbin. Stop at the designed fill level rather than winding thread above the bobbin flange.
- Trying to fix a bad wind with sewing tension. Rewind the bobbin correctly before changing upper or bobbin-case tension.
- Forcing a bobbin-winder spindle or clutch. If it will not engage or disengage normally, recheck the instructions and stop if the mechanism feels stuck.
- Ignoring a cracked or warped bobbin. Replace damaged bobbins because they can wobble, wind unevenly, or sit incorrectly in the bobbin case.
- Skipping the test seam. After inserting a newly wound bobbin, sew a short line on scrap fabric before starting the real project.
If you are completely new to machine setup, a beginner-friendly machine with clear threading arrows and an easy top-loading bobbin can reduce the learning curve. My best sewing machines for beginners guide compares current models I would actually consider for a first machine.
Final Answer: How to Wind a Bobbin Correctly
To wind a bobbin correctly, use the bobbin specified for your sewing machine, install the thread spool securely, follow the dedicated bobbin-winding path, seat the thread in the winding tension guide, place the bobbin fully on the winder spindle, and engage winding mode exactly as your manual directs. Start under control, watch the first layers, and stop at the machine’s designed fill level.
The finished bobbin should be evenly and firmly wound before it goes into the machine. If it is loose, lopsided, overfilled, cracked, or the wrong type, correct that problem first instead of trying to compensate with sewing tension. Once the bobbin is inserted correctly, sew a short test seam on scrap fabric before moving to your project.
Frequently Asked Questions
Why does a bobbin need to be wound before sewing?
The bobbin holds the lower thread used in a lockstitch. Winding prepares a controlled supply of thread so the hook system can draw from it while the upper and lower threads interlock around the fabric.
Can I use any bobbin that fits my sewing machine?
No. Use the bobbin class, dimensions, and material specified by the manufacturer. Similar-looking bobbins can differ enough to affect winding, insertion, and stitch formation.
Why is my bobbin winding unevenly on one side?
The most common causes are an incorrectly seated bobbin, a missed winding guide or pre-tension disc, or the wrong bobbin type. Stop and recheck the winding path before continuing.
Why is my bobbin thread loose after winding?
Loose winding usually means the thread was not seated correctly in the dedicated winding tension guide or disc. Rethread the winding path rather than changing normal sewing tension first.
How fast should I wind a bobbin?
Use the speed and control method recommended by your machine. I start at a controlled pace to confirm the first layers are even, then continue normally once the winding looks stable.
How full should I wind a bobbin?
Stop at the machine’s intended fill level or when its bobbin-winder stop activates. Do not wind thread past the bobbin flange.
Can I wind a bobbin while the machine is threaded for sewing?
It depends on the machine. Some models allow simultaneous or supplemental bobbin winding, while others require a separate setup. Follow the manual instead of assuming the normal upper thread can stay in place.
Does the needle move while winding a bobbin?
On many machines, engaging the bobbin winder disables or disconnects normal needle movement. Designs vary, so use your model’s instructions and do not force the handwheel or clutch.
Can I use the same thread in the bobbin and on top?
For many general sewing projects, yes. Embroidery and specialty applications may call for a dedicated bobbin thread or specific weight, so follow the machine and project instructions.
Can I reuse thread from a badly wound bobbin?
You can unwind and reuse thread if it is still clean and undamaged, but I discard thread that is frayed, knotted, stretched, or repeatedly snagged during the failed winding.
Why will my bobbin winder not start?
Check that the bobbin is fully seated, the winder is engaged, the machine is in the correct mode, and you are using the correct start method. If the mechanism is stiff or makes abnormal noise, stop rather than forcing it.
What should a correctly wound bobbin look like?
It should look evenly filled across its width, with firm layers, no large gaps, no loose loops, no thread outside the flange, and no pronounced mound on one side.