How to Insert a Bobbin in a Sewing Machine: Top-Loading & Front-Loading Guide
The most common bobbin mistake is carrying a rule over from one machine to another. After 12 years of sewing, I’ve learned that bobbin direction isn’t universal, so a rule remembered from a different machine can be wrong for the one in front of you. Learning how to insert a bobbin in a sewing machine is one of the first setup skills that makes every later sewing step easier. The basic idea is simple: use the correct bobbin, place it in the holder or removable case, route the thread through the machine’s lower-thread guide, and make sure it feeds smoothly before sewing.
This guide covers both top-loading and front-loading bobbin systems, explains what to check before you sew, and shows how to troubleshoot tangles, missed thread paths and seating problems without changing tension too early. Your machine’s manual always has the final say on direction and thread path.
Quick Answer: How Do You Insert a Bobbin in a Sewing Machine?
Switch the machine off, raise the needle fully, open the bobbin area, and use the machine’s diagram or manual to confirm the correct bobbin type, orientation, and thread path. For a top-loading machine, the bobbin usually drops into a fixed holder; for a front-loading machine, it usually goes into a removable bobbin case first.
Pull the thread through the indicated slit or tension path, make sure the bobbin or case sits securely, then close the cover and test the machine on scrap fabric. Do not assume every bobbin should unwind clockwise or counterclockwise because the correct direction depends on the exact model.
Key Takeaways
Bobbin insertion becomes easy once you stop memorizing one universal direction and start reading the machine’s own lower-thread path. These are the points I check every time I switch machines.
- Use the exact bobbin type specified for your sewing machine.
- Turn the machine off before working near the bobbin area.
- Raise the needle fully before opening or removing the bobbin system.
- Follow the machine’s arrows, diagram, or manual for the correct bobbin direction and thread path.
- Seat the bobbin or bobbin case securely without forcing it.
- Rethread the machine correctly before adjusting thread tension.
- Test the setup on scrap fabric before starting your project.
If a bobbin does not sit naturally or the thread does not move through the marked path smoothly, I stop and recheck the manual instead of forcing the part into place.
What Is a Bobbin and Why Does It Matter?
A bobbin is the small spool that supplies the lower thread for most domestic lockstitch sewing machines. As the needle carries the upper thread down through the fabric, the hook mechanism catches it around the bobbin area so the upper and lower threads can lock together inside the fabric layers.
That means the bobbin is not just a storage spool. Its size, winding quality, orientation, case or holder, and lower-thread tension path all affect how consistently thread leaves the bobbin while the stitch is forming.
If the names of the parts are still unfamiliar, read MariaSew’s Sewing Machine Parts Explained before working around the bobbin case, needle plate, hook, feed dogs, and presser foot.
How I Test Sewing Machines and Bobbin Systems at MariaSew
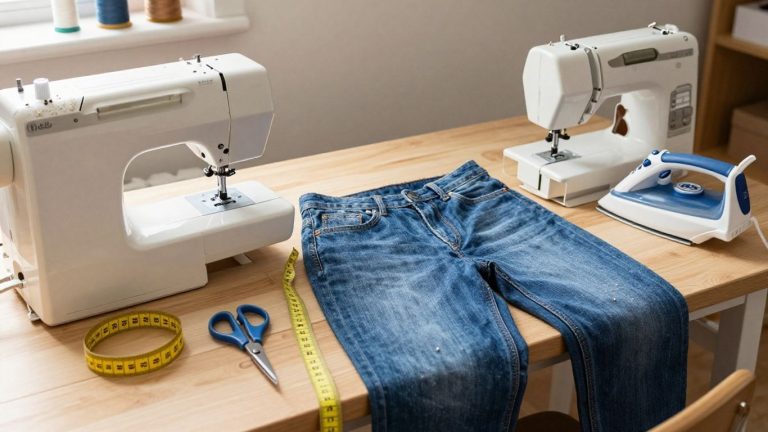
I personally use the sewing machines and setup methods I explain on MariaSew. With more than 12 years of sewing experience, I do not judge a bobbin system by whether it looks simple in a photo. I load it repeatedly, change bobbins, sew real fabric, remove and reinstall the case or cover, and watch what happens when the thread path is even slightly wrong.
For bobbin testing, I use ordinary cotton first, then repeat the setup on lighter fabric, denim or layered seams, and basic quilting cotton. I check whether the bobbin seats consistently, whether the thread slips cleanly under its guide or tension spring, whether the first stitch starts without nesting, and whether the system remains easy to use after several bobbin changes rather than only on the first attempt.
- Correct fit. I verify that the bobbin is the correct type for the machine and sits flat or securely in its removable case.
- Thread path. I follow the manual exactly and check that the lower thread enters every slot, guide, or tension spring it is supposed to use.
- First-stitch behavior. I sew a short test seam and watch for thread nests, skipped stitches, loose loops, snagging, or sudden resistance.
- Repeatability. I remove and reinstall the bobbin several times because a system that works only once is not genuinely beginner-friendly.
- Troubleshooting order. I reseat the bobbin and rethread the upper path before changing tension, because setup mistakes can imitate tension faults.
- Model differences. I do not transfer clockwise, counterclockwise, or quick-set instructions from one machine to another unless the manuals agree.
MariaSew’s editorial policy is that sewing-machine recommendations and techniques are based on hands-on use and real testing, not just manufacturer descriptions.
What You’ll Need Before Inserting a Bobbin
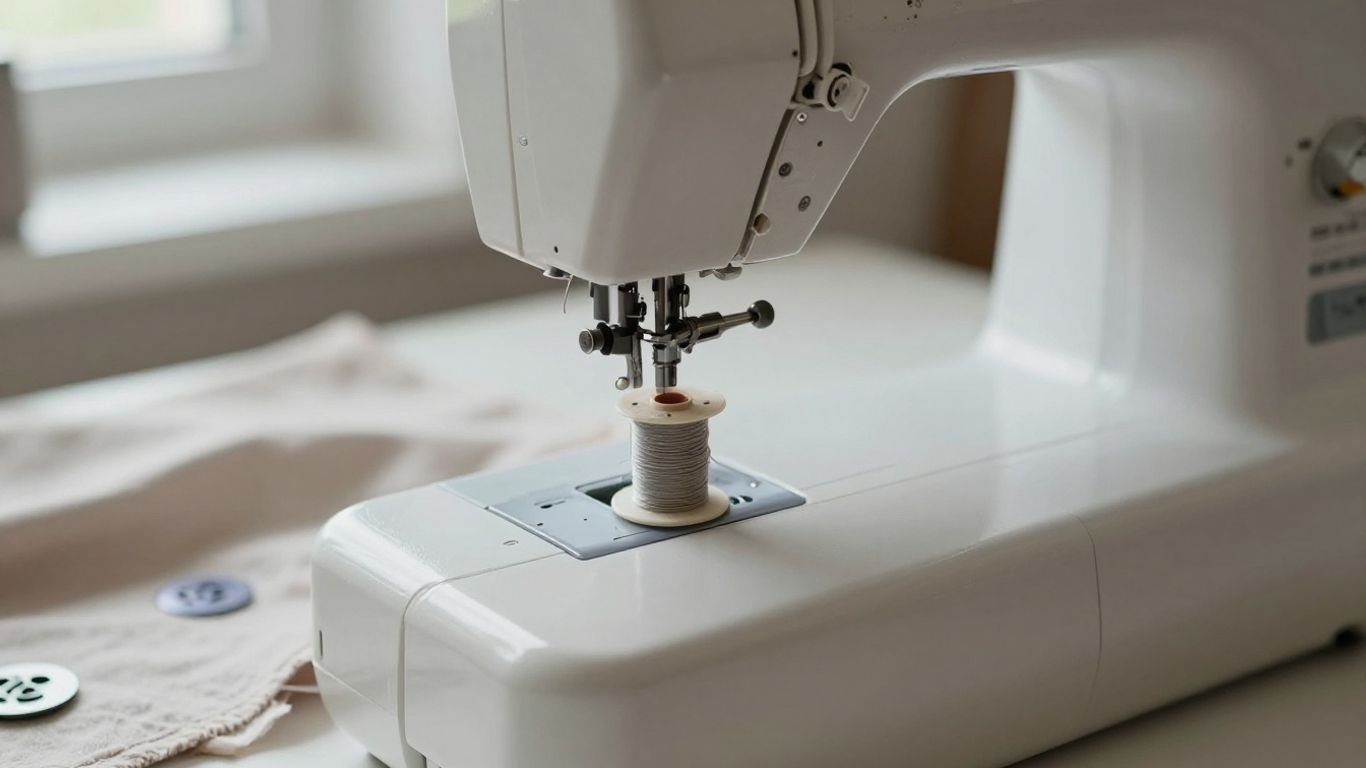
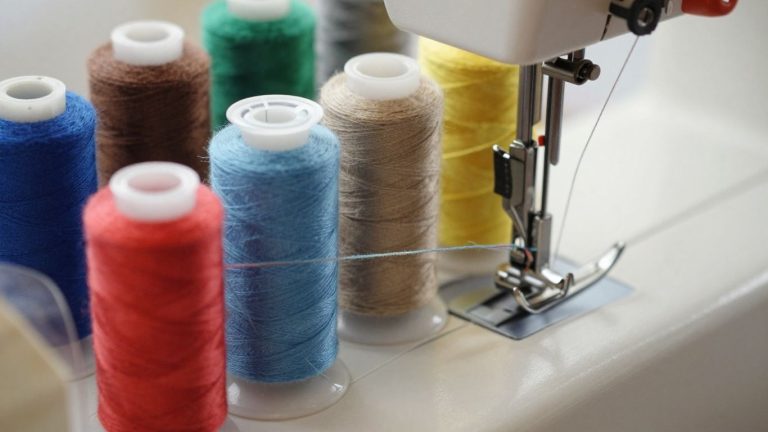
Before I open the bobbin area, I gather the correct wound bobbin, the machine manual or threading diagram, matching sewing thread, and a piece of scrap fabric for testing. The bobbin should be wound evenly, without loose loops, crossed thread, or a heavy mound on one side.
I also check that the machine is stable and the needle is not bent or damaged. If the bobbin area has visible lint, I remove only accessible lint with the brush or cleaning method recommended in the manual instead of poking into the hook area with a sharp tool.
If you are setting up a machine from the beginning, MariaSew’s How to Thread a Sewing Machine explains the full upper-thread and lower-thread setup in one sequence.
Bobbin System Features to Identify Before You Start
Different machines may use similar-looking bobbins while handling them in very different ways. Before inserting anything, I identify these features so I know which instructions actually apply.
Correct Bobbin Type and Size
Use only the bobbin class or part type specified for your machine. A bobbin that is slightly too tall, too narrow, or shaped differently can change thread feed, rub against the case, sit unevenly, or damage stitch quality.
Top-Loading or Front-Loading Access
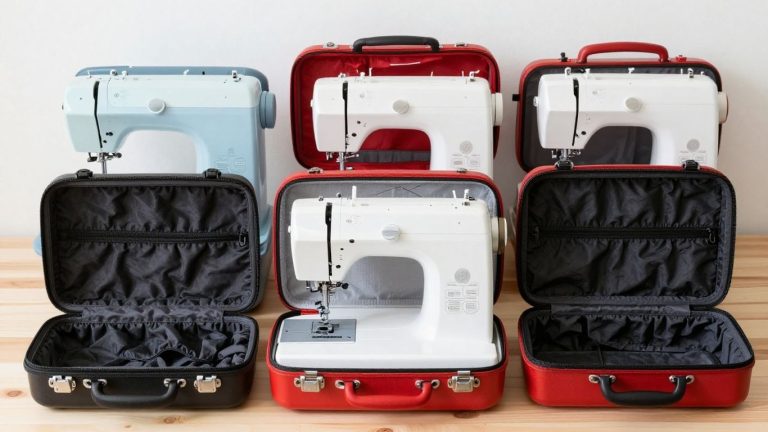
A top-loading bobbin usually drops horizontally into a holder under a cover near the needle plate. A front-loading bobbin is commonly placed into a removable metal or plastic case that then fits into the shuttle or hook area.
Fixed Holder or Removable Bobbin Case
A fixed holder stays inside the machine, so I focus on seating the bobbin flat and following the molded thread path. With a removable case, I also check that the case latch, finger, or alignment point fits securely into the machine.
Thread Slot and Lower Tension Path
The lower thread normally passes through a slot, notch, guide, or tension spring before sewing. Missing that path can make the bobbin thread feed too freely and create loose stitches, nests, or thread showing on the wrong side.
Bobbin Cover or Shuttle Cover
The cover should close easily without pressure. If it resists, I assume the bobbin, case, or thread tail is out of position and reopen the area instead of pushing harder.
Handwheel and Needle Position
I raise the needle fully before working in the bobbin area. Many manuals also specify the correct handwheel direction, so I follow the machine’s instructions rather than rotating the mechanism backward.
Quick-Set Cutter or Thread Tail System
Some modern top-loading machines cut or control the bobbin tail through a built-in channel, while others require a longer tail or manual pickup. I follow the model-specific method because a quick-set bobbin may not need the same final step as an older design.
Top-Loading vs. Front-Loading Bobbin Systems
The two common domestic arrangements differ mainly in how I access the bobbin and how the lower thread is tensioned. Neither system is automatically better for stitch quality; the better system is the one that is correctly designed, maintained, and easy for you to load accurately.
The table below is a general comparison, not a substitute for your manual. Bobbin orientation, thread direction, and pickup method can vary even within the same loading style.
| Feature | Top-Loading System | Front-Loading System | Why It Matters |
|---|---|---|---|
| Bobbin access | Cover in the machine bed near the needle plate | Front access panel or removable extension table area | Shows where to open the machine |
| Bobbin placement | Drops into a fixed horizontal holder | Loads into a removable case first | Determines whether you handle a separate case |
| Thread path | Usually follows molded slots/arrows in the holder or needle plate | Usually passes through a case slot and under a tension spring | Controls lower-thread feed |
| Visibility | Often visible through a clear cover | Usually hidden once the case is installed | Top loaders make remaining thread easier to see |
| Case handling | No removable case in normal loading | Case must be seated and aligned correctly | A misaligned case can prevent normal sewing |
| Bobbin direction | Model-specific | Model-specific | Never assume clockwise or counterclockwise from system type alone |
| Thread pickup | May be manual or quick-set, model dependent | Often uses a thread tail and manual pickup | Follow the exact manual for your machine |
The practical difference is access and handling. Top-loading systems are often easier to see, while front-loading systems make the removable bobbin case part of the setup. Both work reliably when the correct bobbin, orientation, and thread path are used.
How to Insert a Bobbin in a Sewing Machine
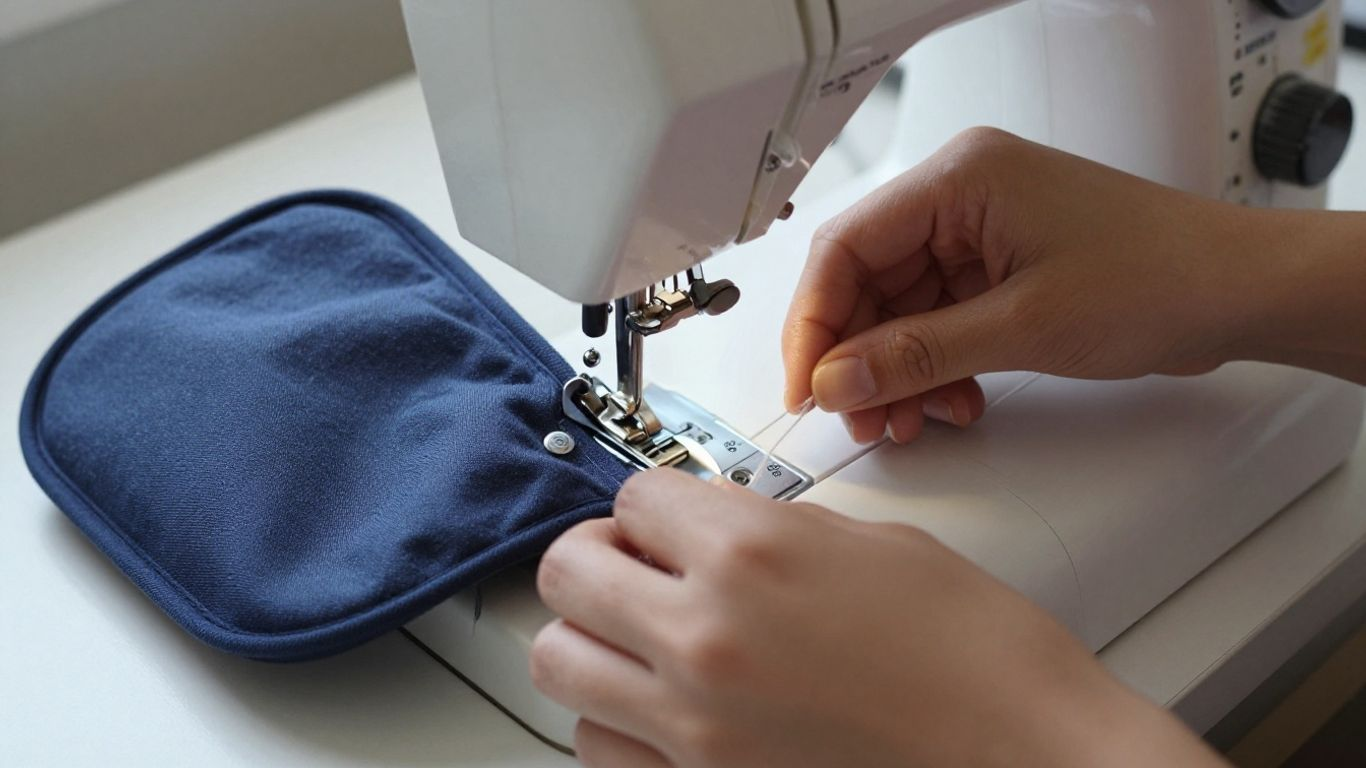
The setup sequence is similar across many machines, but the lower-thread details are model-specific. I use the following process as a safe framework, then let the machine’s diagram decide the final orientation and route.
Step 1: Switch Off the Machine and Raise the Needle
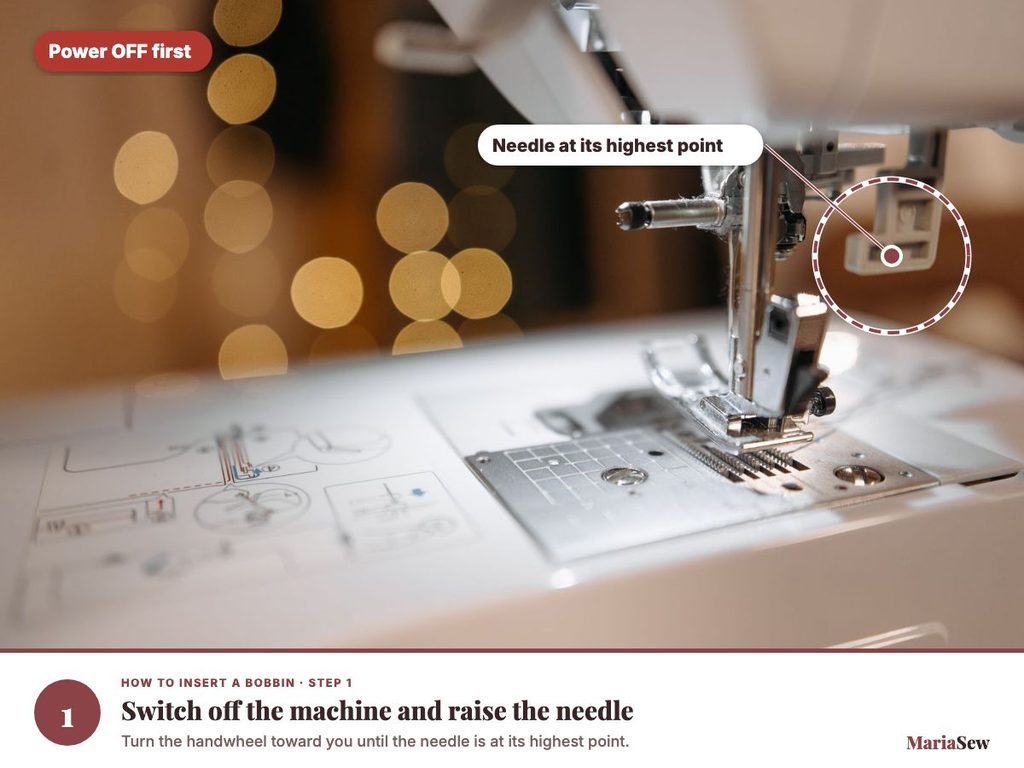
I turn the machine off before placing my fingers near the bobbin, hook, or needle area. Then I raise the needle to its highest position using the method specified in the manual so there is enough clearance to open the bobbin system safely.
Step 2: Open the Bobbin Area
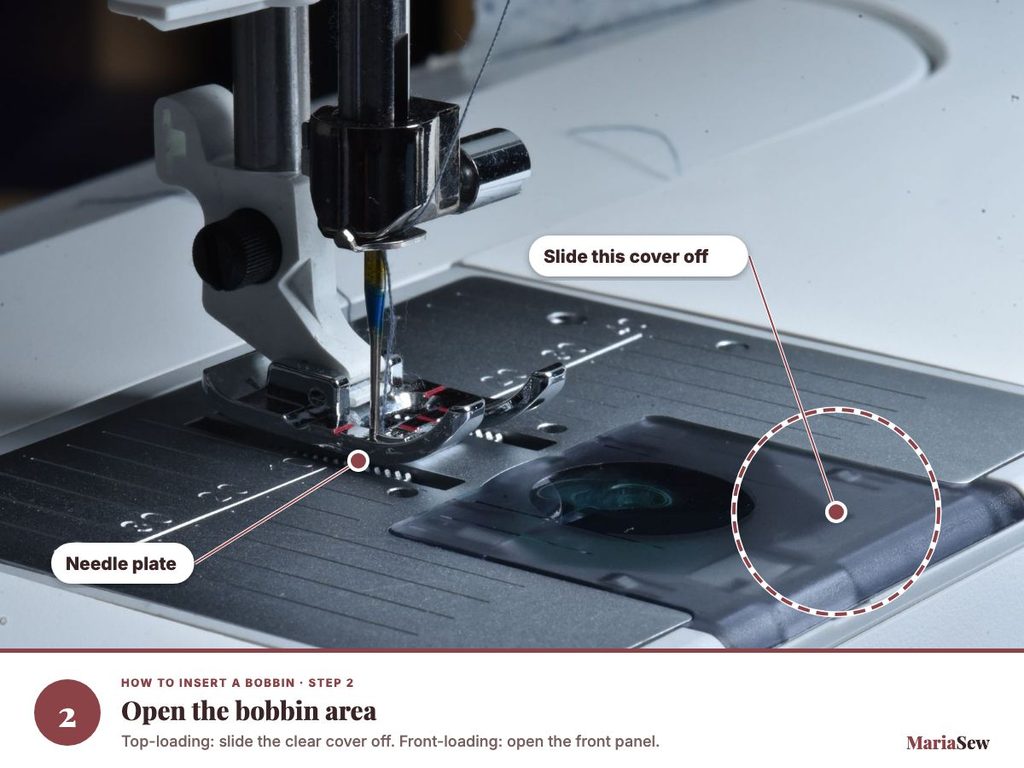
On a top-loading machine, I release the cover on the bed near the needle plate. On a front-loading machine, I open the front access panel and remove the extension table first if the design requires it.
Step 3: Confirm the Bobbin Type and Unwinding Direction
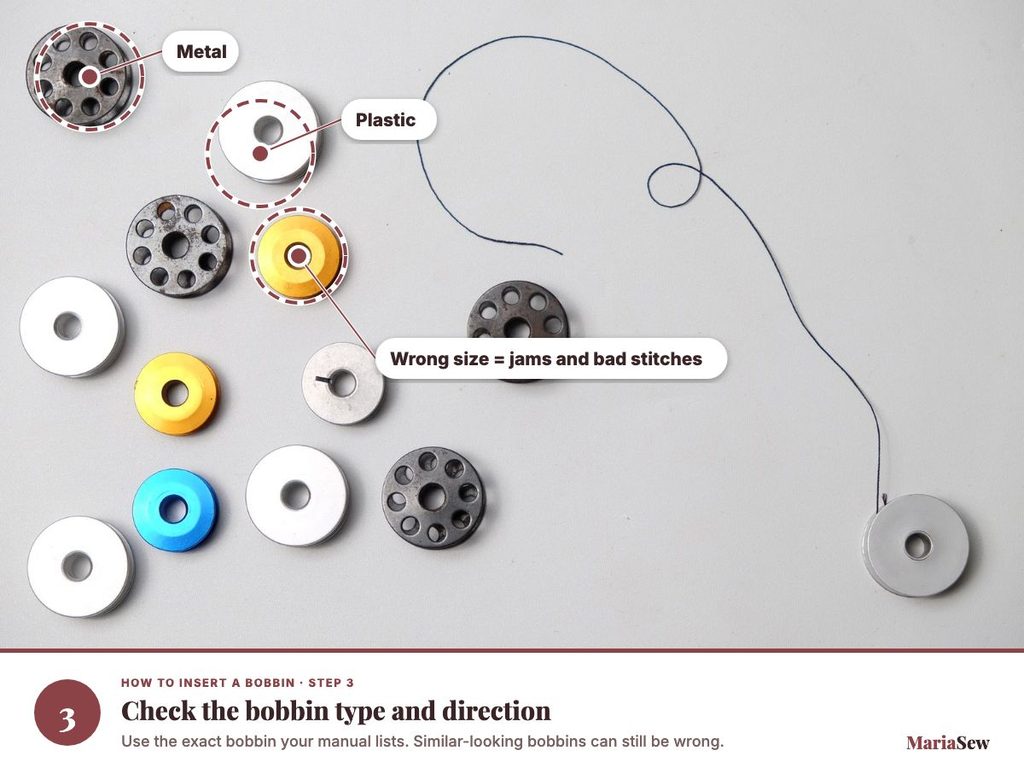
Before inserting the bobbin, I verify that it is the correct type for the machine and check the arrow, threading chart, or manual for the required thread direction. I do not rely on a remembered clockwise or counterclockwise rule because different machines use different systems.
Step 4: Seat the Bobbin or Load the Removable Case
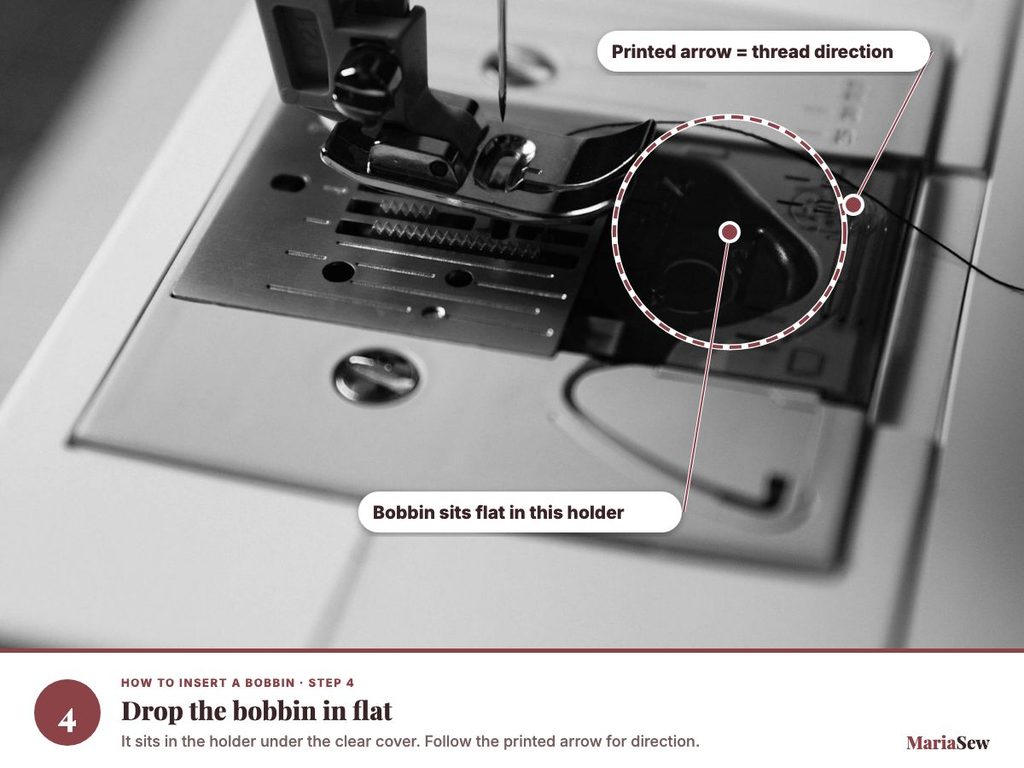
For a top-loader, I lower the bobbin flat into the fixed holder. For a front-loader, I place the bobbin in the removable case first, then route the thread through the case exactly as shown before fitting the case back into the machine.
Step 5: Pull the Thread Through the Correct Guide or Tension Path
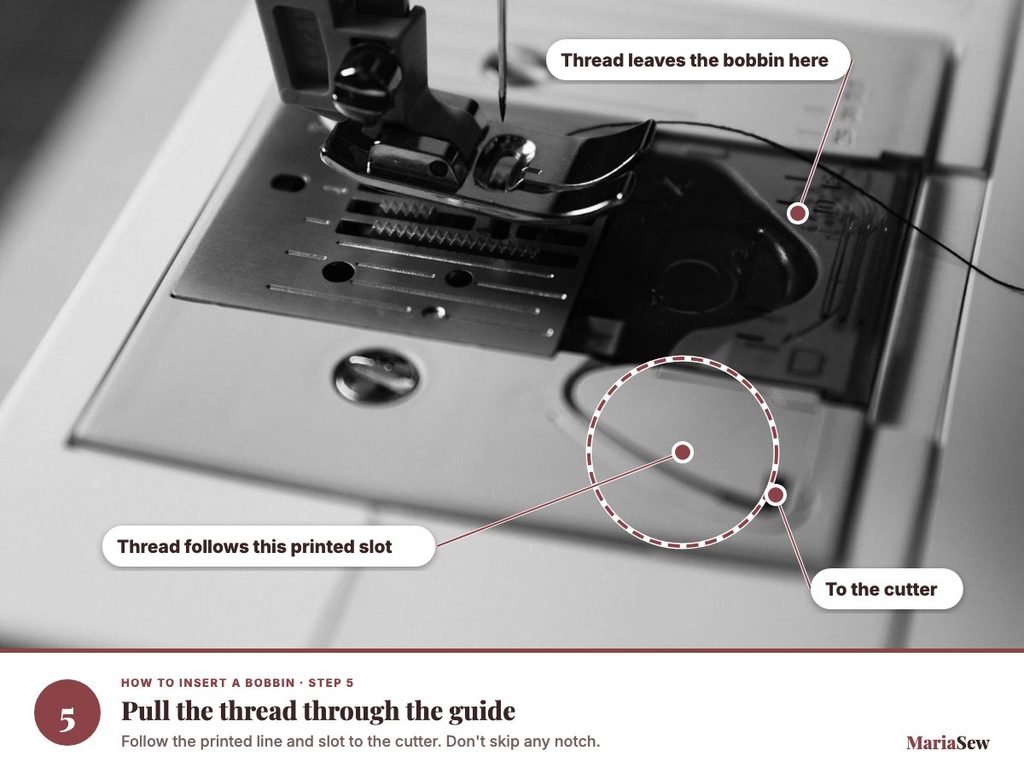
I guide the lower thread through the marked slit, notch, channel, or tension spring without yanking it. The thread should move smoothly while the bobbin remains properly seated.
Step 6: Reinstall the Case or Close the Cover
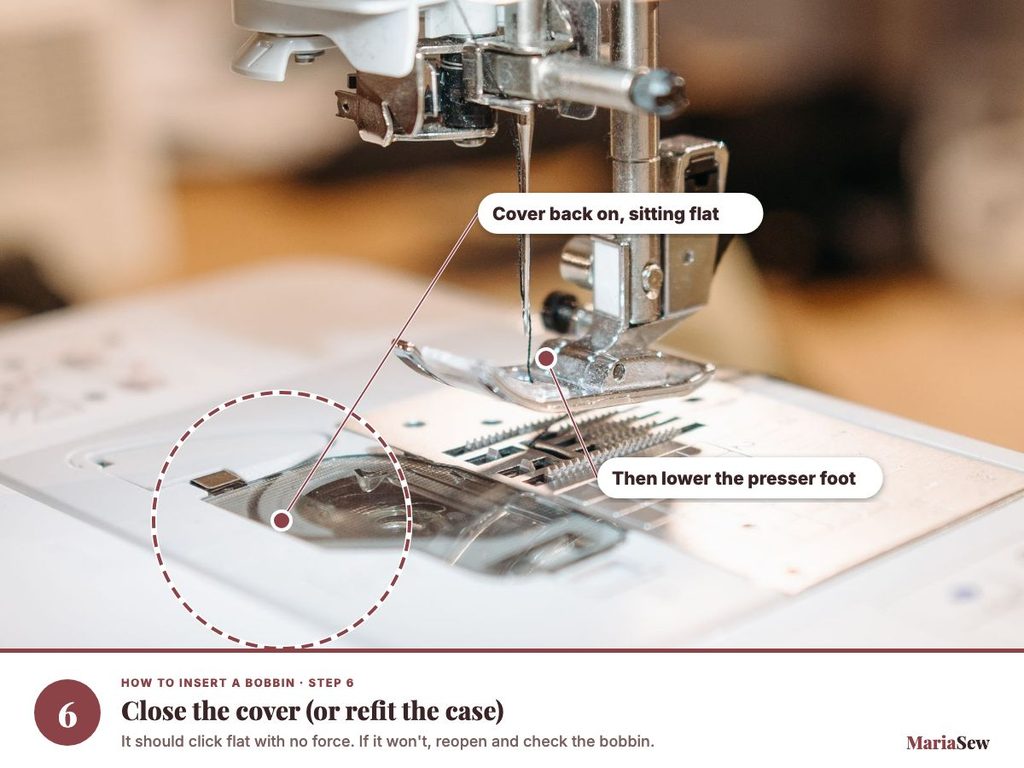
If the machine has a removable bobbin case, I hold it by the latch or grip point and align it with the shuttle according to the manual. With a top-loader, I check the bobbin one last time before replacing the cover.
Step 7: Bring Up the Bobbin Thread If Your Machine Requires It
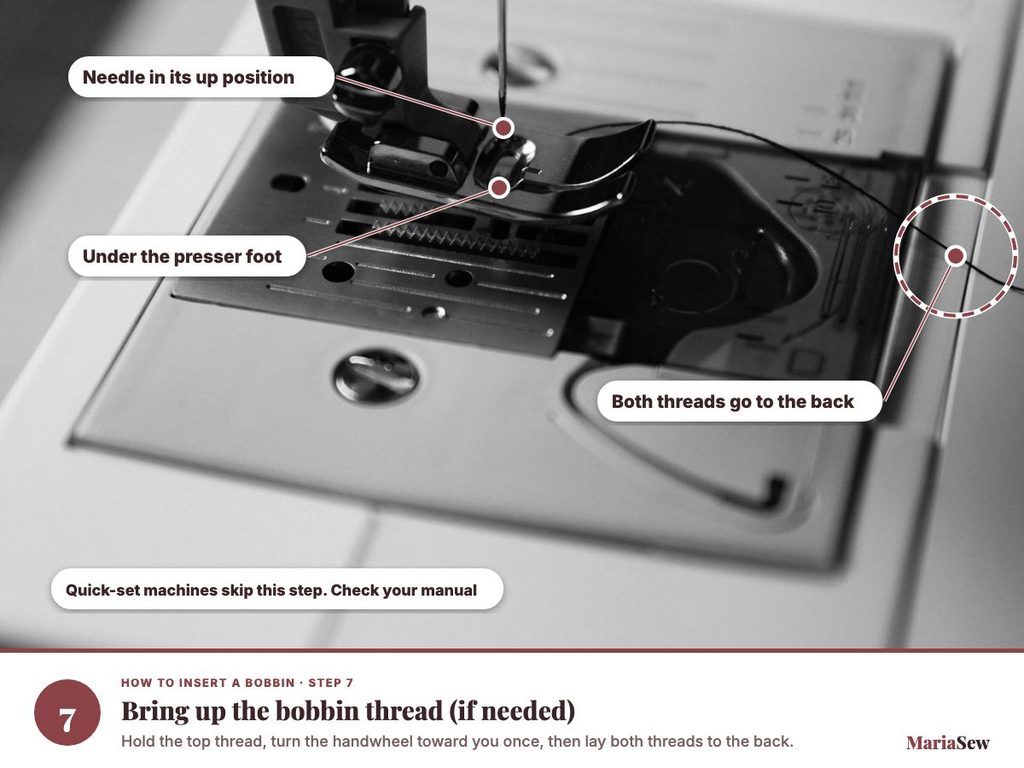
Many machines use the upper thread to catch a bobbin-thread loop by turning the handwheel through one needle cycle. Other quick-set top-loading systems may let you trim the bobbin tail through a built-in cutter and begin sewing without manually pulling the thread up, so I follow the exact model instructions.
Step 8: Test on Scrap Fabric
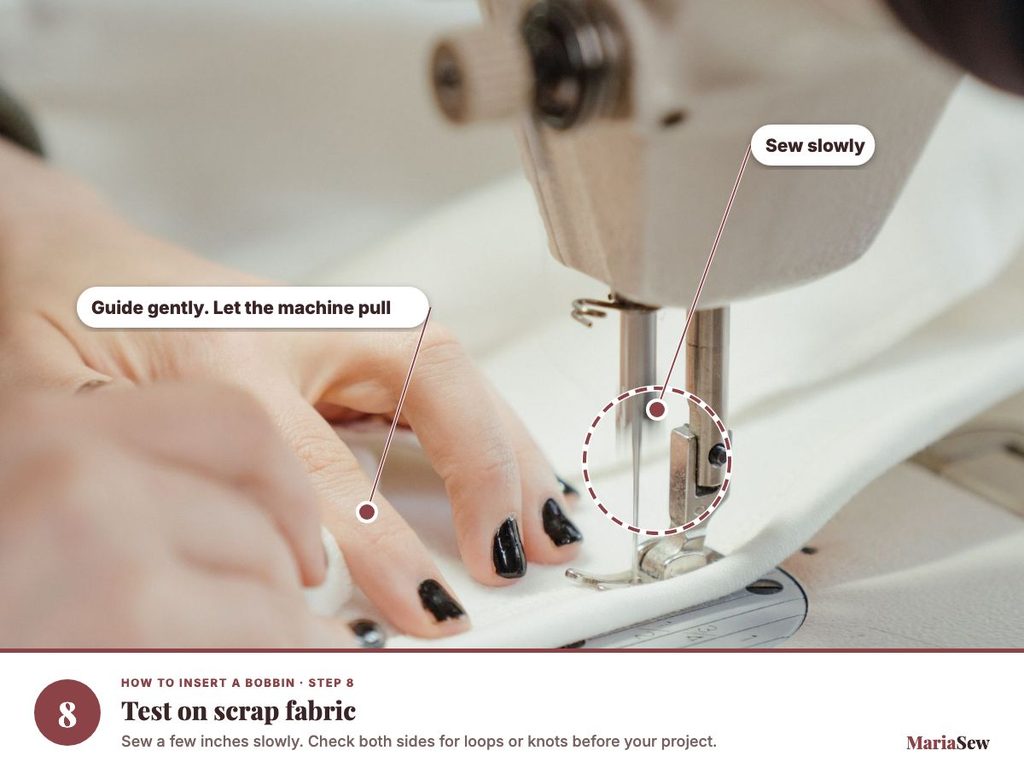
I place scrap fabric under the presser foot and sew slowly for several inches. If the seam forms cleanly on both sides without nesting, snagging, or unusual resistance, the bobbin setup is ready for the project.
How to Insert a Top-Loading Bobbin
Top-loading systems are popular because the bobbin is easy to see and often sits directly under a clear cover. The exact thread path varies, but the loading logic stays consistent.
- Raise the needle and switch the machine off. Do this before opening the bobbin cover.
- Remove the bobbin cover. Use the release button or sliding cover method designed for the machine.
- Drop in the correct bobbin. Follow the manual’s diagram for thread direction and bobbin orientation.
- Hold the bobbin lightly while routing the thread. This keeps the bobbin seated as the thread enters the slot or tension path.
- Follow every marked channel. Do not jump directly from the bobbin to the back of the machine if the holder includes a tension guide or cutter path.
- Replace the cover without force. If the cover does not sit flush, reopen the area and check the bobbin and thread tail.
Singer, PFAFF, Brother, Janome, and other brands may use different thread directions even within top-loading designs, so I always treat the arrows on the actual machine as the final instruction.
How to Insert a Front-Loading Bobbin
Front-loading systems add one more piece: the removable bobbin case. Once I understand how the case’s slot, tension spring, latch, and alignment finger work, the process becomes just as repeatable as a top-loader.
- Open the front or shuttle cover. Remove the accessory table first if it blocks access.
- Remove the bobbin case by its latch. Do not pull on thread or pry the case out with a tool.
- Place the bobbin in the case. Use the exact thread direction shown in the manual for that case.
- Route the thread through the case slot. Pull it under the tension spring or delivery eye when the manual instructs.
- Hold the case by the latch and reinstall it. Align the case finger, notch, or reference marks with the shuttle before releasing the latch.
- Close the cover and test the thread movement. The case should be secure and the thread should pull without catching.
If the case drops out, rocks, or will not seat fully, I remove it and start again rather than trying to sew with a partly installed case.
Do You Need to Bring Up the Bobbin Thread?
Sometimes. Many traditional domestic machines ask you to hold the upper thread and turn the handwheel toward you so the needle makes one complete cycle and pulls a bobbin-thread loop through the needle plate.
However, some modern quick-set top-loading systems use a built-in lower-thread cutter and are designed to begin sewing without manually bringing the bobbin thread to the surface. This is why I avoid treating ‘always pull up the bobbin thread’ as a universal rule.
For the rest of the threading sequence, see How to Thread a Sewing Machine. For Singer Heavy Duty machines specifically, MariaSew also has a model-family threading guide.
How to Tell If the Bobbin Is Inserted Correctly
I check the setup before I change any tension settings. A properly inserted bobbin should sit flat or lock securely in its case, the lower thread should follow the intended path, and the cover or shuttle panel should close normally.
- The bobbin sits flat or the case locks securely. Nothing should be visibly tilted or pushed upward.
- The thread pulls smoothly. You should feel controlled movement, not a hard snag or completely free uncontrolled spinning.
- The cover closes normally. Resistance usually means the bobbin, case, or tail is out of position.
- The first stitch forms without a nest. A clean start is a strong sign that both thread paths are engaged correctly.
- The seam looks balanced on top and underneath. The upper and bobbin threads should lock within the fabric instead of forming loose loops on one side.
If the seam looks wrong, I first rethread the upper path with the presser foot raised and reseat the bobbin before touching tension controls.
Common Bobbin Insertion Problems and Fixes
Several bobbin problems look like tension problems even when the tension settings are fine. I troubleshoot setup first because it is faster, safer, and easier to reverse.
Thread Nests Under the Fabric
A thread nest underneath often points to upper-threading problems, but a bobbin that missed its guide can contribute too. I switch the machine off, remove the tangle carefully, rethread the upper path with the presser foot raised, and reseat the bobbin before adjusting tension.
Bobbin Thread Will Not Come Up
I verify the upper thread is correctly threaded, the needle is fully raised before setup, and the bobbin is in the correct direction. If the machine uses a quick-set system, I check whether manual pickup is even required.
Bobbin Cover Will Not Close
I never force the cover. I reopen the area, confirm the bobbin is the correct type, make sure it sits flat, and check whether the thread tail is trapped under the cover edge.
Removable Bobbin Case Will Not Seat
I check the latch, case finger, alignment notch, and orientation. A case that is almost aligned can still be wrong enough to fall out or interfere with the hook.
Bobbin Thread Shows on Top
I confirm the bobbin is seated and threaded correctly, then rethread the upper thread before changing tension. Bobbin thread showing on top often means the upper thread is pulling too strongly or the lower thread is feeding too loosely.
Stitches Are Loose or Uneven
I inspect both thread paths, the needle, and the bobbin winding. An unevenly wound bobbin or wrong bobbin size can produce changing thread feed that looks like random tension.
For lower-thread balance problems, use MariaSew’s Why Is My Bobbin Thread Showing on Top? and Sewing Machine Tension Guide before adjusting a bobbin-case tension screw.
Common Bobbin Insertion Mistakes to Avoid
Most bobbin mistakes happen because the sewist assumes every machine loads the same way. A few seconds spent checking the machine diagram usually saves far more time than clearing a jam later.
- Using the wrong bobbin because it ‘looks close.’ Use the exact bobbin class or part type specified for the machine.
- Assuming every top-loader runs counterclockwise. Many do, but the correct direction is model-specific and should come from the manual or markings.
- Forcing the bobbin cover or removable case. Resistance is a warning that something is misaligned.
- Skipping the lower-thread guide or tension spring. A bobbin can look correctly installed while the thread is actually bypassing the path that controls it.
- Changing bobbin tension first. Most beginner bobbin problems are better approached by rethreading, reseating, cleaning visible lint, and changing the needle before touching the case screw.
- Using an unevenly wound bobbin. Loose winding, crossed thread, or a heavily loaded edge can produce inconsistent feeding.
- Leaving the machine powered on while reaching near moving parts. Switch the machine off before inserting or removing the bobbin.
- Pulling the handwheel backward without checking the manual. Use the handwheel direction recommended for your model.
- Ignoring the upper thread when the problem appears underneath. Thread nests under the fabric are frequently caused by the upper thread missing the tension discs or take-up path.
- Skipping the scrap-fabric test. A five-second test seam can catch a bad setup before it damages project fabric.
When a machine suddenly starts sewing badly after a bobbin change, I assume setup first and mechanical failure last. That troubleshooting order solves a large percentage of beginner problems.
Beginner Setup Tips After You Learn the Bobbin
Once bobbin insertion feels automatic, the next skills are upper threading, tension, needle choice, and learning how the feed dogs move fabric. These skills work together, so improving one makes troubleshooting the others easier.
Useful next reads on MariaSew include How to Learn Sewing for Beginners, Sewing Machine Parts Explained, and Best Sewing Machines for Beginners if you are still choosing your first machine.
Final Verdict: The Right Way to Insert a Sewing Machine Bobbin
The safest and most reliable way to insert a bobbin is to use the machine’s own diagram as the final authority. Switch the machine off, raise the needle, use the correct bobbin, seat it or its removable case carefully, follow every lower-thread guide, and never force a cover or case that does not fit naturally.
The biggest factual point to remember is that bobbin direction and thread pickup are model-specific. Once you stop trying to memorize one clockwise or counterclockwise rule and instead follow the marked path, both top-loading and front-loading systems become much easier to use and troubleshoot.
Frequently Asked Questions
Which way should a bobbin thread unwind?
There is no universal direction for every sewing machine. Check the arrow, threading diagram, or manual for the exact model. Some machines use counterclockwise top-loading bobbins, while some front-loading cases use a different direction.
Do all sewing machines use the same bobbin?
No. Bobbins can differ in diameter, height, shape, and material. Use the bobbin type specified for your machine even if another bobbin appears to fit.
Should I leave a bobbin thread tail out?
It depends on the bobbin system. Many machines use a thread tail for manual pickup, while some quick-set top-loading systems cut the thread in a built-in channel and do not require the same tail setup.
Do I need to bring up the bobbin thread every time?
No. Many machines do require manual pickup, but some modern quick-set systems are designed so you can begin sewing after following the built-in cutter path. Follow the manual for the exact machine.
Why is my bobbin thread tangling underneath?
A poorly seated bobbin can contribute, but thread nests underneath are often caused by the upper thread missing the tension discs or take-up path. Rethread both systems before adjusting tension.
Why does my bobbin cover keep popping up?
The bobbin may be the wrong size, sitting unevenly, or trapping the thread tail. Stop sewing, remove the bobbin, confirm the correct part, and reinstall it without force.
Can I insert a bobbin while the sewing machine is on?
I switch the machine off before inserting or removing a bobbin so an accidental pedal press or start button cannot move the needle while my fingers are in the work area.
How do I know if the bobbin case is installed correctly?
A removable case should seat securely with its latch, finger, or alignment point in the position shown by the manual. It should not fall out, rock loosely, or prevent the shuttle cover from closing.
Should beginners adjust bobbin tension?
Usually not as a first fix. Check bobbin seating, bobbin type, lower thread path, upper threading, needle condition, and lint before changing the bobbin-case screw.
What happens if I use the wrong bobbin?
The machine may have inconsistent tension, noise, thread jams, poor stitch formation, a bobbin that rocks or binds, or damage to the bobbin case or hook area.
Is a top-loading bobbin better than a front-loading bobbin?
Not automatically. Top-loading systems are often easier to see and access, while front-loading systems use a removable case. Stitch quality depends on the specific machine and correct setup.
What should I do if the machine still jams after I reinstall the bobbin?
Stop forcing the handwheel, switch the machine off, remove accessible tangled thread, rethread the upper path, install a fresh correct needle, and reseat the bobbin. If resistance or abnormal noise remains, consult the manual or an authorized technician.