How to Thread a Singer Heavy Duty Sewing Machine: Step-by-Step 2026 Guide
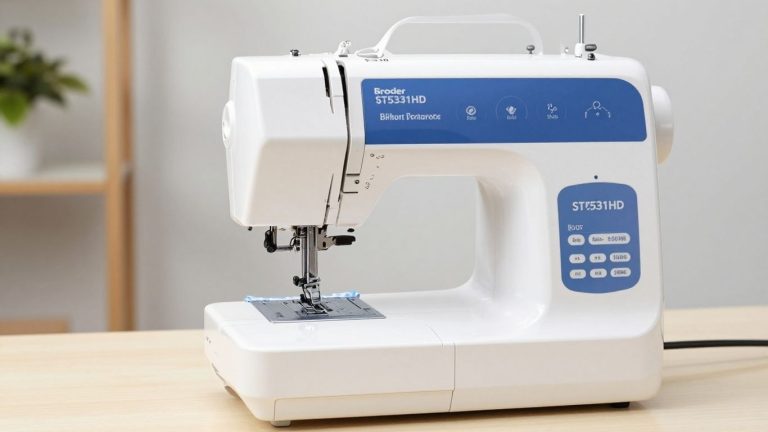
Threading a Singer Heavy Duty sewing machine is simple once you follow the path in the correct order, but one missed guide can cause loops, thread nests, breakage, or uneven stitches. For this guide, I use the SINGER Heavy Duty 4423 as the primary reference because its current manual clearly documents the upper-thread path, built-in needle threader, Class 15 top drop-in bobbin, and bobbin-winding sequence.
Written by Maria
The 4432 and 4452 use a very similar current Heavy Duty layout, while the 4411 shares the top drop-in bobbin system but does not list a built-in needle threader, so always confirm the exact manual for your model. I will show you how to prepare the machine, wind and insert the bobbin, thread the upper path, raise the bobbin thread, test the first seam, and troubleshoot the problems I see most often during hands-on testing.
Quick Answer: How do you thread a sewing machine correctly?
Raise the presser foot, bring the needle and take-up lever to the top of their cycle, and switch the machine off before threading near the needle. Place the spool correctly, pass the thread through the upper guide and pre-tension spring, down the right channel and up the left channel, then pass it from right to left through the take-up lever. Continue through the lower guides and thread the needle from front to back, or use the built-in needle threader on models that include it. Insert the Class 15 transparent bobbin so the thread runs counterclockwise, pull it through the slit and notch, then bring the bobbin thread up and test on scrap fabric.
Key Takeaways
Most Singer Heavy Duty threading problems come from setup order rather than a damaged machine. These are the checks I make before I touch tension settings or assume a repair is needed.
- Raise the presser foot before upper threading so the thread can properly seat between the tension discs.
- Raise the take-up lever to its highest position before threading the Singer Heavy Duty 4423.
- Use the correct Class 15 transparent bobbin and make sure it unwinds counterclockwise when inserted.
- Do not skip the take-up lever, as incorrect positioning can cause loose loops or thread nests.
- Thread the 4423 needle from front to back and leave about 6 to 8 inches of thread behind it.
- Turn the handwheel only toward you when threading or checking the stitch cycle.
- Test the machine before adjusting tension, checking the threading path, bobbin, needle, and thread first.
- Check your exact Singer Heavy Duty model, because threading details and features can vary between models.
- A clean test seam after rethreading can help identify whether the issue is threading, tension, thread quality, or a service-related problem.
A clean test seam after complete rethreading tells me far more than changing several settings at once. If the same problem returns after the path, bobbin, and needle are correct, then I move on to tension, thread quality, or service-related causes.
How I Test Sewing Machines at MariaSew
I personally use the sewing machines I recommend before I publish a verdict, and threading is one of the first things I test because it exposes setup problems immediately. I have more than 12 years of hands-on sewing experience, so I do not judge a threading system by how neat the arrows look on the machine. I thread it from scratch, wind fresh bobbins, change thread weights, use the needle threader repeatedly, and deliberately rethread after a mistake to see how easy the path is to recover.
For Singer Heavy Duty models, I pay particular attention to whether the thread seats cleanly in the tension discs, whether the take-up lever is easy to engage, how smoothly the Class 15 bobbin feeds, whether the built-in needle threader lines up consistently, and whether the first few stitches stay balanced on cotton, denim, canvas, and lighter woven fabric. I also test common failure symptoms such as loops underneath, upper-thread breakage, bobbin-thread problems, and skipped stitches before I recommend changing tension or blaming the machine.
- Upper-thread path. I rethread several times and check every guide, the pre-tension spring, tension channel, take-up lever, needle-bar guide, and needle eye.
- Bobbin setup. I wind the bobbin, inspect whether it fills evenly, insert it in the correct direction, and confirm smooth thread release through the slit and notch.
- Needle threader. On models that include it, I test alignment more than once because a threader that works once but misses repeatedly is not genuinely convenient.
- First-stitch behavior. I hold the thread tails to the rear, sew slowly, and inspect both sides of the seam for nests, loops, skipped stitches, and tension imbalance.
- Fabric range. I repeat the setup on ordinary cotton, denim, canvas, and lighter fabric so I can separate threading problems from needle or fabric problems.
- Troubleshooting order. I rethread and reseat the bobbin before changing tension, because a bad path can make a perfectly normal tension setting look wrong.
MariaSew’s editorial policy is that recommended sewing machines are personally used and tested before publication.
Singer Heavy Duty Threading Features Explained
Before threading, I identify the parts that actually control the thread. Once you know what each component does, troubleshooting becomes much easier because you can tell whether the problem is above the needle, inside the bobbin area, or at the needle itself. If you are unfamiliar with the individual components, see this guide to sewing machine parts.
Spool Pin and Spool Cap
The spool pin holds the upper-thread spool, while the spool cap keeps the spool stable and helps prevent the thread from catching on rough spool edges. I match the cap to the spool size instead of pressing an oversized cap tightly against the thread.
Upper Thread Guide
The first upper guide controls the thread as it leaves the spool and sends it toward the pre-tension area. If the thread misses this guide, the rest of the path can feel loose and unstable even when the lower sections look correct.
Pre-Tension Spring
On the 4423 threading path, the thread passes through the pre-tension spring before entering the main tension channels. This small step helps control thread delivery before the tension discs do the main balancing work.
Tension Discs
The tension discs control resistance on the upper thread. I always raise the presser foot before threading because that releases the discs and lets the thread drop between them properly. If you need to diagnose stitch imbalance after threading, see my sewing machine tension guide.
Take-Up Lever
The take-up lever moves with the needle and removes slack as each stitch forms. On the 4423, the thread must pass from right to left through the slotted eye; missing this point is one of the fastest ways to create loose thread under the fabric.
Horizontal and Needle-Clamp Thread Guides
After the take-up lever, the thread passes through the lower guides that keep it aligned as it approaches the needle. I check these carefully because a missed small guide can create excess drag, thread breakage, or inconsistent stitch formation.
Built-In Needle Threader
The 4423, 4432, and 4452 currently list a built-in needle threader. I use it only with the needle fully raised and the machine switched off; the 4411 does not list this convenience feature, so model differences matter.
Top Drop-In Bobbin System
The 4423 uses a transparent Class 15 top drop-in bobbin system. The bobbin should be inserted with the thread running counterclockwise, then guided through the slit and clockwise into the notch so the lower thread is controlled correctly.
Bobbin Winder Tension Disc and Spindle
The bobbin-winding path is separate from normal upper threading. On the 4423, the thread wraps clockwise around the bobbin-winder tension discs, and the spindle must be pushed right for winding and returned left before normal sewing.
Handwheel
The handwheel lets me position the needle and take-up lever safely during threading. Singer instructs 4423 users to turn it toward themselves, counterclockwise from the operator’s viewpoint, rather than rotating it backward.
Built-In Thread Cutter
The 4423 includes a manual thread cutter on the machine body. It does not replace correct thread tails for setup, but it makes it easy to trim the upper thread to a usable length after threading.
SINGER Heavy Duty 4423 Threading Features & Key Specifications
Because this guide uses the 4423 as its primary model reference, the table below collects the current manufacturer details that matter most while threading and setting up the machine. It is not meant to replace the manual, especially if you own another Heavy Duty model.
For the threading process, the most important specifications are the bobbin class, top drop-in layout, built-in needle threader, threading guides, and mechanical controls. The stitch count and speed help explain the machine’s overall design, but they do not change the threading sequence.
For a closer look at one of these related machines, see my SINGER 4432 review and SINGER 4452 Heavy Duty sewing machine review. The 4411 still uses a top drop-in bobbin but has a simpler feature set, which is why the exact model manual should always win when a control or guide looks different. You can also compare other Singer models in my guide to the best Singer sewing machines.
| Feature / Specification | Current 4423 Detail | Why It Matters for Setup |
|---|---|---|
| Machine type | Mechanical Heavy Duty sewing machine | Physical controls; threading path is visible and manual |
| Built-in stitches | 23 | Utility and decorative stitch selection after threading |
| Stitch applications | 97 | Manufacturer count of techniques supported by available stitches |
| Bobbin system | Top drop-in | Bobbin loads from the top under a transparent cover |
| Bobbin class | SINGER Class 15 transparent | Use the correct size and style to avoid feeding problems |
| Built-in needle threader | Yes | Assists with threading the needle eye |
| Upper threading guides | Quick/easy-follow guides | Visual path assists spool-to-needle threading |
| One-step buttonhole | Yes | Uses the same properly threaded upper and bobbin system |
| Maximum stitch width | 6 mm | Model-dependent stitch width after setup |
| Needle positions | 3 | Useful for seam placement and zipper/topstitch work |
| Sewing speed | Up to 1,100 SPM on current Singer 4423 documentation | High speed makes correct threading and needle choice especially important |
| Sewing space | 6.25 in needle to tower | Working room for garments, repairs and home projects |
| Machine size | 15.5 x 6.25 x 12 in | Full-size domestic footprint |
| Machine weight | 14.6 lb | Stable enough for table use while still portable |
The 4432 and 4452 share several of these setup features, including the top drop-in bobbin and built-in needle threader. The 4411 still uses a top drop-in bobbin but has a simpler feature set, which is why the exact model manual should always win when a control or guide looks different.
What You Need Before Threading
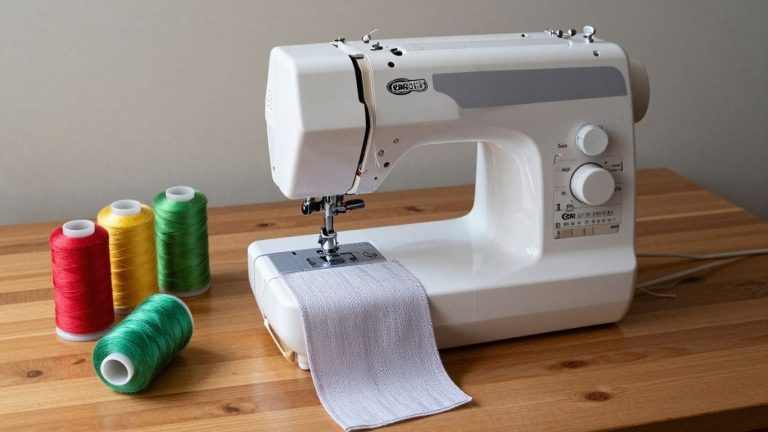
I prepare the thread, bobbin, needle, and test fabric before I start. Threading is much easier when I am not stopping halfway through the path to search for a bobbin or replace a bent needle.
- Good-quality all-purpose thread. Use a thread appropriate for the fabric and needle. Very old, fuzzy, or brittle thread can break even when the path is correct.
- Correct SINGER Class 15 transparent bobbin for the 4423. Avoid substituting a similar-looking bobbin because small dimensional differences can affect the hook and bobbin case.
- Correct needle for the fabric. A universal needle works for many woven fabrics, while denim, stretch, ballpoint, or other specialty fabrics may need a different needle type.
- Fabric scrap from the actual project. Testing on the same fabric and number of layers makes the first seam more meaningful.
- Scissors or thread snips. Trim fuzzy or damaged thread ends instead of forcing them through the needle.
- Good lighting and the exact manual. The take-up lever and small needle-bar guide are easy to miss when the work area is dim.
I also make sure the machine is stable on the table and switch it off whenever my fingers are close to the needle, needle threader, or bobbin area. Threading should feel deliberate, not rushed.
How to Wind the Bobbin on a Singer Heavy Duty 4423
A badly wound bobbin can create uneven lower-thread delivery even if the upper path is perfect. I want the thread to fill the bobbin evenly, without loose sections, crossed loops, or a heavy mound on one side.
Singer’s 4423 manual uses a dedicated winding path across the top of the machine. The winding path is not the same as the normal upper-thread path used for sewing.
Step 1: Place the spool and correct spool cap
Put the thread spool on the spool pin and secure it with the appropriate spool holder so the thread can unwind smoothly.
Step 2: Snap the thread into the bobbin-winding guide
Follow the top guide indicated for bobbin winding rather than sending the thread down the main tension channel.
Step 3: Wind the thread clockwise around the bobbin-winder tension discs
This creates the controlled resistance needed for an even bobbin.
Step 4: Thread the empty bobbin as shown in the manual
Place the bobbin on the spindle and hold the thread end securely for the first few turns.
Step 5: Push the bobbin-winder spindle to the right
The machine is now in bobbin-winding mode. It will not sew normally while the spindle remains in this position.
Step 6: Start winding and trim the starting tail
Use the foot controller to begin winding. After the thread catches securely, trim the loose starting tail close to the bobbin and continue until full.
Step 7: Return the spindle to the left
Cut the thread, slide the spindle back to the sewing position, and remove the bobbin before threading the machine for sewing.
If the bobbin fills heavily on one edge or feels loose, stop and correct the winding path before sewing. A clean bobbin saves far more time than troubleshooting a lower-thread problem in the middle of a project.
How to Insert the Bobbin Correctly
The 4423 uses a top drop-in Class 15 bobbin, so the orientation is easy to check through the transparent cover. I switch the machine off, raise the presser foot, and bring the needle fully up before I touch the bobbin area.
Step 1: Remove the bobbin cover
Slide the small cover-release tab and lift away the transparent bobbin cover.
Step 2: Drop in the bobbin counterclockwise
Place the bobbin in the case with the thread running in the counterclockwise direction, following the arrow shown in the Singer manual.
Step 3: Pull the thread through the slit
Guide the thread into the first slit while holding the bobbin down lightly with a fingertip so it stays seated.
Step 4: Draw the thread clockwise into the notch
Follow the molded thread path until the thread slips into the notch and under the lower-thread tension path.
Step 5: Leave about 6 inches of thread and replace the cover
Pull roughly 15 cm / 6 inches of bobbin thread toward the rear, then reinstall the transparent cover plate.
If the bobbin rocks, pops up, or does not pull smoothly through the slot, remove it and start again. Forcing the cover over a poorly seated bobbin can create a jam before the first stitch is formed.
How to Thread the Upper Thread: Singer Heavy Duty 4423 Step by Step
Upper threading is where most thread nests begin. I use the same sequence every time and do not skip directly from the spool to the needle just because the thread appears to reach the bottom.
On the 4423, Singer specifically instructs the user to raise the needle fully, continue turning the handwheel toward the operator until the needle just begins to descend, and raise the presser foot so the tension discs open. That puts the take-up lever and tension system in the correct threading state.
Step 1: Turn the machine off
For safety, switch the machine off before threading near the needle or using the built-in needle threader.
Step 2: Raise the presser foot
This releases the tension discs. Threading with the foot down can leave the thread outside the discs and create loops under the fabric.
Step 3: Bring the needle and take-up lever to the threading position
Turn the handwheel toward you until the needle reaches the top and just begins to descend, following the Singer 4423 manual.
Step 4: Place the spool and spool cap
Set the spool on the pin in the orientation shown for your machine and use the cap that best matches the spool diameter.
Step 5: Pass through the upper thread guide and pre-tension spring
Draw the thread through the top guide, then through the pre-tension spring so the thread enters the main path under control.
Step 6: Go down the right channel and up the left channel
Lead the thread through the tension module. I hold light tension on the thread near the spool so it seats rather than floating outside the channel.
Step 7: Thread the take-up lever from right to left
At the top of the left channel, pass the thread through the slotted eye of the take-up lever, then bring the thread down again.
Step 8: Use the lower thread guides
Pass the thread behind the horizontal guide and then behind the thin wire guide at the needle clamp before moving to the needle.
Step 9: Thread the needle from front to back
If threading manually, cut a clean thread end and pass it through the needle eye from front to back. Leave about 6 to 8 inches behind the needle.
Step 10: Route the thread under the presser foot toward the back
Keeping the tail to the rear helps prevent it from being pulled into the hook area when you begin sewing.
Before I touch the fabric, I trace the path once more from spool to needle. That final ten-second check catches the take-up lever mistake that can otherwise turn into a large nest under the needle plate.
How to Use the Built-In Needle Threader
On the current 4423, 4432, and 4452, the built-in needle threader can save time once the upper thread is already routed correctly. It only handles the last step through the needle eye; it does not replace the main upper-thread path.
I switch the power off, raise the needle fully, and follow the threader guide on the machine. The threader hook must align with the needle eye, so a bent needle, wrong needle height, or forcing the lever can make the feature look defective.
- Raise the needle fully. The threader hook must line up with the needle eye.
- Lower the needle-threader lever gently. Let the mechanism swing into position instead of forcing it sideways.
- Follow the small threader guide. Route the thread around the guide and hook in the direction shown for the 4423.
- Release the lever slowly. A small loop should be pulled through the needle eye.
- Pull the loop completely through. Leave a usable thread tail behind the presser foot before sewing.
If the threader repeatedly misses, I check the needle position and replace a bent needle before assuming the threader is damaged. On a 4411, thread manually because Singer does not list a built-in needle threader on the current model page.
How to Bring Up the Bobbin Thread
After both thread paths are set, I bring the bobbin thread to the surface so both tails are controlled before the first seam. Singer includes this step in the 4423 manual even though the bobbin is top loading.
I hold the upper-thread tail with my left hand and rotate the handwheel toward me through one complete needle cycle. The needle carries the upper thread around the bobbin area, forming a loop that brings the lower thread through the needle-plate opening.
- Hold the upper thread lightly. Do not pull hard; just keep enough control to catch the bobbin loop.
- Turn the handwheel toward you. Lower and raise the needle through one full stitch cycle.
- Pull the upper thread gently. The bobbin-thread loop should rise through the needle-plate hole.
- Pull both thread tails to the back. Position them under the presser foot before the first stitch.
If the bobbin thread will not come up, I check the upper threading and bobbin seating first. Repeatedly spinning the handwheel with a wrong path usually makes the problem worse, not better.
How to Test the Threading Before You Start Sewing
I never move straight from threading to the finished project. A short test seam on matching scrap fabric tells me whether the upper thread, bobbin, needle, and tension are working together before any important fabric is under the foot.
- Start with a basic straight stitch. Use a normal stitch length and the standard tension setting recommended by the manual as your starting point.
- Hold the thread tails for the first few stitches. This helps prevent the loose ends from being pulled into the bobbin area.
- Sew slowly at first. Listen and feel for unusual resistance before using the 4423’s higher sewing speed.
- Inspect both sides of the seam. Balanced lockstitches should meet within the fabric rather than forming loose loops on one side.
- Change one thing at a time. If the seam is wrong, rethread or correct the bobbin before adjusting multiple controls.
If the stitch is balanced but you need help fine-tuning the tension for a new fabric, use my sewing machine tension guide.
Troubleshooting Singer Heavy Duty Threading Problems
Threading problems are easier to solve when I work from the most common, reversible causes toward the less common mechanical ones. I do not start by turning tension screws or opening the machine.
For routine machine maintenance before assuming there is a major mechanical fault, see my guide on how to oil a sewing machine.
Thread Bunching Under the Fabric
I rethread the upper path first with the presser foot raised. A missed take-up lever or thread sitting outside the tension discs can feed too much upper thread into the hook area and create a nest that looks like a bobbin problem.
Upper Thread Keeps Breaking
I inspect the spool edge, upper guides, tension path, needle size, needle condition, and thread quality. A rough spool edge, bent needle, wrong needle/thread combination, or excessive drag can shred the upper thread.
Bobbin Thread Will Not Come Up
I confirm the bobbin is inserted counterclockwise and seated under the slot/notch path, then recheck the upper thread. I hold the upper tail and turn the handwheel toward me through one complete needle cycle.
Loose or Uneven Stitches
I verify both threading paths before adjusting tension. If the paths are correct, I check whether the needle is the right type and size and whether the bobbin is wound evenly.
Needle Threader Will Not Catch the Thread
I raise the needle fully, confirm the needle is straight and fully inserted, and lower the threader gently. If alignment remains wrong with a correct needle, the threader may need service.
Machine Will Not Sew After Winding a Bobbin
I check the bobbin-winder spindle. On the 4423, the spindle must be returned to the left sewing position after winding or the machine will remain in bobbin-winding mode.
Thread Keeps Slipping Off the Spool
I check spool orientation and cap size. The cap should control the spool without squeezing it tightly, and the thread should not snag on a rough spool edge.
Thread Nest Returns After Correct Rethreading
I stop and inspect the needle, bobbin, bobbin case seating, lint, and accessible hook area. If the handwheel is stiff, the needle strikes metal, or the jam returns immediately, I stop forcing the machine and consider service.
For a deeper diagnostic order when the machine locks up or nests thread repeatedly, use my sewing machine jamming troubleshooting guide.
Common Singer Heavy Duty Threading Mistakes to Avoid
Most threading mistakes are small, but they can create symptoms that look much more serious. I avoid the following habits because they make it harder to identify whether the real problem is the upper path, bobbin, needle, or tension.
- Threading with the presser foot down. This can prevent the upper thread from seating correctly between the tension discs.
- Missing the take-up lever. The machine may still look threaded, but the upper thread will not be controlled correctly during stitch formation.
- Turning the handwheel backward. On the 4423, Singer directs the user to turn the handwheel toward the operator, not away.
- Using the wrong bobbin class. A similar-looking bobbin can sit at the wrong height or release thread incorrectly. The 4423 calls for Class 15 transparent bobbins.
- Inserting the bobbin in the wrong direction. The 4423 bobbin should unwind counterclockwise before the thread is drawn through the slit and notch.
- Forcing the built-in needle threader. If the needle is not fully raised or is bent, forcing the lever can damage the threader mechanism.
- Adjusting tension before rethreading. A tension change cannot fix a thread that missed the discs or take-up lever.
- Leaving a very short thread tail. A short upper tail can pull out of the needle before the first stitches form.
- Starting at full speed immediately. A slow test seam lets you catch a bad setup before loose thread packs around the hook.
- Assuming every Heavy Duty model is identical. Model families look similar, but needle-threader features, accessory packages, and exact instructions can differ.
If I make a mistake, I remove the upper thread completely and start from the spool instead of trying to repair the path halfway down. A full rethread is usually faster and more reliable than guessing which guide was missed.
Best Thread, Bobbin, and Needle Setup for Singer Heavy Duty Machines
Correct threading cannot compensate for a poor needle-and-thread match. A heavy-duty machine can sew a wide range of fabrics, but the setup should change with the material rather than using the same needle for everything.
- Everyday woven cotton. Start with good all-purpose polyester thread and a universal needle appropriate for the fabric weight.
- Denim and heavy twill. Use a denim/jeans needle and suitable thread; slow down at bulky seam crossings rather than relying on motor speed.
- Stretch knits. Use a stretch or ballpoint-style needle when the fabric requires it so the needle can form the stitch without damaging the knit structure.
- Fine woven fabric. Use a finer sharp/universal needle and smooth thread, and test tension and presser-foot pressure on scrap first.
- Bobbin. Use the exact bobbin class specified by Singer for the model. For the current 4423, Singer recommends Class 15 transparent bobbins.
If a new needle and clean rethread solve the problem, I leave the tension dial alone. Many apparent tension faults are actually setup faults.
When Threading Is Correct but the Machine Still Will Not Sew
A correctly threaded machine should turn smoothly by hand, pick up the bobbin thread, and form test stitches without hard resistance. If it does not, repeated rethreading may no longer be the right fix.
- The handwheel remains unusually stiff. Stop forcing it and check for trapped thread or a mechanical obstruction.
- The needle repeatedly strikes the plate, foot, or hook area. Install a new correct needle and verify insertion. Repeated strikes can point to alignment or timing problems.
- The bobbin case will not sit correctly. Inspect for trapped thread, damage, or displacement rather than forcing the cover closed.
- The threader stays misaligned with a correct needle. The needle-threader mechanism may need adjustment or repair.
- The same jam returns immediately after complete setup. A damaged hook surface, bobbin case, timing issue, or internal problem can require professional service.
At that point, I stop sewing rather than using extra pedal pressure or handwheel force. Threading is a setup task, not a way to overcome mechanical resistance.
Final Verdict: The Correct Singer Heavy Duty Threading Order
The most reliable way to thread a Singer Heavy Duty machine is to treat threading as one continuous system rather than separate pieces of thread. Start with the presser foot raised and needle/take-up lever in the correct position, control the spool with the right cap, seat the thread through every upper guide and the take-up lever, then finish at the needle with enough tail to start cleanly.
On the 4423, the lower setup is just as specific: use a Class 15 transparent bobbin, insert it so the thread runs counterclockwise, follow the slit and notch, bring the bobbin thread up, and test slowly on scrap fabric. If a seam still looks wrong, recheck the path and needle before changing tension. That troubleshooting order prevents most simple threading mistakes from turning into unnecessary adjustments or repairs.
Frequently Asked Questions
How do I thread a Singer Heavy Duty 4423?
Raise the presser foot, position the needle and take-up lever at the top of the cycle, place the spool and cap, use the upper guide and pre-tension spring, go down the right channel and up the left, pass through the take-up lever from right to left, use the lower guides, then thread the needle from front to back or use the built-in needle threader.
Should the presser foot be up or down when threading a Singer Heavy Duty?
Up. Raising the presser foot releases the tension discs so the upper thread can seat between them correctly.
Which way should the bobbin face in a Singer 4423?
Insert the Class 15 transparent bobbin so the thread runs counterclockwise, then pull it through the slit and clockwise into the notch as shown in the manual.
What bobbin does the Singer Heavy Duty 4423 use?
Singer currently specifies SINGER Class 15 transparent bobbins for the Heavy Duty 4423.
Which direction should I turn the handwheel?
Toward you. Singer specifies turning the 4423 handwheel toward the operator, counterclockwise from the operator position, during threading and when raising the bobbin thread.
Why is my Singer Heavy Duty bunching thread underneath?
The first thing to check is the upper thread path. Rethread with the presser foot raised and confirm the thread is seated in the tension discs and actually passing through the take-up lever.
Why will my Singer Heavy Duty not sew after winding the bobbin?
Check that the bobbin-winder spindle has been moved back to the left sewing position. On the 4423, the machine will not sew normally while the spindle remains in bobbin-winding mode.
Does the Singer 4423 have an automatic needle threader?
Yes. Singer currently lists a built-in needle threader on the 4423. The 4432 and 4452 also list one, while the current 4411 does not.
Do I need to bring up the bobbin thread on a Singer 4423?
Singer includes a bobbin-thread-raising step in the 4423 manual. Hold the upper thread and turn the handwheel toward you through one complete needle cycle, then pull the lower-thread loop to the surface.
Why does my upper thread keep breaking?
Check for a missed guide, rough spool edge, damaged or incorrectly sized needle, poor thread quality, excessive tension, or thread that is snagging in the path.
What tension should I use after threading the 4423?
Singer manuals commonly show a basic upper-tension starting point around 4 for normal straight-stitch sewing, but fabric, thread, needle, and stitch choice can require adjustment. Test on scrap before changing tension.
Can I use this guide for the Singer 4411, 4432, or 4452?
The Heavy Duty family shares several layout features, but not every model is identical. Use this 4423-based guide for the overall logic, then confirm the exact threading diagram, bobbin instructions, and needle-threader features in your own model manual.