Best Serger for Beginners in 2026: 6 Easy-to-Learn Overlock Machines Compared
Choosing the best serger for beginners is less about finding the fastest machine and more about finding one you can thread, adjust, and use with confidence. A beginner-friendly overlocker should produce neat four-thread seams, handle everyday knits and woven fabrics, and make common tasks such as rolled hems and differential-feed adjustments understandable.
In this guide, I explain the features that really matter, the difference between a serger and a sewing machine, and how six current US-market models compare. I also walk through first-use setup, fabric choices, troubleshooting, and the buying mistakes that can turn an exciting purchase into an unused machine.
Quick Answer: What Is the Best Serger for Beginners?
The Brother 1034D is my most practical starting recommendation for an ordinary first serger because its 3/4-thread system, color-coded threading, differential feed, three included presser feet, and wide availability of model-specific guidance cover the fundamentals without unnecessary complexity. The SINGER S0100 is worth comparing if you want 2/3/4-thread options and a free arm, while the Janome MOD-8933 makes a strong case for a compact lay-in-threading alternative.
If difficult threading is your main worry, look at the SINGER HD0500S and its illuminated lower-looper area. For heavier woven projects, consider the Brother ST4031HD; for someone who expects to sew garments often and can invest more, the JUKI MO-654DE offers a higher advertised top speed and a broader 2/3/4-thread range. These are feature-based recommendations, not claims that any machine will outperform another on every fabric.
Key Takeaways
A first serger should simplify your regular sewing, not ask you to pay for advanced capabilities you will rarely use. I would begin with the projects I actually make, then compare the following practical points before choosing a model.
- Choose a four-thread overlocker for versatile garment seams, especially when sewing suitable knit fabrics.
- Look for color-coded threading guides, easy lower-looper access, and a clear manual.
- Choose a serger with differential feed to help prevent fabric stretching and puckering.
- Remember that overlockers do not provide the coverstitch finish commonly found on ready-to-wear T-shirts.
- Compare included accessories such as presser feet, converters, waste trays, needles, and support.
The best buy is the machine that matches both your current projects and the way you prefer to learn. A clear manual and dependable basic seam may save more frustration than a longer feature list.
What Is a Serger and What Does It Do?
A serger, also called an overlocker, usually forms stitches using needles and loopers while an integrated cutting system trims excess seam allowance. A suitable overlock stitch can join fabric and wrap its raw edge in one operation, which is why a serger is useful for garments, knit tops, lounge clothing, fleece projects, and neat interior finishes. On many models, the cutting knife can be disengaged for techniques that do not require trimming.
An overlocker is especially helpful on stretchy fabrics because the finished seam can flex with the garment. It is not automatically better than a regular machine for every seam, however. Straight topstitching, buttonholes, most zipper insertions, and conventional precise seam construction usually remain jobs for a standard sewing machine. If you are just learning the basics, my sewing machine basics guide explains the companion machine you still need.
Serger vs. Sewing Machine vs. Coverstitch Machine
A regular sewing machine usually interlocks a needle thread with bobbin thread to make straight or zigzag stitches and handles everyday construction, closures, topstitching, and a wide range of accessories. A serger does not use the same bobbin system. Instead, its needle-and-looper arrangement wraps the fabric edge, often while trimming it, so the inside of a garment can look cleaner and the seam can stretch.
A coverstitch machine has another job: it makes the parallel top rows and looper-thread underside commonly used to hem knit T-shirts and leggings. Some higher-priced combination machines perform both functions, but switching between modes may require rethreading and adjustments. The six standard sergers below are selected for overlocking, not for true coverstitch hemming. Beginners choosing their first standard machine can also compare my best sewing machines for beginners.
How to Choose a Beginner Serger: Features That Matter
I prefer to learn a small set of controls thoroughly rather than buy a machine based on every accessory mentioned in an advertisement. These are the features I look at first when evaluating a potential starter serger.
3-Thread and 4-Thread Overlock Stitches
A four-thread overlock uses two needle threads with the loopers to produce a common garment-construction seam. Three-thread overlocking is often used for finishing raw edges or lighter applications, depending on the project and machine instructions. Some sergers also support two-thread stitches, but not every model in this guide does.
Clear Threading Paths and Looper Access
Threading difficulty is one of the biggest practical hurdles for new owners. I look for color-coded guides, enough room to reach the lower looper, and instructions that show the correct threading order. Lay-in guides and illuminated work areas can help, but they do not make a standard machine an air-threading serger.
Differential Feed for Knits and Lightweight Fabrics
Differential feed changes how the front and rear feed dogs move the material. It can reduce stretched, wavy seams on jersey or help control puckering on lighter woven cloth; higher settings may also gather fabric intentionally. I still test adjustments on an offcut because the correct ratio is not universal.
Adjustable Stitch Length and Cutting Width
Stitch length changes the spacing of the overlock stitches, while cutting width determines how much fabric is left beneath the wrapped edge. These settings help match the stitch to the fabric weight and seam allowance. Manufacturer measurement ranges are useful, but an attractive number alone does not establish clean stitching.
Rolled-Hem Conversion
A rolled hem is useful for napkins, scarves, lightweight fabric edges, and decorative finishes. Some sergers offer a quick-change lever while others require a more involved setup described in the manual. I check whether the conversion affects stitch fingers, tension, length, and other settings before assuming it takes one step.
Adjustable Presser-Foot Pressure
Foot pressure influences how firmly the fabric is held while feeding. An adjustable system can help with different fabric thicknesses and textures, but it must be used carefully alongside differential feed. Too much pressure can distort soft material, while too little may cause inconsistent feeding.
Free-Arm Access for Cuffs and Sleeves
A free arm provides a narrower work area for circular pieces such as small cuffs, leg openings, and sleeves. It is useful if children’s clothing or alterations are part of your routine. Not every beginner serger advertises a free arm, so I would never assume it is present without checking the exact model.
Knife Design and Retractable Upper Knife
The blade is a defining feature of a serger because it can trim fabric while the stitch forms. A retractable or disengageable upper knife is useful for certain techniques, but even a durable blade needs cleaning and eventual servicing. I turn the machine off before opening the cutting area and follow the manual when changing or inspecting the knife.
Speed, Control, and Stability
A stated top speed of 1,300 or 1,500 stitches per minute describes maximum capacity, not the speed a beginner must use. Smooth control at a comfortable pace matters more on curved seams and small garment pieces. A stable surface and sensible fabric support also help prevent the project from pulling on the stitch line.
Included Feet, Parts, and After-Sale Support
A gathering foot or blind-stitch foot can extend what you make without a separate purchase. I compare the included kit, manual, compatible needles, replacement knife availability, warranty terms, and access to qualified service. Third-party Amazon bundles may differ from the manufacturer’s base package, so always verify the exact listing.
Beginner Serger Features and Specifications: Quick Reference
The descriptions above explain what the controls actually do. A specification table is most useful only after you know what question each feature answers; more thread options, for example, do not automatically mean a cleaner seam, and advertised top speed does not prove easier control.
Before comparing machines, I use three checks: decide whether four-thread garment construction is the primary job, note which convenience features would remove genuine friction for me, and verify the supplied accessories against the precise new-product listing. This keeps a neat spec sheet from disguising a machine that is awkward for my intended work.
- Prioritize four-thread overlock, sensible threading access, and differential feed for general beginner garment sewing.
- Add two-thread capability, a free arm, or quick rolled hems when specific projects genuinely require them.
- Treat maximum speed, nominal weight, and marketing labels as supporting details, not stand-alone performance scores.
| Feature / Specification | What It Means for a Beginner | What to Verify |
|---|---|---|
| Thread capability | Determines the stitch configurations available | 3/4 or 2/3/4, as stated by the maker |
| Color-coded / lay-in threading | Helps you follow the correct thread path | Lower-looper access and manual diagrams |
| Differential feed | Helps manage stretching, puckering, and gathering | Adjustment exists and is explained |
| Rolled-hem conversion | Supports fine finished or decorative edges | Changeover procedure, not just label |
| Adjustable cut width | Controls fabric edge width under overlock | Actual range for selected model |
| Presser-foot pressure | Useful across fabrics of different thickness | Whether user-adjustable |
| Free arm | Helps with narrower tubular openings | Explicit manufacturer confirmation |
| Accessories and warranty | Affect first-use value and ownership costs | Exact box contents, seller, and US coverage |
How I Evaluate and Test Sergers at MariaSew
When I evaluate a sewing machine or serger, I start with the things a beginner has to do repeatedly: set it up, thread it, identify its controls, and sew a usable sample. I do not judge a serger solely from its advertised speed or how many stitches appear on the packaging. For a meaningful hands-on comparison, I use the same fabric types, thread quality, seam allowances, and setup order so that one machine is not given an easier task than another.
My serger checklist begins with stable quilting cotton, then moves to a stretchy jersey, a lightweight woven piece, and a thicker seam crossing when the manufacturer says that fabric is suitable. I inspect whether the seam lies flat, whether the looped edge is balanced, how consistently the blade trims, and what happens when I change differential feed one setting at a time. I also note how readable the threading map is, whether the looper area is accessible, and how quickly I can return to a known-good stitch after a mistake.
- Threading and rethreading: I follow the manual from the beginning rather than relying on a shortcut that may be specific to another model.
- Stitch quality: I inspect both sides, the wrapped edge, seam stretch, loops, gaps, waviness, and visible puckering.
- Fabric progression: I work from manageable woven scraps to knits and suitable thicker materials instead of starting with difficult layers.
- Ease of adjustments: I change one control at a time and record the result so an improvement has a clear cause.
- Safety and care: I check knife access, lint removal, needle guidance, and when the manual requires the machine to be unplugged.
Editorial distinction: This six-model buying guide compares verified manufacturer features and available retailer information. It does not present invented side-by-side stitch tests, measured noise levels, or personal ownership of all six units. For my wider approach to sewing accuracy and troubleshooting, see MariaSew’s sewing techniques for beginners.
6 Best Sergers for Beginners in 2026
I have chosen six distinct options rather than filling the list with nearly identical variations of one machine. Each model has a different reason to make a shortlist: established beginner basics, flexible budget features, simpler threading, tougher fabrics, or a longer-term garment-sewing upgrade. The recommendation is about documented suitability, not a claim of a universal laboratory winner.
1. Brother 1034D: Best Overall First Serger
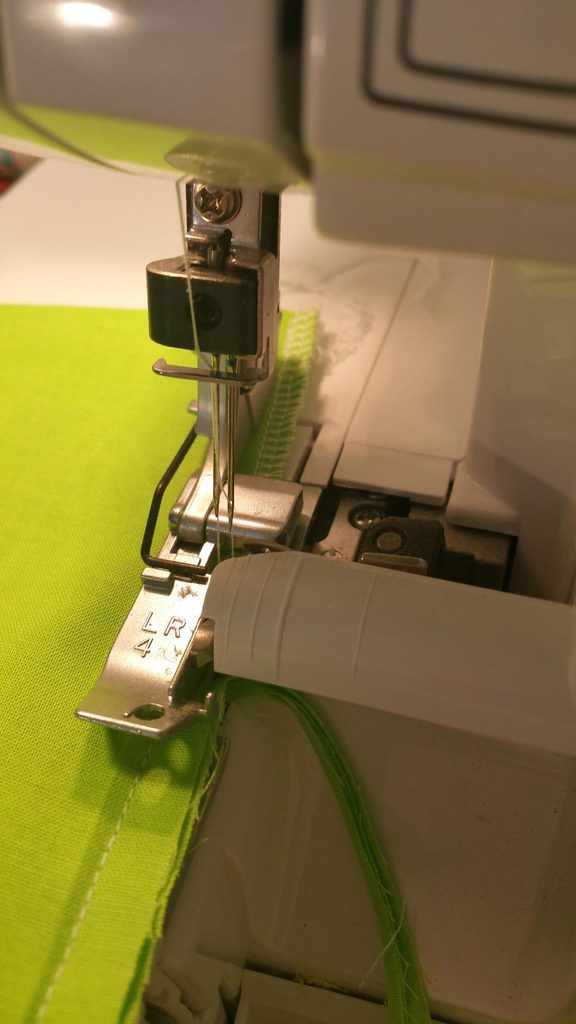
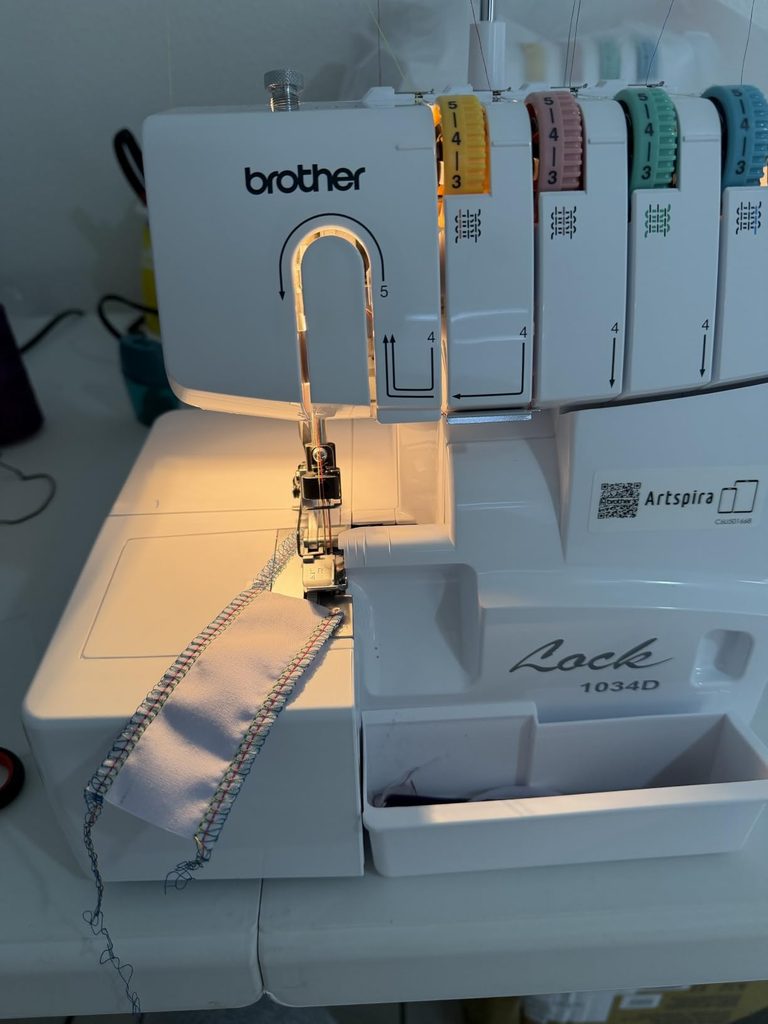
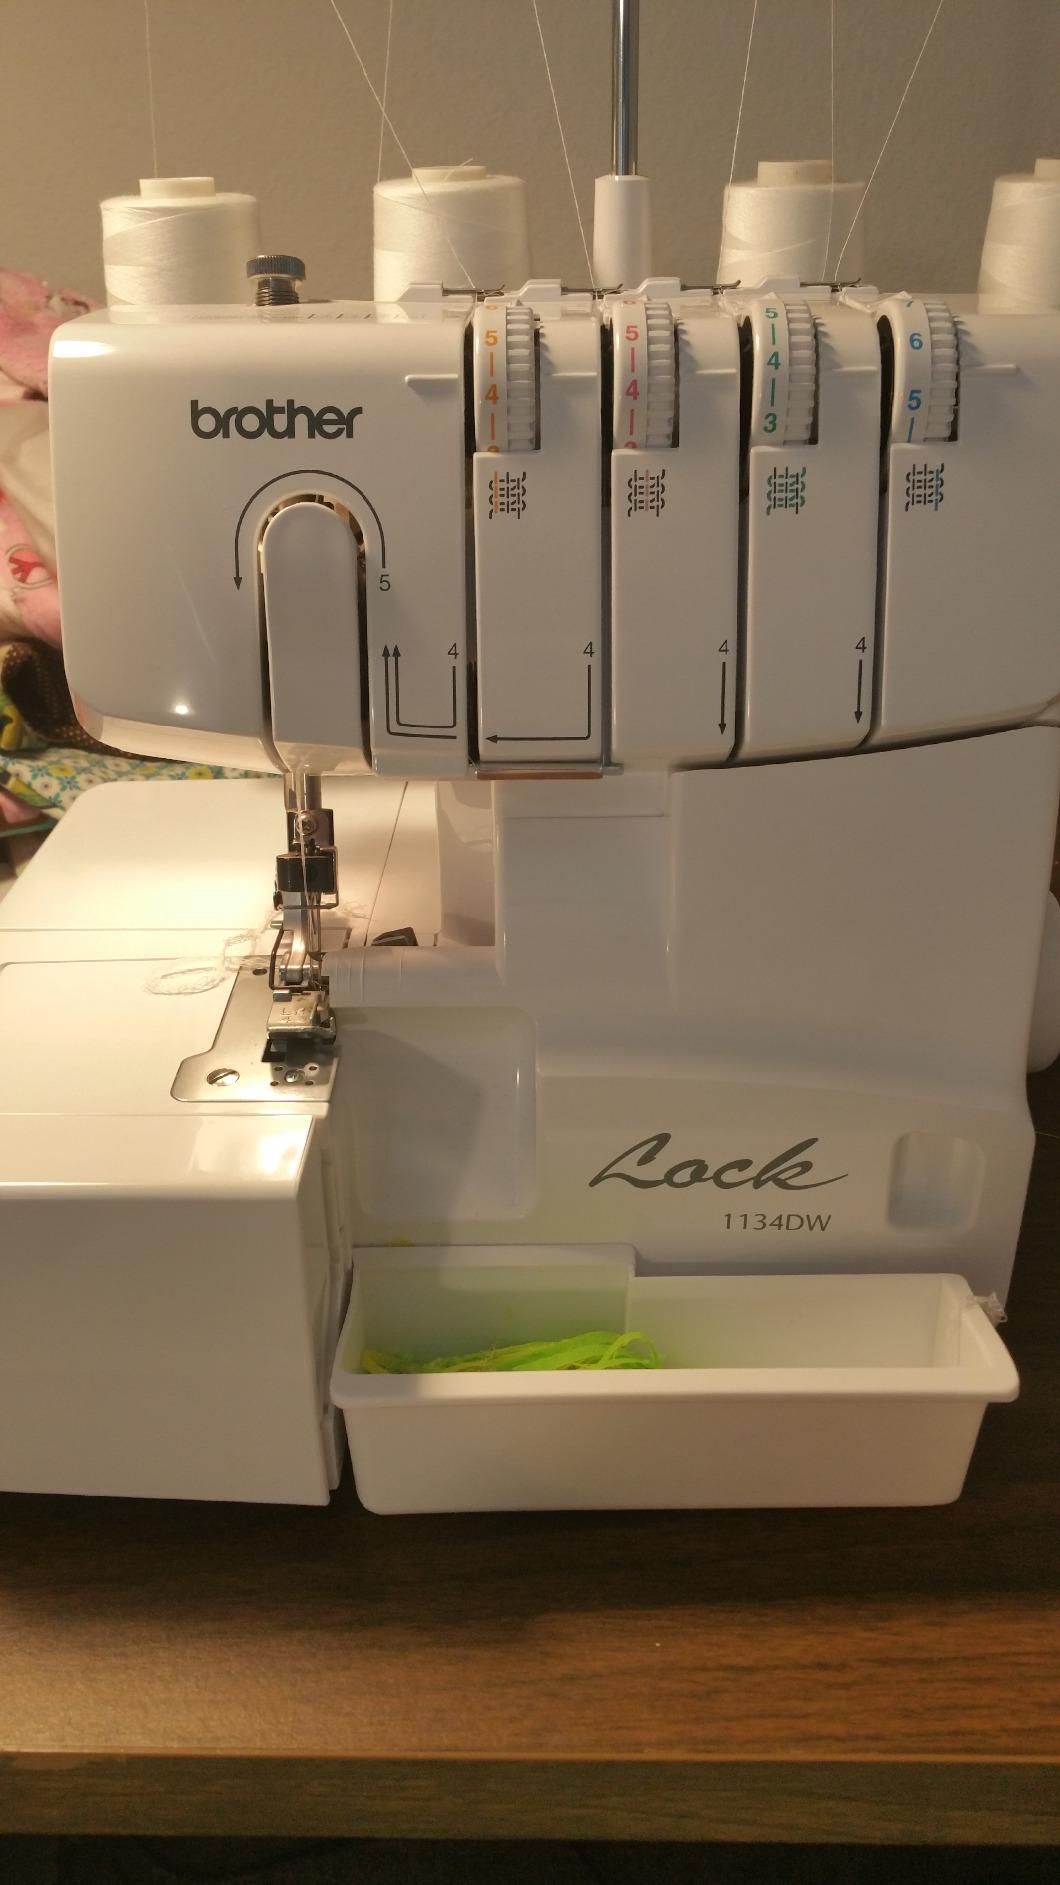
The Brother 1034D is my default recommendation for someone who wants the core functions of an overlocker without learning a large set of advanced settings first. Brother has three- and four-thread operation, differential feed, color-coded upper guides with a lower-looper threading system, and a maximum speed of 1,300 stitches per minute. Its options include four-thread overlocking, three-thread finishing, narrow and rolled hems, and a decorative ribbon-lock stitch. Three snap-on feet, standard, blind-stitch, and gathering, are listed in the US package, making the accessory selection useful from day one.
I would choose the 1034D for a first attempt at T-shirts, simple knit lounge pants, clean woven seams, and basic decorative edges, especially if detailed teaching resources matter more than extra threading configurations. The important limit is that Brother specifies 3/4-thread, not a two-thread converter, and this model is not a coverstitch machine. Its maximum 1,300-stitch speed is plenty for home sewing, but I would learn on scrap at a comfortable pedal speed.
Pros
- Color-coded thread paths and model-specific guidance support first-time setup.
- Four-thread construction and three-thread edge finishing cover common garment work.
- Differential feed helps control knit stretch and lightweight puckering.
- Three practical snap-on accessory feet are listed by Brother.
- Up to 1,300 stitches per minute offers room to grow without needing that speed immediately.
Cons
- Does not offer the two-thread configurations available on some competitors.
- Conventional lower-looper threading still requires practice.
- It is not a replacement for a sewing machine or a dedicated coverstitch unit.
Final verdict: My best all-round starting point for learning overlock stitching, routine garments, and straightforward maintenance. Choose it for dependable essentials rather than extra stitch modes.
2. SINGER S0100: Best for Budget-Conscious Feature Coverage
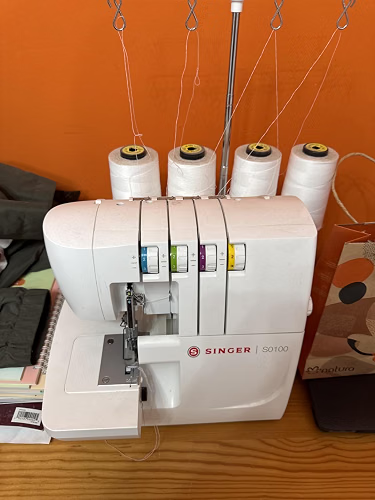
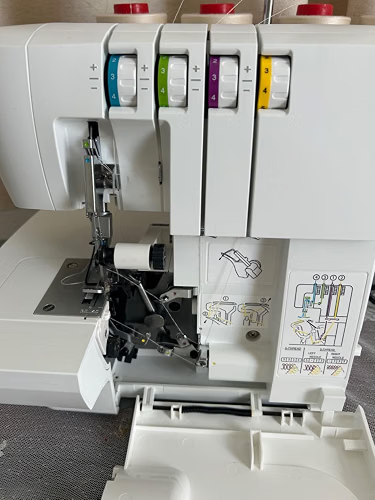
The SINGER S0100 has an attractive beginner-oriented feature mix when the selling price is competitive with the Brother. Singer confirms two-, three-, and four-thread stitches, differential feed, color-coded threading, a built-in free arm, a built-in rolled-hem conversion, and maximum stitching speed of 1,300 per minute. It is particularly worth a look for a beginner who wants to experiment with decorative edge finishes and cuff-sized projects rather than remaining exclusively with four-thread construction seams.
I would compare the S0100 carefully against the S0230 and other Singer listings because similar product descriptions do not guarantee identical bundles, prices, or condition. The S0100 has conventional threading rather than push-button air threading, and the many adjustments still require sample sewing. Singer has a metal internal frame, a general-purpose foot, basic tools, and foot controller for its standard package.
Pros
- Supports 2/3/4-thread overlock configurations.
- Free arm is useful for cuffs, sleeves, and narrow openings.
- Differential feed helps with stretchy and delicate fabrics.
- Color coding and on-machine threading references aid setup.
- Rolled-hem conversion and retractable knife add versatility.
Cons
- Not an automatic or air-threaded machine.
- Standard accessory kit is less specialized than some Brother bundles.
- Price can overlap more premium alternatives, so its value depends on the current offer.
Final verdict: An appealing starter when a live Amazon offer makes its 2/3/4-thread features good value. Prioritize it if a free arm and flexible edges matter more than extra bundled feet.
3. Janome MOD-8933: Best Lay-In Threading Alternative
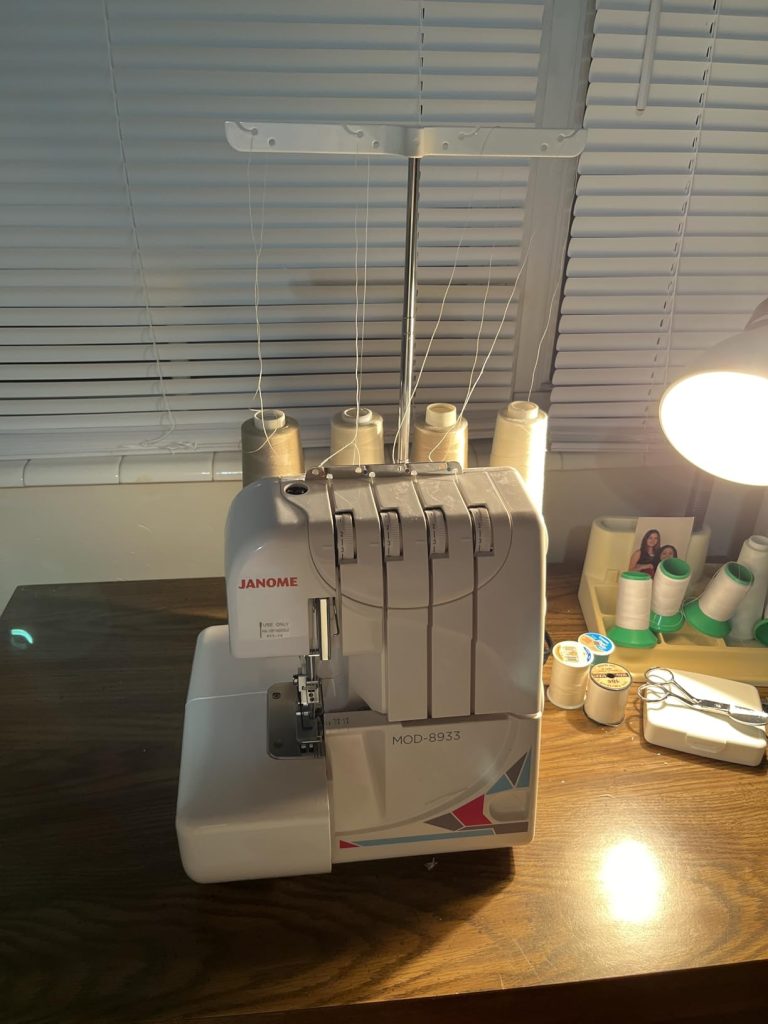
Janome’s MOD-8933 takes a simple, compact approach without claiming to be an air-threading machine. The official specification has a three- or four-thread serger, lay-in tension dials, color-coded threading guides, a readable threading chart, an accessible lower looper, and quick-change rolled-hem capability. The machine also has adjustable presser-foot pressure, an upper knife that retracts, stitch length from 1 to 4 mm, and differential feed stated by Janome as 0.5 to 2.25. Its published maximum speed is 1,300 stitches per minute.
I would shortlist the MOD-8933 for someone who likes a clear mechanical layout and expects to sew garments over several years, but does not need two-thread work. It is also a sensible alternative if you prefer Janome’s dealer and manual ecosystem and want careful control of the rolled-hem transition. The manufacturer’s listed base kit differs from some Amazon bundles, so verify the included feet, needles, and any accessories before judging price.
Pros
- Lay-in tension and color-coded threading provide helpful setup cues.
- Accessible lower-looper area and printed threading chart support rethreading.
- Adjustable differential feed offers a broad published range.
- Quick-change rolled hem adds practical decorative finishing.
- Adjustable presser-foot pressure and retractable upper knife add flexibility.
Cons
- Janome has 3/4-thread rather than two-thread operation.
- Manual threading is still a learned skill, not fully automatic.
- Base accessories are limited and may differ from retail bundles.
Final verdict: A credible first serger for buyers who value a compact, clearly labeled mechanical machine. A good Janome-centered choice when the exact price and seller compete well with Brother and Singer.
4. SINGER HD0500S: Best for Visibility While Threading
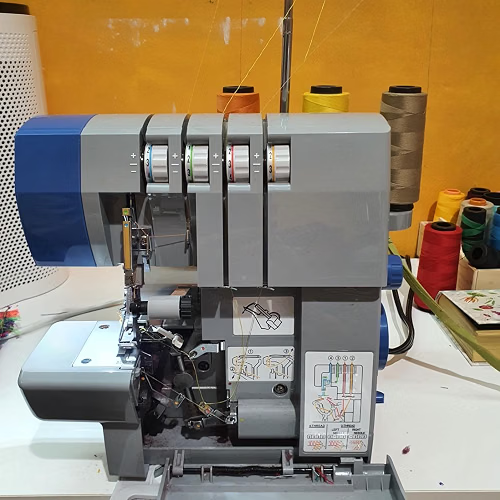
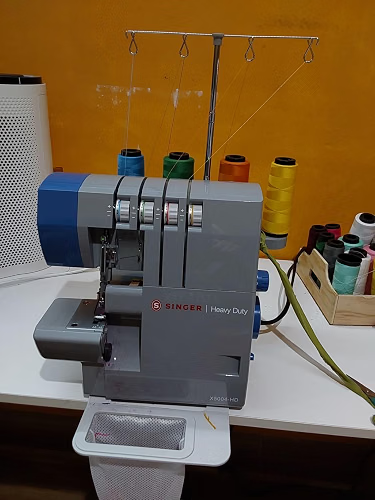
The SINGER HD0500S is my convenience-focused choice for a beginner who finds the looper area difficult to see. Singer promotes an Easy View Threading light that illuminates the lower-looper path, plus color-coded tension dials and threading guides. Official features also include two-, three-, and four-thread options, differential feed, a free arm, and a maximum speed of 1,300 stitches per minute. Singer describes its motor as having 20% higher wattage than its standard overlock line, which is the maker’s comparative claim rather than independent proof that it wins every heavy-fabric test.
I would consider it for cuffs, woven household projects, occasional denim seams, and sewists who appreciate better visibility during setup. A lower-looper light can reduce guesswork, but it does not route the thread by itself. I also like that the stated accessory list includes a two-thread converter, spare lower knife and waste tray; check that those are actually included with the Amazon offer you choose.
Pros
- Lower-looper LED targets a common threading pain point.
- Supports two-, three-, and four-thread techniques.
- Free arm helps with circular garment pieces.
- Differential feed and adjustable settings suit a range of fabrics.
- Includes useful care accessories on Singer’s standard product list.
Cons
- LED assistance is not the same as air threading.
- Manufacturer motor-power marketing does not guarantee superior real-world pickup or stitch quality.
- Its premium over basic Singer models needs to be justified by the current offer.
Final verdict: A strong fit when lower-looper visibility is the main concern and the added features fit your budget. Buy for its threading aids and useful kit, not for an unverified performance guarantee.
5. Brother ST4031HD: Best for Heavier Fabric Projects
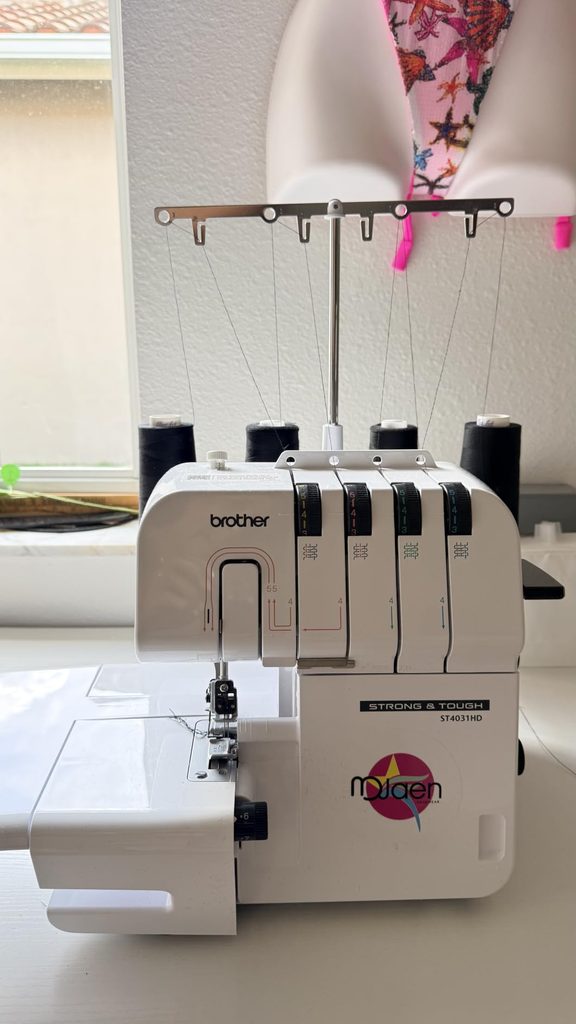
The Brother ST4031HD Strong & Tough is designed around more demanding home serging than an occasional light cotton project. Brother specifies 3/4-thread overlocking, up to 1,300 stitches per minute, a durable carbon-steel cutting blade, a heavy-duty interior metal frame, and a large extension table for better fabric support. Differential feed and three included feet round out its utility for projects where a heavy skirt, canvas, or stacked seam could otherwise tug against the work area.
I would recommend the ST4031HD to beginners who already know they will work on suitable heavier fabrics and want the extra table and cutter emphasis from the outset. That does not mean forcing any number of denim layers beneath the presser foot: follow the manual, choose appropriate needles and thread, slow at seam crossings, and never treat a heavy-duty label as permission to ignore limits. Brother has this one as a 3/4-thread serger; it should not be misdescribed as supporting two-thread work.
Pros
- Heavy-duty metal frame and carbon-steel blade are model-specific strengths.
- Included extension table supports larger or weightier projects.
- Differential feed provides essential fabric-control flexibility.
- Three included feet cover standard, gathering, and blind-stitch work.
- 1,300-stitch maximum speed is competitive for home use.
Cons
- Supports three and four threads, not two-thread options.
- Larger table and heavy-duty construction take more workspace.
- Added cost may be unnecessary for occasional lightweight sewing.
Final verdict: My pick for a buyer who knows heavier woven projects are part of the plan. If most of your work is simple knit tops, the less expensive 1034D may be the more sensible first investment.
6. JUKI MO-654DE: Best Step-Up for Frequent Garment Sewing
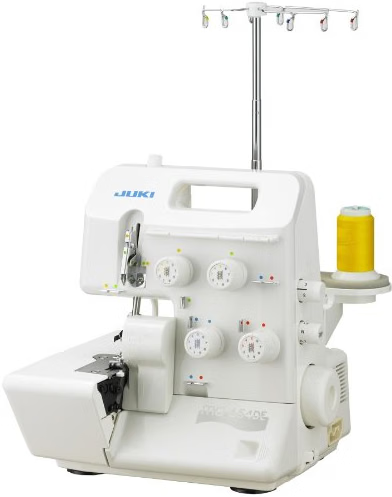
JUKI’s MO-654DE is the step-up option in this shortlist for someone ready to invest in frequent garment construction. Its official page confirms two-, three-, and four-thread overlock stitches, differential feed, built-in rolled hemming, and flatlock variations. JUKI also publishes a top speed of up to 1,500 stitches per minute and positions the machine for light through heavier fabrics when used as directed. The higher maximum speed is a capacity specification, not a claim that a beginner needs to work that fast.
I would shortlist this model if you routinely sew knits and woven garments and want a conventional, established machine with room to refine your technique. The trade-off is the learning curve and cost: it is a manual-threading overlocker, not a push-button air-threader, and JUKI’s suggested retail price can be much higher than discounted dealer or Amazon offers. Check that the Amazon listing is the US electrical configuration and that any third-party seller’s warranty terms are acceptable.
Pros
- Supports two-, three-, and four-thread stitch configurations.
- Differential feed and rolled-hemming capability suit garment work.
- Advertised maximum 1,500-stitch speed offers headroom for experienced use.
- Flatlock options broaden decorative and construction techniques.
- Established machine family offers detailed manufacturer documentation.
Cons
- Higher acquisition cost than many basic beginner models.
- Conventional threading still requires practice and correct order.
- Fast advertised speed is not itself evidence of easier beginner control.
Final verdict: A worthwhile longer-term choice for the sewist expecting regular garment production and a bigger budget. For a first trial of serging, the more modest Brother or Singer models remain easier to justify financially.
Best Beginner Sergers Compared: Which One Should You Buy?
I would not rank six sergers by top speed alone. The right comparison is whether the machine supports the stitches you need, how straightforward it will be to thread, whether you need a free arm or extra workspace, and what you get for your money from the precise seller. Those factors affect real ownership more than a headline count of decorative finishes.
These six models cover distinct needs rather than identical budgets. Start with the Brother 1034D for a general first machine; consider the SINGER S0100 if two-thread finishing and a free arm are priorities; choose Janome for its lay-in layout; favor the HD0500S for lower-looper lighting; look at ST4031HD for heavier projects; and move toward JUKI for frequent garment work. None of those descriptions guarantees a stitch-quality ranking without controlled testing of your actual fabrics.
- Mostly first-time garment sewing: prioritize four-thread overlocking and a clear threading diagram.
- Frequent cuffs or sleeves: a confirmed free arm can make the workflow more comfortable.
- Heavy projects: choose appropriate fabric support, knife design, needles, and service access.
- Longer-term practice: compare setup experience, available manual, stitch flexibility, and total price.
| Serger Model | Thread Options | Advertised Max Speed | Standout Feature | Best Buyer Fit |
|---|---|---|---|---|
| Brother 1034D | 3/4 | 1,300 spm | Three included feet; color-coded setup | First all-round serger |
| SINGER S0100 | 2/3/4 | 1,300 spm | Free arm and flexible edge finishes | Feature-conscious budget buyer |
| Janome MOD-8933 | 3/4 | 1,300 spm | Lay-in guides and quick rolled hem | Mechanical-layout preference |
| SINGER HD0500S | 2/3/4 | 1,300 spm | Illuminated lower-looper path | Threading visibility priority |
| Brother ST4031HD | 3/4 | 1,300 spm | Carbon-steel blade and extension table | Heavier woven projects |
| JUKI MO-654DE | 2/3/4 | 1,500 spm | Broad overlock/flatlock capability | Frequent garment sewing |
Best Serger for Knits, Cotton, Denim, and Beginner Projects
The fabric should influence the setting and machine choice, not the other way around. For stretchy jersey I pay special attention to a balanced four-thread seam and the differential feed, because a waved edge can be caused by fabric handling as much as thread tension. On stable cotton, I check that the overlock wraps the raw edge without cutting away too much seam allowance.
For flannel or linen, the right edge finish depends on the garment and fabric weight; a three-thread overlock can finish an already joined woven seam while a four-thread stitch may construct some seams in one pass. On thicker woven fabrics, I slow down at layered crossings and confirm the model’s needle and knife limits. If the project needs a traditional straight line or precision topstitching, I return to the regular machine rather than trying to force the serger into that role.
How to Set Up and Use a Serger for the First Time
A good first session is intentionally simple. I choose two clean cotton scraps, good-quality compatible serger thread, a suitable needle, the exact owner’s manual, and a stable table with plenty of light. I also check where the presser-foot lifter, cutting area, power switch, handwheel, and waste tray are before doing anything near the needle or blade.
The following sequence gives you a repeatable starting routine without pretending that every manufacturer’s looper order and tension settings are identical. Your own manual takes priority for needle installation, threading, knife adjustment, cover interlocks, cleaning, and oiling.
- Read the model-specific threading diagram. Identify upper and lower loopers, tension controls, needle threads, and the machine’s required thread order.
- Power down for close-up adjustments. Turn the machine off and unplug it when changing a needle, inspecting the blade, or cleaning inside a cover as your manual requires.
- Install the correct needles and threads. Use only the needle system and thread specifications approved for your model.
- Thread the machine in the prescribed order. Follow each guide and looper exactly; do not rely on another brand’s shortcut.
- Start from the maker’s baseline settings. Check stitch length, cutting width, differential feed, tensions, and upper-knife position.
- Sew a short scrap seam slowly. Keep the fabric supported and do not pull it from behind the presser foot.
- Inspect the seam and adjust one setting. Compare the next sample with the first, noting which change affected the result.
- Save a successful sample. Label it with fabric type, thread, needles, and settings for the next project.
A sample that lies flat, has a securely wrapped edge, and stretches appropriately for its fabric is more valuable than racing through a practice seam. Once you can reproduce a good seam, move on to a small garment section rather than switching instantly to delicate fabrics.
Beginner Serger Problems and How to Fix Them
The first issue is often threading, not a mechanical defect. If a stitch suddenly looks unbalanced, stop, consult the diagram, check needle condition and thread quality, and return to the manual’s normal settings before making several tension changes. A serger has loopers instead of a traditional bobbin, so regular sewing-machine bobbin troubleshooting does not apply directly.
Loops Hang Beyond the Fabric Edge
Check whether the fabric is being cut to the correct width for the stitch and whether the looper threads are balanced. Confirm the manual’s recommended stitch width and then make a small, isolated adjustment on scrap. Avoid pulling the fabric into the blade to compensate.
Knit Seams Look Wavy
Differential feed is the first model-supported control I investigate after confirming correct setup. Test the maker’s recommended direction of adjustment on the same fabric. Also make sure the project is supported rather than being stretched as it enters or leaves the machine.
Threads Snap or Stitches Skip
Stop and check the full threading order, thread quality, correct needle system, and needle condition. Rethread from scratch before changing several tension dials. For general fabric and thread handling, see my sewing machine thread-break guide, while remembering that serger looper systems are different.
The Machine Trims Too Much Fabric
Recheck the cutting-width control and the seam allowance marked on your pattern. The blade should not be used as a guesswork guide, especially on a piece already cut close to its finished dimensions. Make the correction on a scrap, not an irreplaceable garment panel.
The Rolled Hem Looks Uneven
Confirm the rolled-hem changeover, which may require changes to stitch finger, length, width, and tension. A single lever may not complete the entire setup. Test on the exact fabric because a lightweight sheer behaves differently from cotton or a loosely knit material.
Common Beginner Serger Mistakes to Avoid
Most frustrating early serger problems come from treating the machine like a regular sewing machine or changing too many variables at once. I prefer a repeatable routine and a short sample rather than spending an entire project trying to guess why an edge is wavy.
- Buying for top speed instead of threading support. A fast machine with confusing instructions is not automatically the best starter.
- Assuming every serger does two-thread work. Brother’s 1034D and ST4031HD and Janome’s MOD-8933 list 3/4-thread operation.
- Confusing a rolled hem with coverstitch. They are different finishes made using different stitch arrangements.
- Ignoring the manual’s threading order. Thread paths and lower-looper sequences vary by machine.
- Using the wrong needles or old thread. Compatibility affects skipped stitches, shredding, and seam formation.
- Changing tension, differential feed, and width together. One-variable testing shows which setting helped.
- Letting the cutter remove an unplanned seam allowance. Once fabric has been trimmed, a measurement mistake is hard to reverse.
- Pulling fabric or sewing thick crossings at full speed. Support the material and follow the manufacturer’s fabric guidance.
- Skipping cleaning or oiling indiscriminately. Remove lint safely, but use oil only where the specific manual directs.
- Assuming Amazon’s bundle is the manufacturer’s standard kit. Check the exact item condition, seller, electrical configuration, and accessories.
The simplest prevention is to save a reference swatch for each common fabric. A few minutes of controlled practice gives better information than an extra accessory or an unverified “heavy duty” label.
How Much Should a Beginner Spend on a Serger?
The right spend depends on whether this is a one-project experiment or a machine you expect to use for garments every week. Start by budgeting for the machine, suitable serger thread, compatible replacement needles, practice fabric, and any accessory not actually included. Consider service access and warranty validity alongside the headline price, especially if choosing a marketplace seller.
I would not use a fixed 2026 dollar threshold as a promise because promotions and Amazon stock fluctuate. Instead, compare the live total checkout cost of at least two models with similar functions. If an inexpensive SINGER is priced close to a better-equipped Brother or Janome bundle, the seemingly lower-tier model may not be the best value that day. If you still need your first regular sewing machine, that should usually take budget priority.
Who Should Buy a Serger and Who Can Wait?
A serger makes the most sense for sewists who regularly make knit garments, want neatly enclosed edges, or need to finish a growing number of sewn pieces efficiently. It is also satisfying for decorative rolled edges, some gathering and flatlocking techniques, and frequent home garment construction, provided you are prepared to learn threading and care.
You can wait if you mainly hem occasional ready-made clothes, stitch buttonholes, insert zippers, or sew only a few simple woven projects each year. A regular machine’s zigzag or overcast stitch and appropriate presser foot may be adequate. My sewing machine basics guide and sewing machine tension guide are useful before investing in a second machine.
Final Verdict: Which Serger Should a Beginner Choose?
For most beginners, I would begin by comparing the Brother 1034D with the SINGER S0100 at their live total purchase prices. Brother’s included feet and simple 3/4-thread focus are persuasive for a first machine; Singer’s free arm and two-thread options justify a closer look when you want those functions. The Janome MOD-8933 is an excellent alternative when lay-in threading and quick rolled hems are priorities.
Choose the SINGER HD0500S for greater lower-looper visibility, the Brother ST4031HD for supported heavier-fabric projects, or the JUKI MO-654DE when you expect regular garment sewing and have room for a more expensive setup. Whichever machine you buy, learn one clean four-thread seam on scrap first. A machine you can confidently thread and maintain is a better beginner investment than a feature-rich serger that stays in its box.
Frequently Asked Questions
Which beginner serger is the easiest to learn?
There is no single verified winner for every owner. The Brother 1034D has clear color-coded threading and strong model-specific learning resources, while the Janome MOD-8933 offers lay-in guides and the Singer HD0500S illuminates the lower-looper area. Choose the layout you understand best and compare manuals before purchase.
Do I need a serger if I already own a sewing machine?
Only if its edge finishing, stretch-friendly overlock seams, or workflow speed will be useful for your projects. Many beginners can complete substantial sewing work on a regular machine alone.
Is a four-thread serger better for beginners?
Four-thread overlocking is an excellent starting technique for many garment-construction seams. The broader machine choice still depends on threading, differential feed, accessories, support, and budget rather than thread count alone.
What is the difference between a three-thread and four-thread serger stitch?
A three-thread overlock typically uses one needle with two loopers and is common for edge finishing. A four-thread overlock uses two needles and two loopers and can construct many suitable garment seams, subject to pattern instructions and fabric type.
Can a serger sew denim?
Some models are marketed and specified for multiple suitable denim layers, including Brother’s ST4031HD. Needle system, thickness, feed, and blade limits still apply. Test slowly on scraps and never force a bulky seam through the machine.
Can a serger replace a coverstitch machine?
A standard serger cannot make the usual twin-needle coverhem with the same underside as a dedicated coverstitch machine. Rolled hems and flatlocking are different techniques. Combination overlock-coverstitch machines exist, but they are a separate category.
What is differential feed and do I need it?
Differential feed changes the relative movement of two feed-dog sections. It can help control waviness and puckering and is especially useful when sewing knits. All six selected models advertise differential feed.
Do sergers use bobbins?
Ordinary domestic overlockers of this type use needles and loopers with multiple thread supplies, not the standard bobbin arrangement of a lockstitch sewing machine.
Can I use regular sewing thread in a serger?
Use the thread types, needle system, and spool setup supported by your machine’s manual and suitable for the project. Some applications use standard sewing thread, but thread weight, lint, delivery from the spool, and coverage can differ from dedicated serger thread.
What is the best beginner serger for knit fabric?
A model with four-thread overlocking and differential feed is a practical starting point. Brother 1034D, SINGER S0100, Janome MOD-8933, SINGER HD0500S, Brother ST4031HD, and JUKI MO-654DE all offer those categories, but proper adjustments matter more than a universal ranking.
Does the Brother 1034D support two-thread stitches?
No. Brother’s current US specifications list three- and four-thread serging for the 1034D. Look at machines explicitly advertised for 2/3/4-thread use when a two-thread finish is important.
Is air threading worth paying extra for?
It can be valuable if difficult looper threading would prevent you from using the machine. None of the six models in this comparison is a push-button air-threading serger, so do not confuse color coding, lay-in guides, or a looper LED with air threading.
How often should I clean or oil my serger?
Remove lint and trimmings at intervals appropriate to how much and what you sew, always following the model’s safe-access instructions. Oil only the points and schedule specified in the exact owner’s manual; do not assume every model needs the same treatment.
Are these six machines definitely in stock on Amazon USA today?
Live inventory and seller details can change at any time, and checkout stock could not be independently confirmed for every listed configuration when this guide was prepared. Open the exact Amazon listing or model search, confirm the new US model is available to your delivery ZIP code, and review the seller, return terms, voltage and warranty before buying.