Why Does My Sewing Machine Thread Keep Breaking? 10 Causes & Fixes
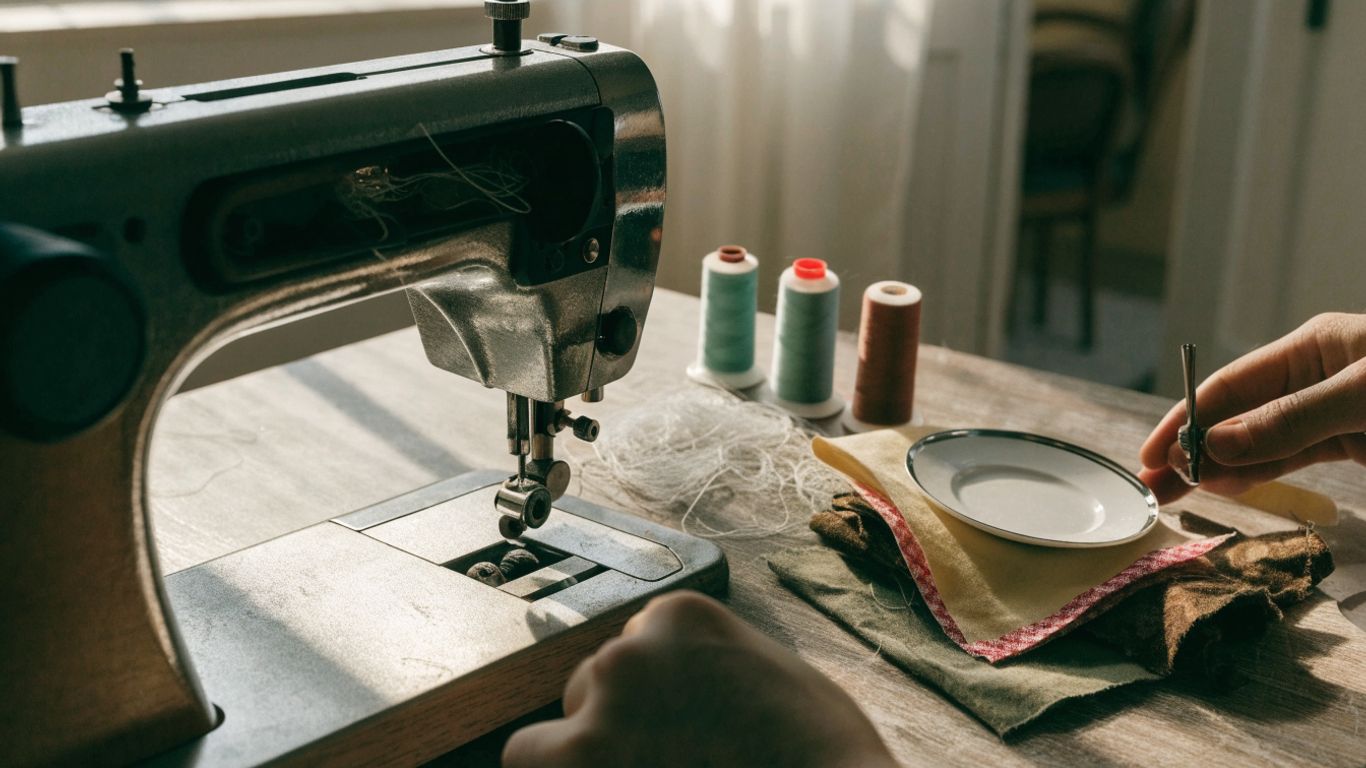
If your sewing machine thread keeps breaking, the cause is usually somewhere along the thread path rather than a major internal failure. Incorrect threading, a damaged or mismatched needle, old or unsuitable thread, excessive upper tension, a spool snag, an incorrectly seated bobbin, lint, or a rough edge can all make the thread fray and snap.
I troubleshoot these problems in a fixed order so I do not hide the real cause by changing several settings at once. This guide explains the 10 causes I see most often, the safest fixes to try first, how to tell upper-thread breakage from bobbin-thread trouble, and when repeated snapping is a sign that the machine needs service.
Quick Answer: Why Does My Sewing Machine Thread Keep Breaking?
Start by completely rethreading the upper path with the presser foot raised when your machine manual instructs it, then install a fresh needle that matches the fabric and thread. Check that the spool unwinds freely, the thread passes through every guide and the take-up lever, and the upper tension is not excessively tight. Next, reseat the correct bobbin and clean accessible lint from the bobbin and hook area. If the same thread still frays or breaks at the same point, inspect for a burr or damaged part and stop home troubleshooting if mechanical resistance or repeated needle strikes are involved.
Key Takeaways
Thread breakage is a symptom, not a diagnosis. I start with the common, reversible setup checks before touching calibrated parts or assuming the machine is damaged.
- Rethread the machine correctly before adjusting tension to rule out missed guides or the take-up lever.
- Replace bent, dull, damaged, incorrectly installed, or unsuitable needles that may fray the thread.
- Match the needle size and thread weight to your fabric to prevent friction and breakage.
- Check that the thread unwinds freely without catching on the spool cap, spool edges, or spool pin.
- Use fresh, smooth, high-quality thread to avoid breakage caused by brittle or uneven fibers.
- Reduce excessive upper tension only after checking the threading and needle.
- Clean lint and loose thread from the bobbin and hook area to prevent snagging.
- Have damaged machine parts inspected or replaced professionally instead of filing them yourself.
The safest diagnostic method is one change at a time, followed by a short test seam on the same fabric, thread, needle, and number of layers as the project.
What Does Repeated Thread Breaking Actually Mean?
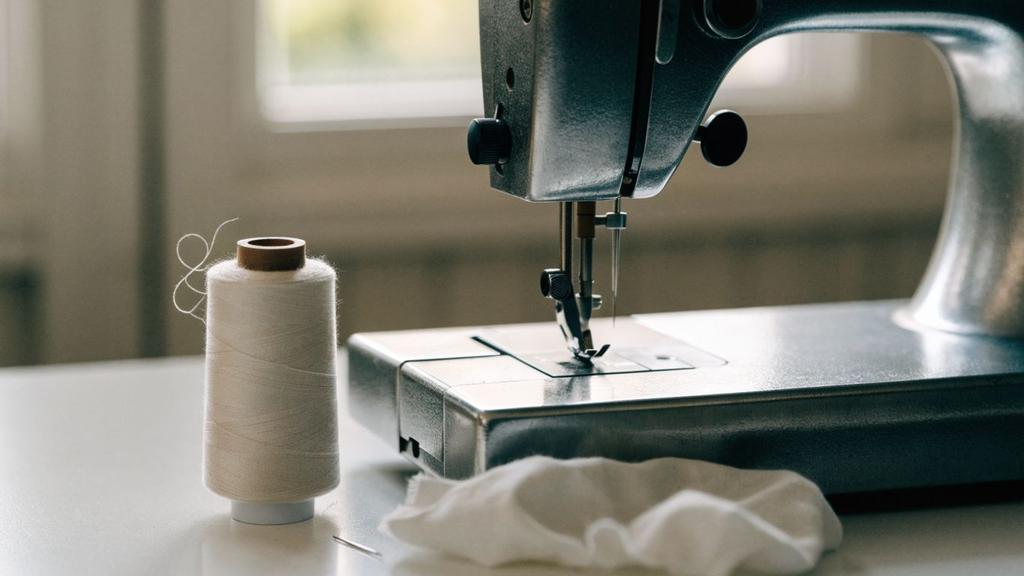
The location and timing of the break are useful clues. Thread that snaps immediately after you start sewing points me toward threading, spool feeding, needle installation, or a major snag. Thread that gradually frays near the needle points more strongly toward a damaged needle eye, poor needle-thread compatibility, or a rough surface.
If the break happens only on thick seam crossings or at high speed, I also look at needle deflection, project drag, and whether the machine is being asked to force an unsuitable needle through a dense stack. If the break always happens in the exact same area of the stitch cycle, I inspect for a burr or mechanical contact point.
How I Test Sewing Machine Thread-Breaking Problems at MariaSew
I have more than 12 years of hands-on sewing experience, and I personally use the sewing machines and troubleshooting methods I recommend on MariaSew. When thread starts snapping during a test, I do not immediately turn the tension dial or blame the bobbin. I reproduce the problem on scrap fabric, note exactly where the thread breaks, and isolate one variable at a time.
I test ordinary quilting cotton first, then lightweight woven fabric, stretch fabric, denim seam crossings, and layered fabric when the problem seems material-dependent. I repeat the same seam after rethreading, replacing the needle, changing the thread, reseating the bobbin, and cleaning the hook area so I can tell which correction actually changed the result.
- Thread-path test. I rethread from spool to needle, confirm every guide and the take-up lever, and watch for the spool or cap catching the thread.
- Needle test. I install a fresh correct needle rather than trying to judge a tiny bend or rough eye by sight alone.
- Thread test. I switch to a known-good spool that suits the needle and fabric so weak or fuzzy thread is removed from the equation.
- Tension test. I return to the normal manufacturer-recommended range and make only small upper-tension changes after setup is verified.
- Bobbin and hook test. I confirm the correct bobbin, winding quality, insertion direction, case seating, and accessible lint or wrapped thread.
- Service threshold. If the thread still catches at the same metal point, the handwheel is resistant, or the needle repeatedly hits the foot, plate, or hook area, I stop testing and arrange service.
This matches MariaSew’s broader hands-on sewing machine troubleshooting process and the site’s published standard that techniques and machines are tested under real conditions.
Why Does Sewing Machine Thread Keep Breaking? 10 Common Causes
I work through these causes from the easiest setup problems to issues more likely to need service. The goal is to solve the problem without introducing a second one by changing too many settings.
1. The Upper Thread Is Routed Incorrectly
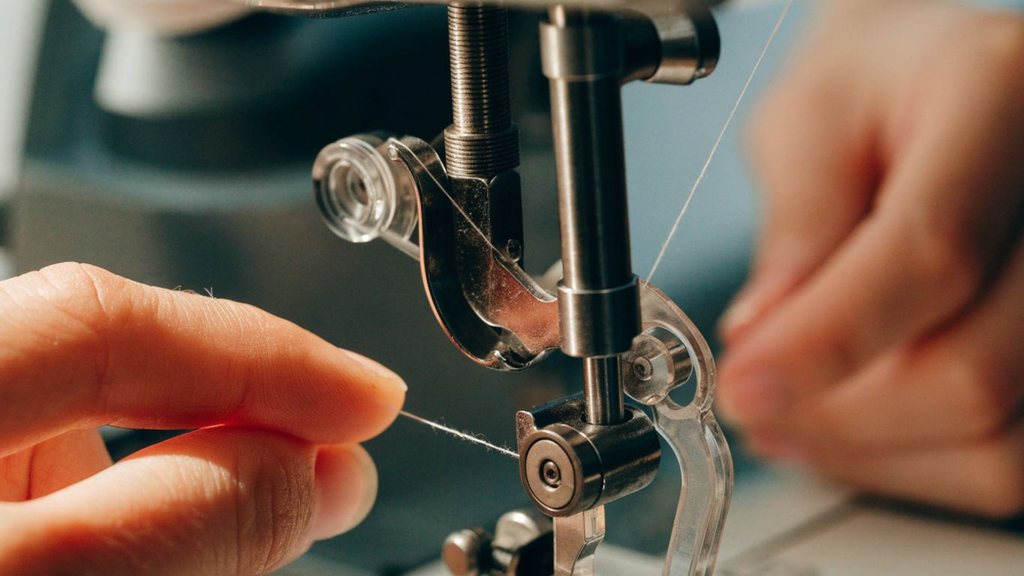
A missed guide, tension path, or take-up lever can create sharp changes in thread tension as the needle moves. The thread may look normal while the machine is still, then jerk, fray, or snap once sewing begins.
If the path is uncertain, start with my step-by-step sewing machine threading guide and follow your exact machine manual where the layouts differ.
2. The Thread Is Catching on the Spool, Cap, or Thread Path
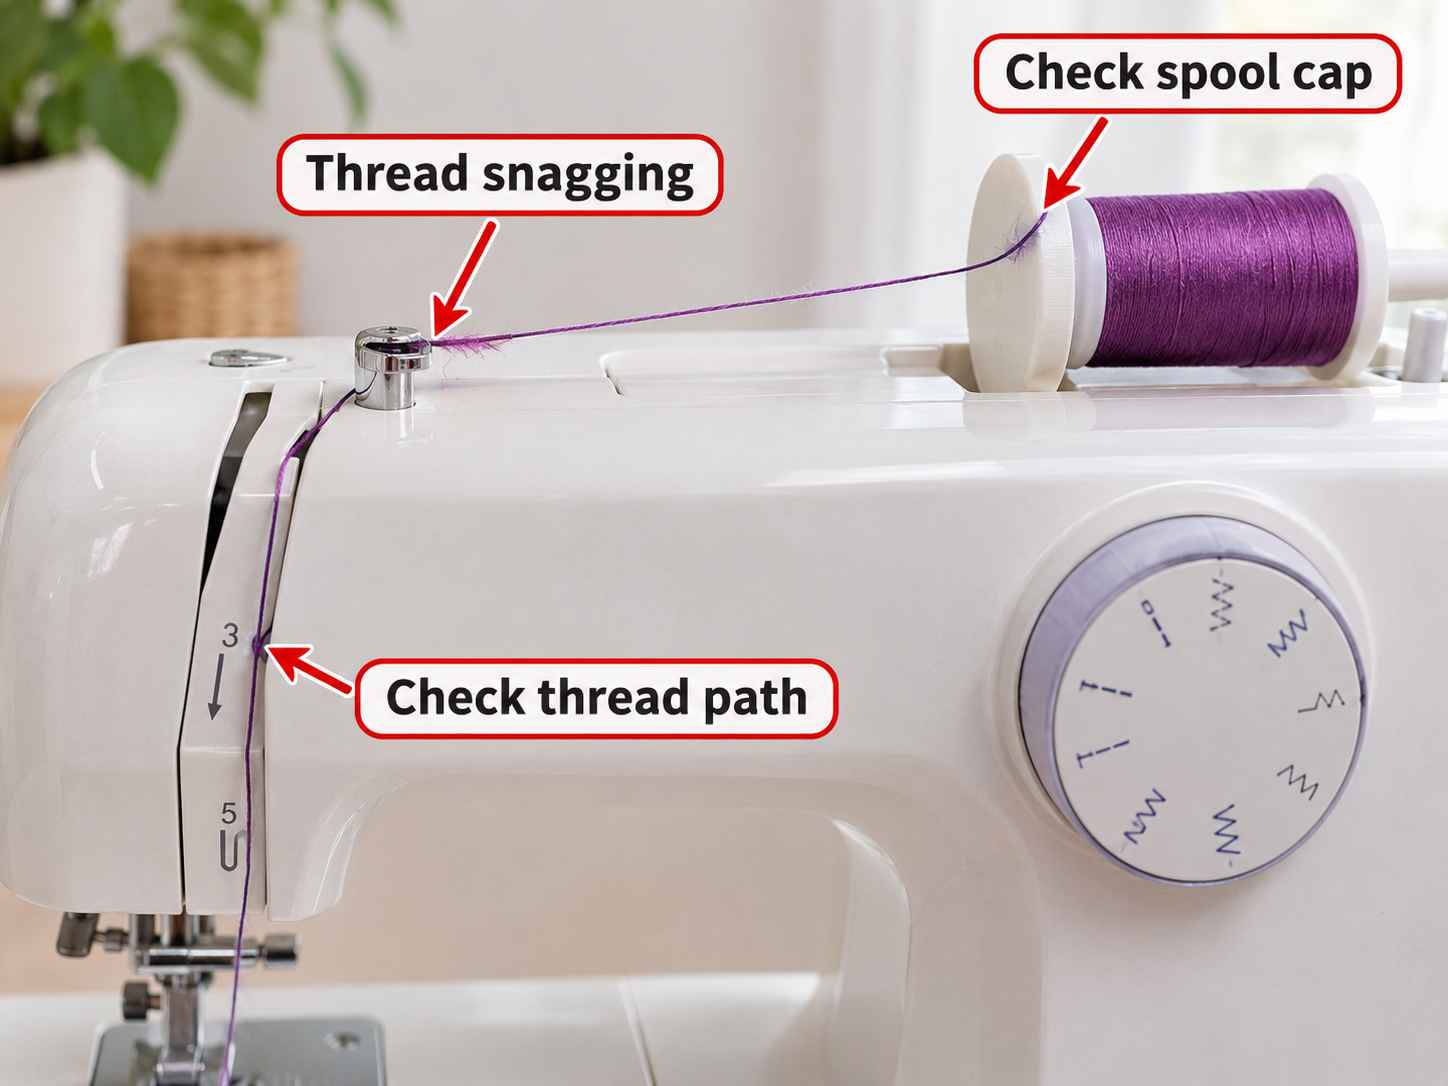
Thread can snag behind an oversized spool cap, catch on a rough spool edge, wrap around the spool pin, or hang on a guide before it ever reaches the needle. I gently pull thread from the needle end with the presser foot raised and watch the spool to see whether it unwinds smoothly.
3. The Needle Is Bent, Dull, Damaged, or Installed Incorrectly
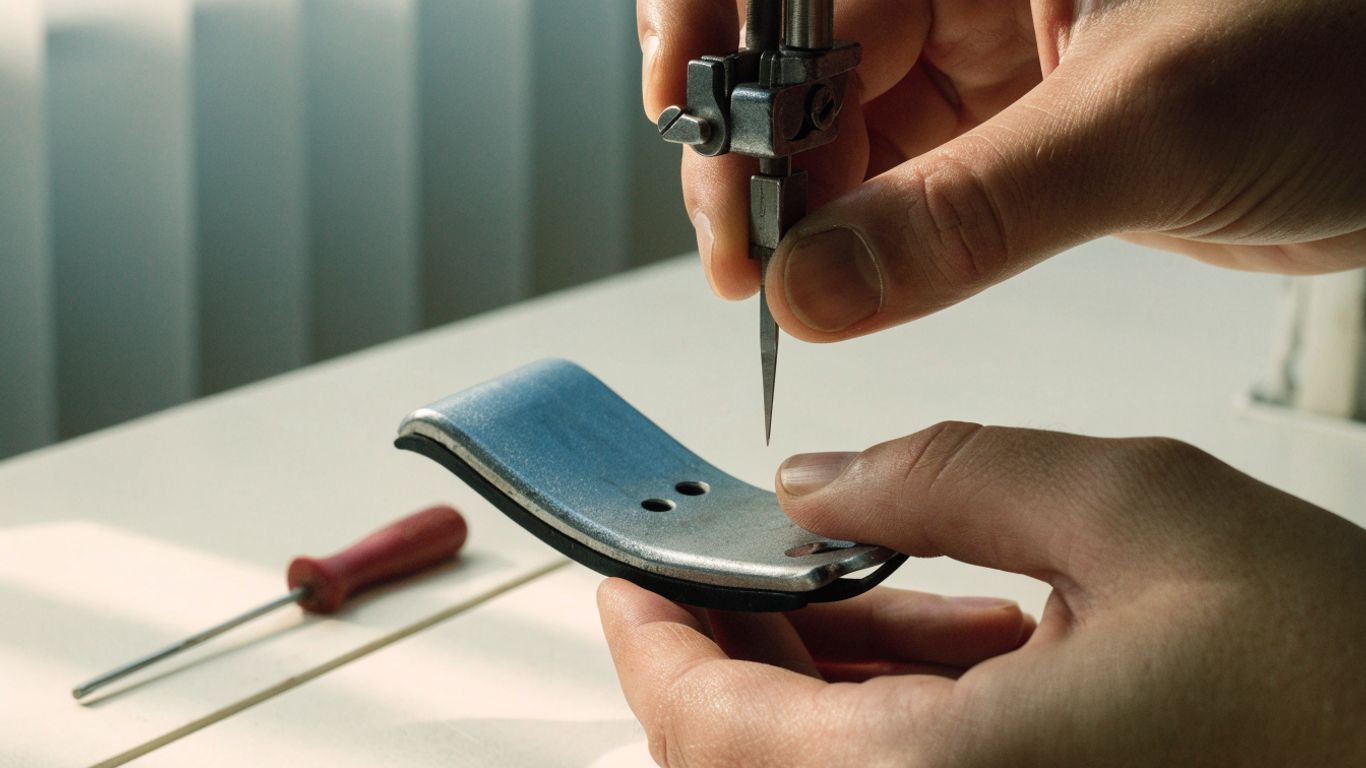
A worn needle eye can act like a tiny file on the thread, while a bent needle can create abnormal rubbing as it passes through the fabric or near the hook. I replace the needle if it has hit a pin, presser foot, needle plate, or thick seam unexpectedly.
I also insert the new needle fully and orient it exactly as the manual specifies. Needle direction varies across machine types, so I do not assume every model installs the same way.
4. The Needle and Thread Are the Wrong Match
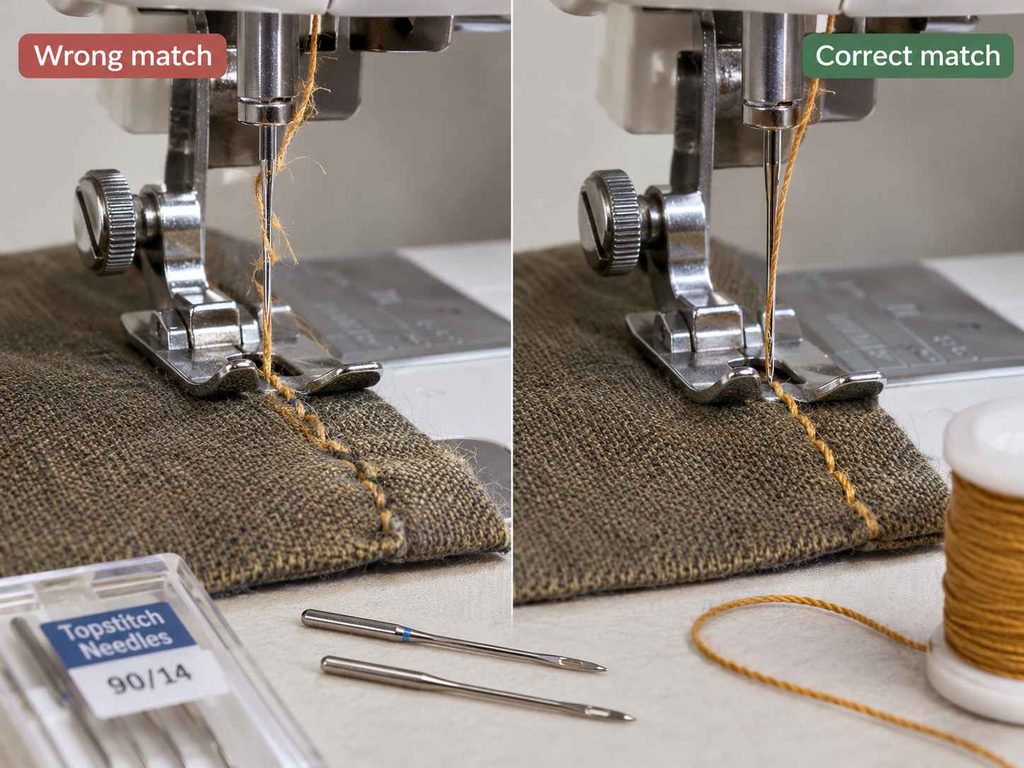
Thread must pass through the needle eye without being squeezed or abraded. Heavy topstitching thread in a fine needle, or a needle style that does not suit the fabric, can increase friction and create shredding even when the machine tension is normal.
I match the needle type and size to both the fabric and thread. A denim needle, stretch needle, Microtex needle, or larger eye can solve a problem that no amount of tension adjustment will fix.
5. The Thread Is Old, Brittle, Fuzzy, or Poorly Made
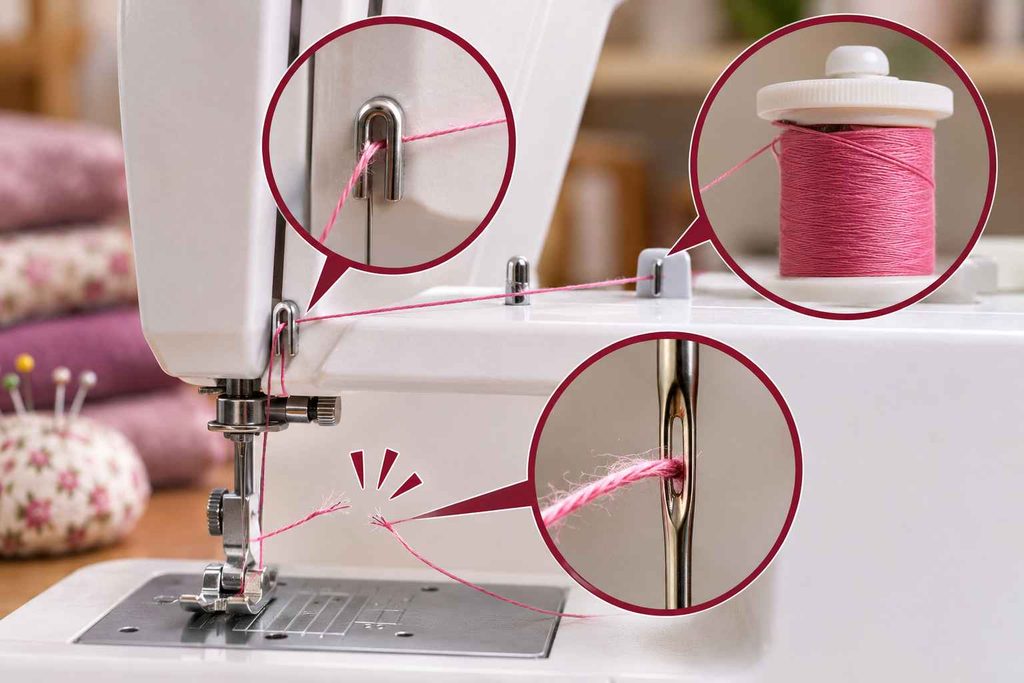
Thread can weaken from age, heat, sunlight, dust, or poor storage. A fuzzy or uneven filament can also drag through guides and the needle eye, creating inconsistent resistance and eventual breakage.
I test with a fresh spool from a reliable brand before diagnosing the machine itself. If the break disappears immediately, I have saved myself from unnecessary tension changes or service.
6. Upper Thread Tension Is Too Tight
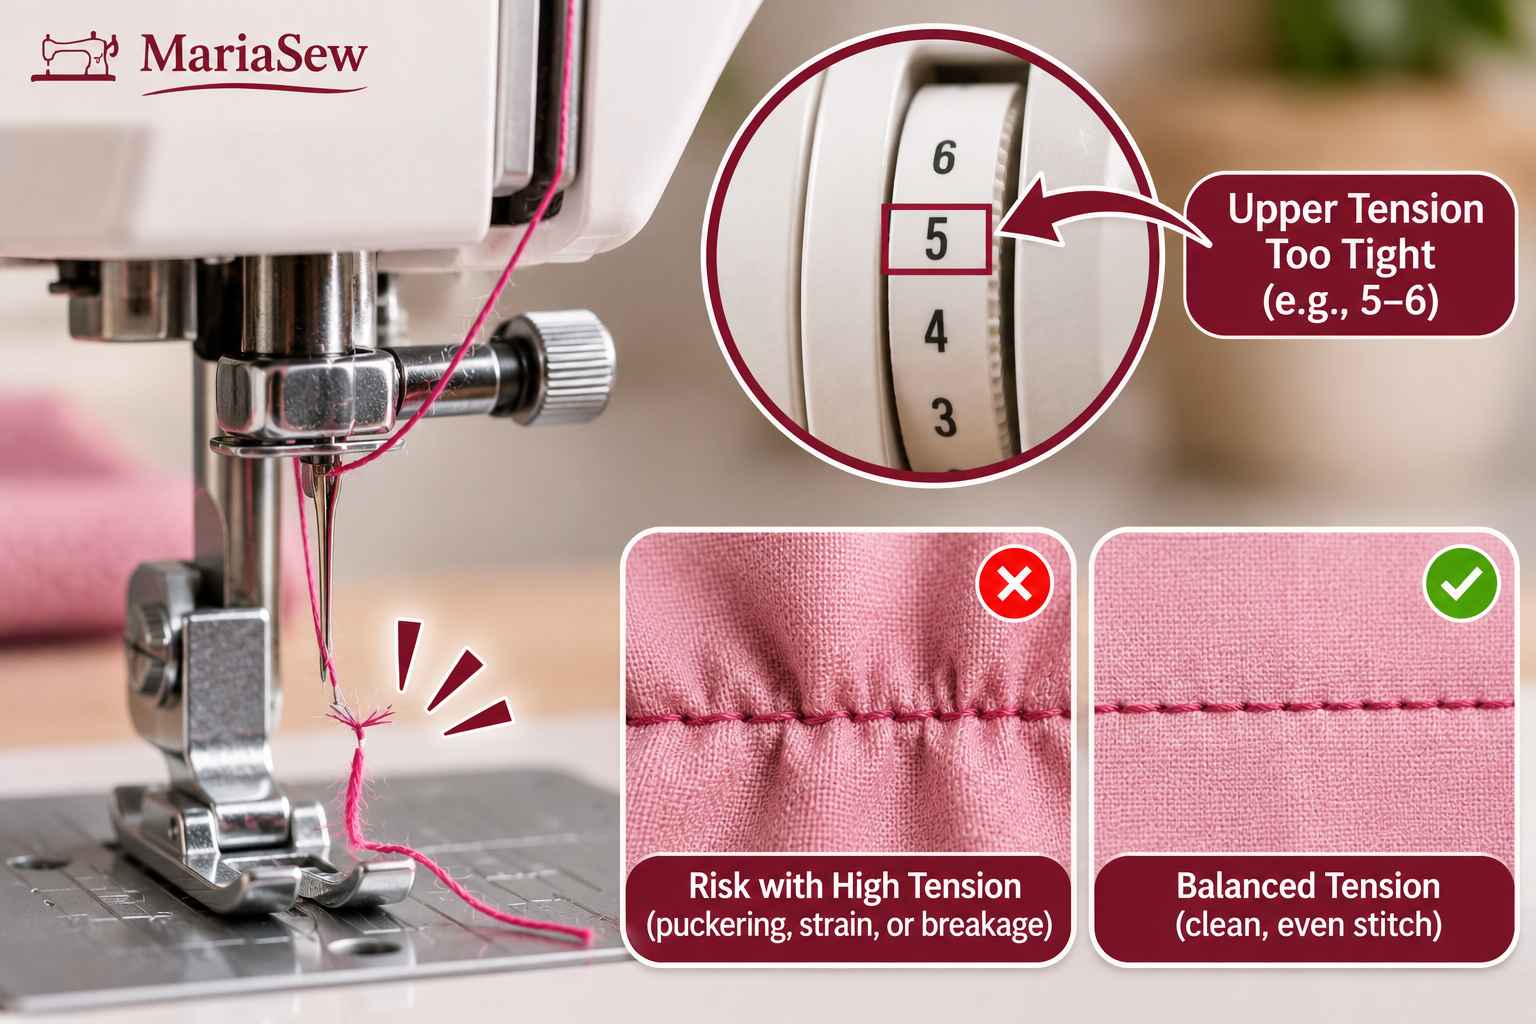
Excessive upper tension pulls the needle thread harder through every guide, tension disc, and needle eye. The result can be puckering, visible bobbin thread on top, or thread that simply snaps under repeated load.
I check threading and needle setup first, then make small changes. My sewing machine tension guide explains why bobbin tension should usually not be the first adjustment.
7. The Bobbin Is Wrong, Wound Poorly, or Seated Incorrectly
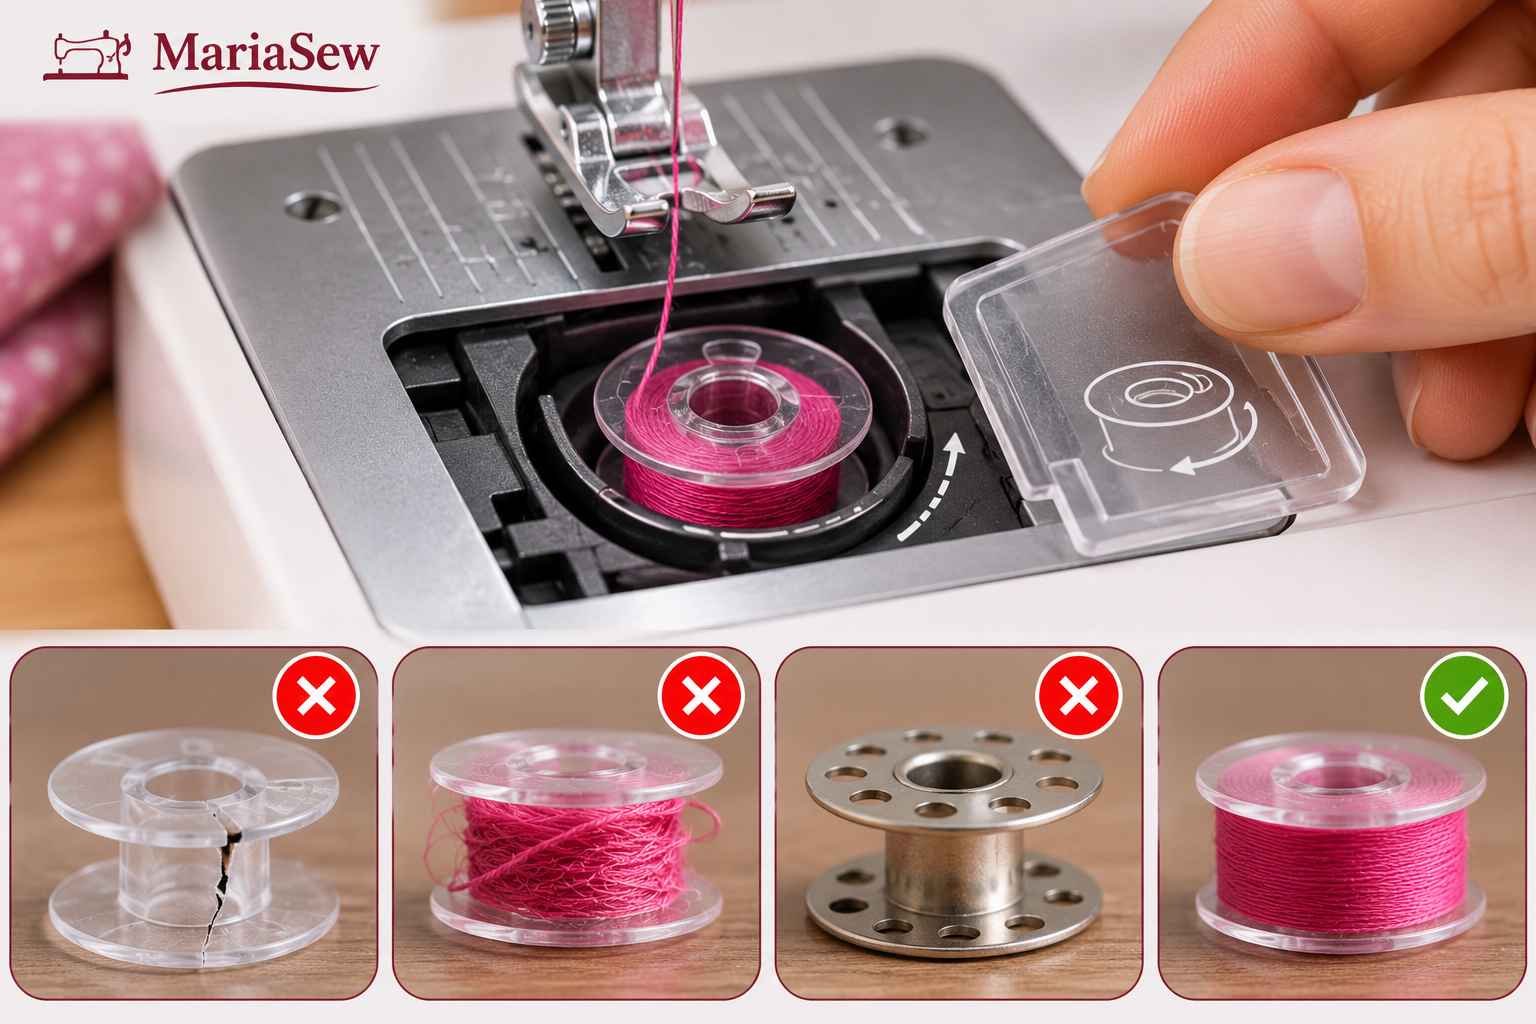
A cracked, warped, wrong-size, unevenly wound, or incorrectly inserted bobbin can disturb lower-thread movement and create tangles or sudden resistance that affect the upper thread. I use only the bobbin type specified for the machine and follow the exact insertion direction shown in the manual.
If the visible symptom is bobbin thread pulling to the top rather than the needle thread snapping, use my bobbin-thread troubleshooting guide instead of treating every lower-thread symptom as the same problem.
8. Lint, Wrapped Thread, or Debris Is Interfering With the Hook Area
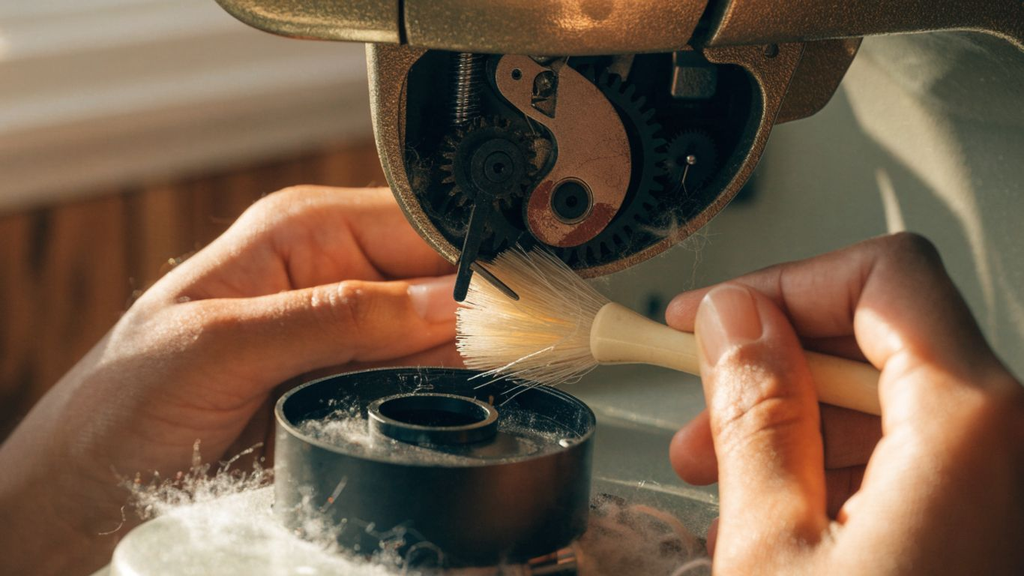
Lint and short thread fragments can collect around the bobbin race, feed dogs, and hook area. A small wrapped strand can create surprising resistance even when the rest of the machine looks clean.
I switch the machine off and unplug it before cleaning accessible areas, then follow the manual for cover removal, brushing, and lubrication. I do not add oil unless the manual identifies a user-oiling point.
9. A Burr or Rough Edge Is Cutting the Thread
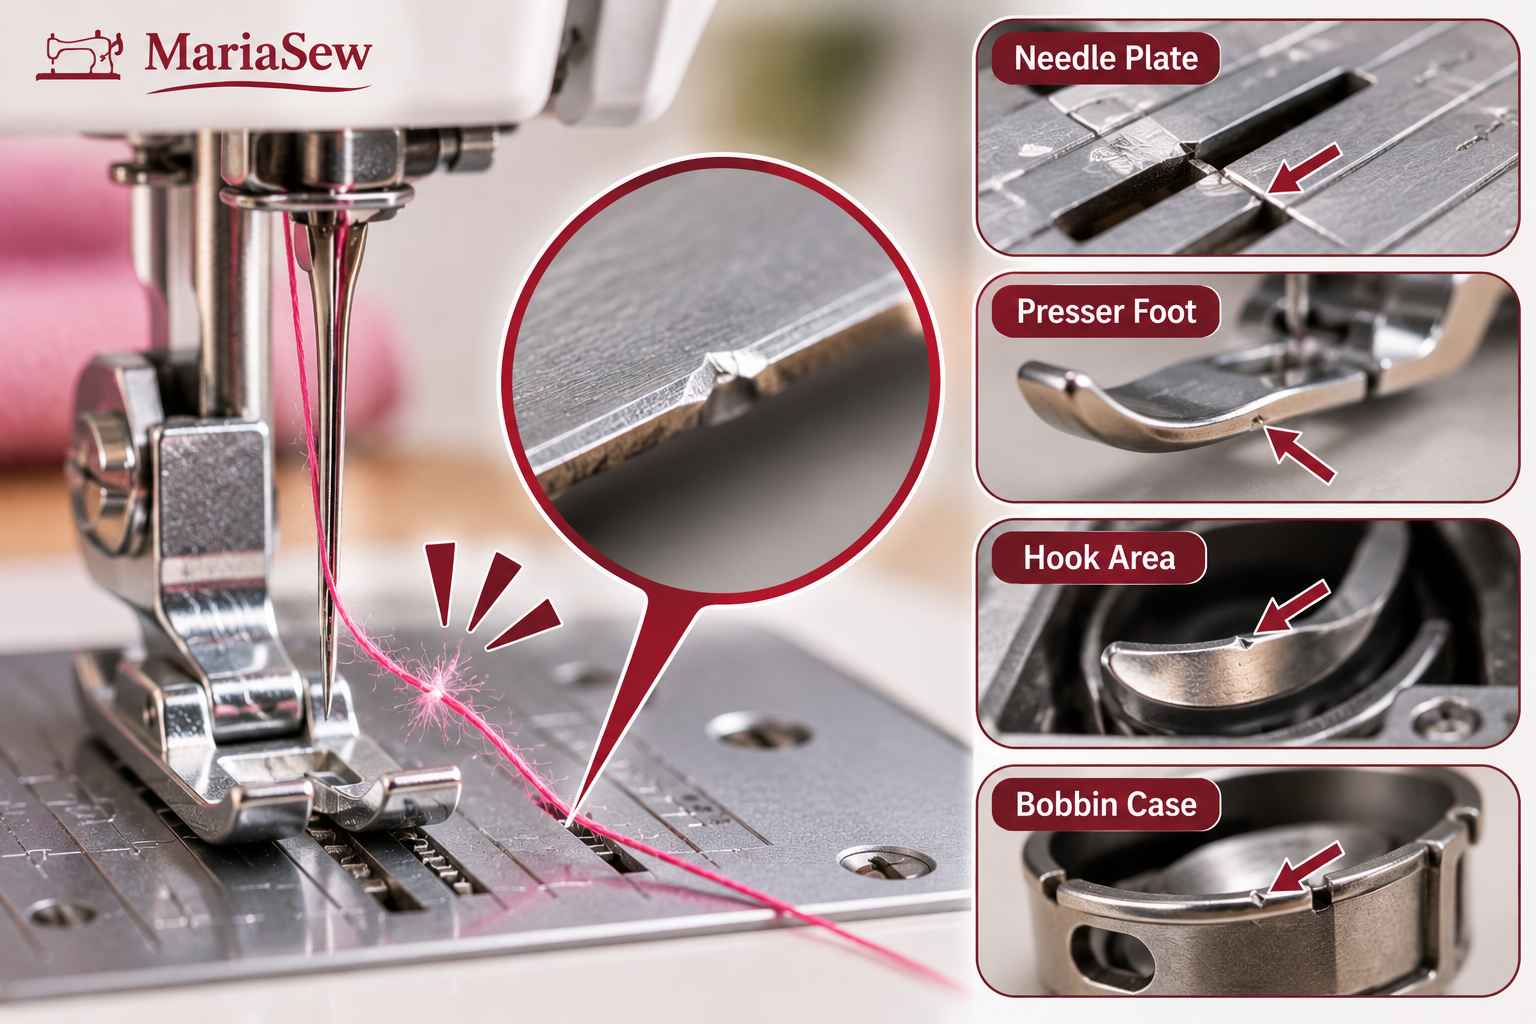
A needle strike can leave a tiny sharp burr on the needle plate, presser foot, hook, or bobbin case. When the thread catches that edge every stitch, rethreading and new thread may help only briefly before the break returns.
I inspect accessible metal and plastic parts under good light. I do not sand or file precision sewing-machine parts without model-specific service guidance because changing their surface or shape can create a worse problem.
10. Fabric Handling, Speed, or an Internal Mechanical Problem Is Causing Excessive Stress
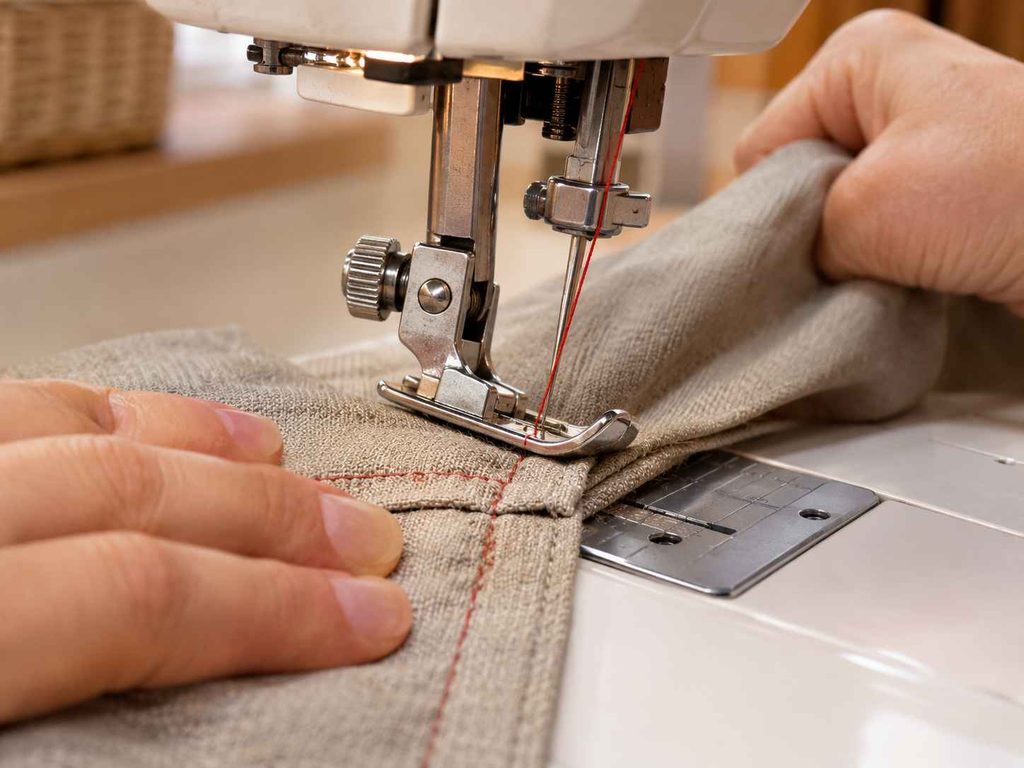
Pulling fabric from behind the presser foot can deflect the needle and change the path of the thread through the eye. Thick seam crossings can do the same thing if the presser foot tips sharply or the needle is too fine for the stack.
I slow down, support the project, level the foot at bulky transitions, and let the feed dogs move the fabric. If thread still breaks with a correct setup on ordinary fabric, especially with clicking, impact, or a stiff handwheel, the hook timing or another internal part may need professional inspection.
Sewing Machine Thread-Breaking Troubleshooting Reference
This is the only table I use in this guide because thread breakage is easier to diagnose from symptoms than from a generic specification list. Start with the visible behavior, check the least invasive cause first, then sew a short test seam before moving on.
One symptom can have more than one cause. The table gives you a starting point, not a diagnosis, and the manual for your exact machine always takes priority for threading, bobbin direction, needle installation, cleaning access, and lubrication.
| What You Notice | Likely Area to Check | First Safe Fix |
|---|---|---|
| Thread snaps immediately after starting | Upper threading, take-up lever, spool snag | Rethread completely and watch the spool unwind |
| Thread frays or fuzzes near needle | Needle eye, needle size, thread mismatch | Install a fresh correct needle and test new thread |
| Thread breaks only on thick seams | Needle deflection, speed, fabric drag | Use correct heavy-fabric needle, slow down, level foot |
| Thread breaks after several stitches | Tension, snag, burr, spool feed | Check tension only after inspecting thread path |
| Bobbin thread tangles or nests | Bobbin seating, wrong bobbin, lint, upper threading | Reseat bobbin and rethread upper path |
| Bobbin thread shows on top | Upper tension too tight or lower thread feeding loosely | Verify setup, then reduce upper tension slightly |
| Same snag at same point every stitch | Burr on plate, hook, foot, or bobbin case | Stop and inspect for damage |
| Breakage plus needle strikes or stiff handwheel | Mechanical alignment, hook, timing | Stop DIY testing and arrange service |
If the first fix solves the problem, I sew a longer scrap seam before returning to the project. If the break returns immediately, I move to the next likely cause instead of repeatedly changing the same setting.
10 Fixes to Stop Sewing Machine Thread From Breaking
I use the fixes below in this order because the first steps are common, safe, and easy to reverse. By the time I reach the final steps, I should already know that the basic setup is correct.
1. Rethread the Upper Thread Completely
Remove the upper thread and start again from the spool. Raise the presser foot when your manual specifies it so the thread can seat correctly in the tension system, then confirm every guide and the take-up lever before threading the needle.
2. Remove and Reinstall the Correct Bobbin
Use the bobbin type specified for the machine, check that it is wound evenly, insert it in the model-correct direction, and pull the thread through the required lower-thread path or tension slot.
3. Install a Fresh, Correct Needle
Replace the needle rather than trying to reuse one involved in repeated thread breaks. Match the needle type and size to the fabric and thread, insert it fully, and tighten the clamp correctly.
4. Switch to Fresh, Appropriate Thread
Use a smooth spool that unwinds evenly and suits the needle eye. If changing only the thread stops the breakage, the old spool was part of the problem.
5. Correct the Spool and Spool-Cap Setup
Make sure the cap size, spool orientation, and spool pin match the thread spool. Watch for thread catching behind the cap, on the spool notch, or around the pin.
6. Return Upper Tension to a Normal Baseline
After threading, needle, and spool checks, return the upper tension to the machine’s normal range and test. If it is clearly too tight, reduce it in small increments rather than making a large jump.
7. Clean the Bobbin, Hook, and Feed Area
Switch off and unplug the machine, remove accessible lint and loose thread, and check for wrapped strands around the bobbin or hook area. Follow the manual for any cover removal or lubrication.
8. Match the Setup to the Fabric and Slow Down
Use the correct needle and stitch settings for denim, knits, delicate fabrics, or layered projects. Slow at bulky transitions and support heavy projects so their weight does not pull the fabric and needle sideways.
9. Inspect for Burrs and Repeated Contact
Look closely at the needle plate, presser foot, bobbin case, and accessible hook area. If the same thread spot keeps getting shaved or snagged, a damaged part may need replacement or service.
10. Stop and Arrange Service When the Setup Is Correct
If thread still breaks on ordinary fabric with correct threading, a fresh needle, good thread, clean bobbin area, and normal tension, stop there. Repeated needle strikes, grinding, a stiff handwheel, or an obvious damaged hook or case are service signals.
This reset sequence solves the majority of setup-related thread breaks without disturbing sensitive lower-tension adjustments or internal timing.
Upper Thread Breaking vs. Bobbin Thread Breaking
Most sewists who say “my sewing machine thread keeps breaking” mean the upper needle thread, but bobbin thread can break too. The distinction matters because the first checks are different.
Upper-thread breakage sends me toward the spool, upper guides, tension discs, take-up lever, needle eye, and upper tension. Bobbin-thread breakage sends me toward bobbin type, winding quality, insertion direction, bobbin-case damage, lower-thread path, and lint around the hook.
If the machine is also tangling or locking up, use my sewing machine jamming guide so you do not treat a jam as a simple tension problem.
Why Does My Sewing Machine Thread Break at the Needle?
When the thread repeatedly breaks very close to the needle, I focus on the needle eye, needle condition, needle size, needle installation, thread thickness, and any point where the thread rubs immediately before entering the needle. A new needle is the fastest test. If a fresh correctly sized needle fixes the issue, I do not keep adjusting tension.
Why Does the Thread Break After a Few Stitches?
A break after several stitches often means the thread is feeding normally at first and then encountering growing resistance. A spool snag, take-up issue, excess tension, wrapped thread, burr, or thread that gradually frays through the needle eye can create this pattern. I watch the spool while sewing slowly on scrap and inspect the broken end for a clean snap versus fuzzy shredding.
Why Does Thread Break on Denim or Thick Fabric?
If the machine behaves normally on cotton but breaks thread at a denim hem, bag seam, or thick quilt intersection, the setup may simply be wrong for the material. I switch to the correct heavy-fabric or denim needle, choose a suitable stitch length, slow down, level the presser foot at bulky transitions, and support the project so the fabric weight does not pull behind the needle.
How to Prevent Sewing Machine Thread From Breaking
Prevention is mostly consistent setup. I use a short pre-project routine so a new fabric or thread combination does not begin from unknown settings.
- Start important projects with a fresh needle. Match the needle to both the fabric and thread rather than using one universal needle indefinitely.
- Thread carefully from the beginning. Do not skip guides or the take-up lever just because the machine was sewing correctly yesterday.
- Use the exact bobbin type. Bobbins that look similar can differ in height, diameter, curvature, or material.
- Store thread away from heat, dust, and strong sunlight. Good storage helps keep thread smooth and less brittle.
- Clean accessible lint regularly. Lint-heavy fabrics, batting, fleece, and repeated sewing can fill the bobbin and feed area quickly.
- Test specialty thread on scrap. Topstitching, metallic, very fine, or decorative thread may need a different needle, speed, or tension.
- Let the feed dogs move the fabric. Pulling from behind can deflect the needle and increase thread rubbing.
- Stop after a hard needle strike. Replace the needle and inspect the foot, plate, and thread path before continuing.
A stable sewing setup should be repeatable. If I have to keep compensating with extreme tension or frequent rethreading, I treat that as a sign that something else still needs diagnosis.
Common Thread-Breaking Mistakes to Avoid
Thread problems usually become harder to diagnose when several settings are changed too quickly. I avoid the following mistakes because they can turn a simple threading issue into a confusing machine setup.
- Turning tension before rethreading. A missed tension disc cannot be fixed by dialing in more tension.
- Reusing a needle after repeated breakage or impact. A tiny bend or rough eye can keep damaging fresh thread.
- Using any bobbin that appears to fit. The wrong bobbin can create erratic lower-thread movement.
- Pulling fabric while sewing. This can bend the needle and increase rubbing at the eye.
- Forcing thick seams at full speed. More motor speed does not compensate for the wrong needle or unsupported fabric.
- Adjusting the bobbin-tension screw casually. Lower tension is rarely the first fix for upper-thread breakage.
- Sanding burrs without service guidance. Precision hook and bobbin parts can be damaged by aggressive DIY repair.
- Adding oil as a universal fix. Oiling does not correct wrong threading, a bad needle, a snagged spool, or a damaged part.
- Changing needle, thread, tension, and bobbin at the same time. One-variable testing is the only way to know what actually solved the problem.
If the troubleshooting process is becoming more invasive instead of simpler, I stop and use the exact machine manual or a qualified technician.
When Should You Take the Sewing Machine for Repair?
Home troubleshooting is appropriate for threading, needles, thread, normal tension checks, bobbin setup, and accessible cleaning. I move to professional service when the symptom points to damaged precision parts or internal alignment.
- The handwheel remains stiff after visible tangles are removed. Do not force it through resistance.
- The needle repeatedly hits the presser foot, plate, or hook area. Repeated impact can damage timing and precision parts.
- Thread breaks at the same visible burr or damaged component. Replacement is safer than unverified filing or reshaping.
- The bobbin case will not stay seated correctly. This can indicate damage or an installation problem requiring model-specific service.
- Grinding, scraping, or knocking continues. Noise plus thread breakage suggests the problem is beyond ordinary setup.
- Correct threading, a new needle, good thread, cleaning, and normal tension do not change the symptom. At that point, further dial changes are unlikely to solve the real cause.
For general machine anatomy before you inspect a part, my sewing machine parts guide explains the needle, bobbin, hook, feed dogs, presser foot, tension path, and other components in beginner-friendly terms.
Final Verdict: The Fastest Way to Stop Sewing Machine Thread From Breaking
Most repeated thread breakage comes back to a small group of causes: incorrect upper threading, a spool snag, the wrong or damaged needle, poor needle-thread compatibility, weak thread, excessive upper tension, a bobbin or hook-area problem, or a burr along the thread path. The safest fix is a methodical reset, not more force.
I start by rethreading, installing a fresh correct needle, testing fresh thread, checking the spool, reseating the bobbin, cleaning accessible lint, and returning tension to a normal baseline. If the thread still breaks in the same place or the machine shows mechanical resistance, repeated impact, or grinding, I stop there and arrange service rather than trying to adjust precision parts at home.
If you are still learning the basic setup, Sewing Machine Basics for Beginners is the best place to reinforce threading, bobbin, needle, presser-foot, and feed-dog fundamentals.
Frequently Asked Questions
Why does my sewing machine upper thread keep breaking?
Incorrect upper threading, a spool snag, too-tight upper tension, a damaged or wrong-size needle, poor thread quality, or a burr along the thread path are common causes. Rethread and install a fresh correct needle before making large setting changes.
Why does the thread keep breaking at the needle?
The needle may be bent, dull, rough, incorrectly installed, or too small for the thread. A needle-thread mismatch can squeeze and abrade the thread every stitch.
Can sewing machine tension make thread break?
Yes. Excessive upper tension can put enough continuous force on the needle thread to snap it. Verify threading first, then reduce overly tight upper tension in small steps.
Can old thread cause repeated breakage?
Yes. Thread that has become brittle, fuzzy, uneven, or damaged in storage can break even when the machine is set up correctly. Test with a fresh known-good spool.
Why does my thread break only on thick fabric?
A fine needle may deflect or pinch heavy thread at a thick seam. Use the correct denim or heavy-fabric needle, slow down, level the presser foot, and support the project instead of pulling it.
Can the bobbin cause the upper thread to break?
Yes, indirectly. A wrong, damaged, poorly wound, or incorrectly seated bobbin can create tangles or abnormal resistance in the hook area that affects the needle thread.
Should I adjust bobbin tension when the thread keeps breaking?
Usually not as a first step. Rethread, replace the needle, check thread quality, verify the bobbin, clean the machine, and test upper tension first.
Can lint cause sewing machine thread to break?
Yes. Lint and wrapped thread around the bobbin race or hook can interfere with smooth movement and contribute to snags, nests, or breakage.
Why does the thread break after a few stitches instead of immediately?
The thread may be gradually fraying through a damaged needle eye, snagging intermittently on the spool or a burr, or being pulled too tightly through the tension system.
How do I know if there is a burr on my sewing machine?
If correctly threaded fresh thread repeatedly snags or shreds at the same place, inspect the accessible needle plate, presser foot, bobbin case, and hook area under bright light. Do not file precision parts without model-specific guidance.
Can sewing too fast break thread?
Speed alone should not break correctly matched thread, but high speed increases friction, needle deflection, and stress at difficult seam crossings. Slowing down can expose whether the setup is marginal.
When should I stop troubleshooting and call a technician?
Arrange service if the handwheel remains resistant, the needle repeatedly strikes metal, grinding continues, the bobbin case is damaged, or thread keeps breaking after correct threading, a new needle, good thread, cleaning, and normal tension.