How to Start a Vegetable Garden at Home Beginner Friendly Guide
I’ve always wanted to grow my own vegetables, but honestly, the thought of it felt a bit overwhelming. You see all these perfect gardens in magazines and online, and you think, ‘How do I even begin?’ Well, I decided to just go for it, and I’m here to share what I’ve learned about how to start a vegetable garden at home.
It’s not as complicated as it seems, and I think anyone can do it with a little planning and effort. Let’s get our hands dirty and grow some tasty food!
Key Takeaways
- Pick a spot that gets at least six hours of sunlight each day for most vegetables.
- Start with easy-to-grow vegetables like lettuce, beans, or radishes.
- Prepare your garden bed by loosening the soil and adding compost or manure.
- Water your plants regularly, especially when they are young or during dry spells.
- Don’t be afraid to start small; you can always expand your garden later.
Why Start a Vegetable Garden?
Honestly, I thought gardening was for people with a lot more patience and a green thumb. But after witnessing it firsthand, I’ve discovered it’s gratifying as hell, and not nearly as challenging as I’d feared. Starting an organic garden has been a lifesaver for me at home.
There are so many awesome reasons to get your hands dirty. For starters, nothing beats the flavor of homegrown produce. The freshness and flavor of vegetables picked within footsteps of your plate significantly outrival anything you’ll find at the store. And you know exactly what has gone into growing them, no strange chemicals or long-haul travel required.
With food on the road, a home garden dramatically decreases your food miles. That means less pollution from trucks and planes, which is one small but concrete way that I am able to support the health of our planet. At least when I then use a tomato from my kitchen, it feels good to reduce my carbon footprint, even if just one at a time.
And then the subject of saving money. Though you invest in seeds and soil, the amount of produce you can grow in a small plot can quickly add up. In the long run, it’s definitely cheaper than purchasing fresh vegetables weekly. Plus, it’s one of those skills that pays for itself!
If you enjoy spending time improving your home environment, you might also enjoy ideas like small apartment ideas or creating cozy corners such as reading nook ideas to complement your gardening lifestyle.
Here are a few benefits I’ve really noticed:
- Fresher, tastier food: Seriously, the difference is night and day.
- Better for the planet: Reduced transportation and packaging waste.
- Healthier eating: You control what goes into your food.
- A great way to get outside: It’s a gentle form of exercise and stress relief.
And growing your own food connects you to nature in a way that is difficult to put into words but so worthwhile. This broad generalization is a very modest bliss that brings a tremendous kick.
If you’re currently on the fence, I would say try it. You may discover that you actually like it. Some great tips on how to get started with simple gardening methods that ease the entire process.
Choosing the Right Location for Your Garden
Selecting the ideal spot for my vegetable patch was actually more eventful than I had anticipated. At the outset, I figured any patch of open ground would suffice, but through a few too many sunburnt lettuce leaves and sad tomatoes, I learned that location makes or breaks gardening success. Here’s a breakdown of what worked best for me and what to look for.
If you’re improving your outdoor space, you might also enjoy ideas for home upgrades like window treatment ideas or improving indoor lighting with kitchen lighting ideas.
Sunlight Requirements
Most vegetables are essentially sun worshippers. Before even planting, I had to monitor how much sun each area of my yard received throughout the day. It turns out that the best harvests come from places receiving at least 6-8 hours of direct sunlight per day (at least 6-8 hours of direct sunlight).
Here’s a quick way to contrast some places:
Tips to get the sunlight right:
- Monitor shadows from fences, trees, and even your own house.
- Think of how the sun moves from spring to summer: that sunny spot in March can be completely shaded out by June.
- I plant as many of my rows north and south as I can. In this way, my veggies are less likely to hinder each other.
I learned that sketching can really help you with your garden spot: Basically, I sketched a sun map of my yard, hour by hour, which made choosing my garden’s location much easier; eyeballing it just wasn’t going to cut it.
Accessibility and Water Source
After learning the hard way, I wouldn’t put my garden anywhere that’s a pain to get to. Making it easy for myself meant I actually kept up with watering and harvesting, plus, I could check for weeds and bugs more often.
What I look for:
- As close to the house as I can put them, just so I see it and don’t forget about it
- A long way from big trees, those roots will compete with your plants for moisture
- Not on a slope, water runs off too fast
- Have a hose, rain barrel, or other source of water readily available.
Also, if you want to do container gardening or raised beds, you’ve got a little more wiggle room, just ensure the surface is flat and that you aren’t constantly tripping over anything.
In short, doing these basics correctly from the start is less work later on. It’s not fancy setups, it’s about setting your veggies up for success right out of the gate.
If you’re also optimizing your home setup, you might explore how to upgrade your kitchen appliances to make cooking with your fresh vegetables even easier.
Deciding What to Grow
Having determined where my garden is going, the other big question is: What to plant? It’s tempting to get excited and build everything in the garden, but for my first garden, I should start with something simple. The secret to getting started is to grow a few simple vegetables that will bolster your confidence.
Just like beginners often start sewing with basic tools from sewing kits for beginners you can buy online, beginner gardeners should also focus on easy crops first.
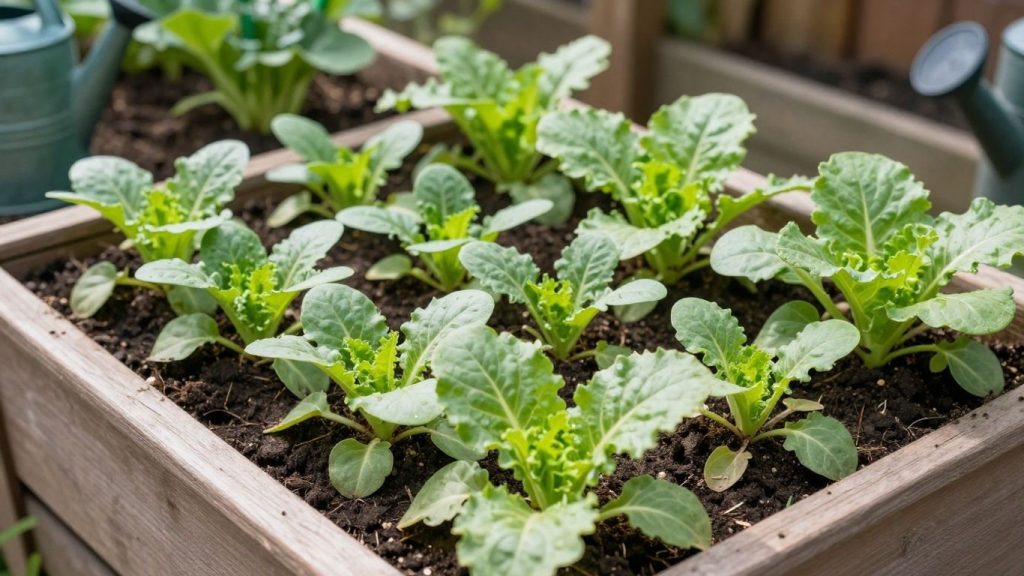
Easy Vegetables for Beginners
When I began thinking about this whole “growing your own food” guide, I made a list of things I really enjoy eating. That’s where to begin, right? There is no point in growing a ton of kale if I’m not going to eat it. Going off some things I’ve read and my inchoate thoughts, here are some good options for novices:
- Lettuce and other leafy greens: These are relatively quick-growing, and you can usually harvest them several times. Just trim away the outer leaves, and it keeps on growing.
- Radishes: Super quick growers! You can grow radishes for more than a month before harvest.
- Bush Beans: Do not need lots of support and produce a fair amount.
- Herbs: Items like basil, mint, and chives are usually quite forgiving and pack a lot of flavor into meals.
Consider Your Climate and Season
And this is where things become a bit more specific to my area. What flourishes in Florida may not thrive here. Developing the growing season in your area is something I need to keep in mind. Some plants prefer cool temperatures; others require heat. I’ve been perusing planting calendars for my region to see when what should go in.
Iñigo: For example, I can start things like lettuce and peas early in spring when it’s still cold. Then, when it does warm up, I can switch to tomatoes and peppers. I also learned about succession planting, where I can plant some crops in the weeks after the first batch so that I have a longer harvest. It’s timing and providing the plants with what they need.
I’m also reminding myself that some plants may require a little extra care. For example, broccoli can be a pest challenge, and peas never provide enough for even half a meal unless I plant tons. For year one, I’m keeping things simple and will attempt more intense stuff down the road.
Planning your planting schedule is similar to planning seasonal home upgrades like choosing best space heaters in winter or installing best outdoor Christmas lights during the holidays.
Preparing Your Garden Bed
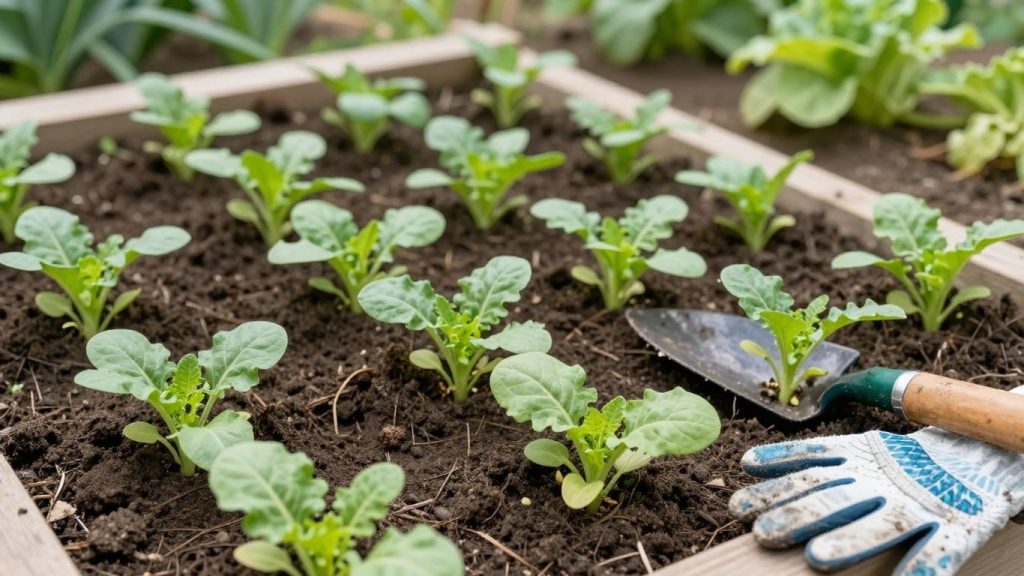
Setting up your garden bed was honestly harder than I expected, but also really satisfying. Here’s the dirty truth: Healthy soil is the foundation of any successful vegetable patch. If you’ve never done this before and you’re looking for tips for starting an at-home garden, don’t skip this step. Do a little work up front to save headaches down the road.
Just like understanding the basics of equipment in guides such as sewing machine parts or learning how to thread a sewing machine, understanding soil preparation makes the entire gardening process easier.
Soil Preparation and Amendments
Before anything hits the dirt, you have some choices about where your veggies will grow: directly in the ground, or in a raised bed. I even started mine over a patch of scraggly lawn that wasn’t really loved. To keep it simple, this is what I did to prepare my beds:
- Select the spot and remove rocks, weeds, or any stubborn roots you encounter.
- For raised beds, I placed cardboard boxes (not the glossy kind) at the bottom. This chokes out grass and suppresses weeds for a time.
- For plain ground, use a shovel to break up dry dirt. Shoot for somewhere around 8 inches deep; your veggies’ roots will thank you.
- I then incorporated organic matter. For me, that was some bags of compost and a bit of well-rotted manure. Homemade is best, though store-bought will do in a pinch.
- Once mixed, I raked all smooth and thoroughly watered. Then, and I know this sounds ridiculous, I left the bed for a few days before planting. The amendments have a way of all blending in.
Don’t rush the prep stage. Spending some time making great soil will make everything from watering to harvest way less stressful in the future.
Here’s a simple breakdown of different amendments and what they bring to the table:
Some quick tips for starting an at-home garden:
- Avoid compacting your soil, don’t walk on your garden beds if you can help it.
- Always toss in more organic matter than you think you need.
- Go easy on chemical fertilizers at first. They can burn plants if used too soon.
Trust me, once you’ve done the groundwork, planting day finally feels like you’re starting something real. And yeah, your veggies will definitely show their appreciation.
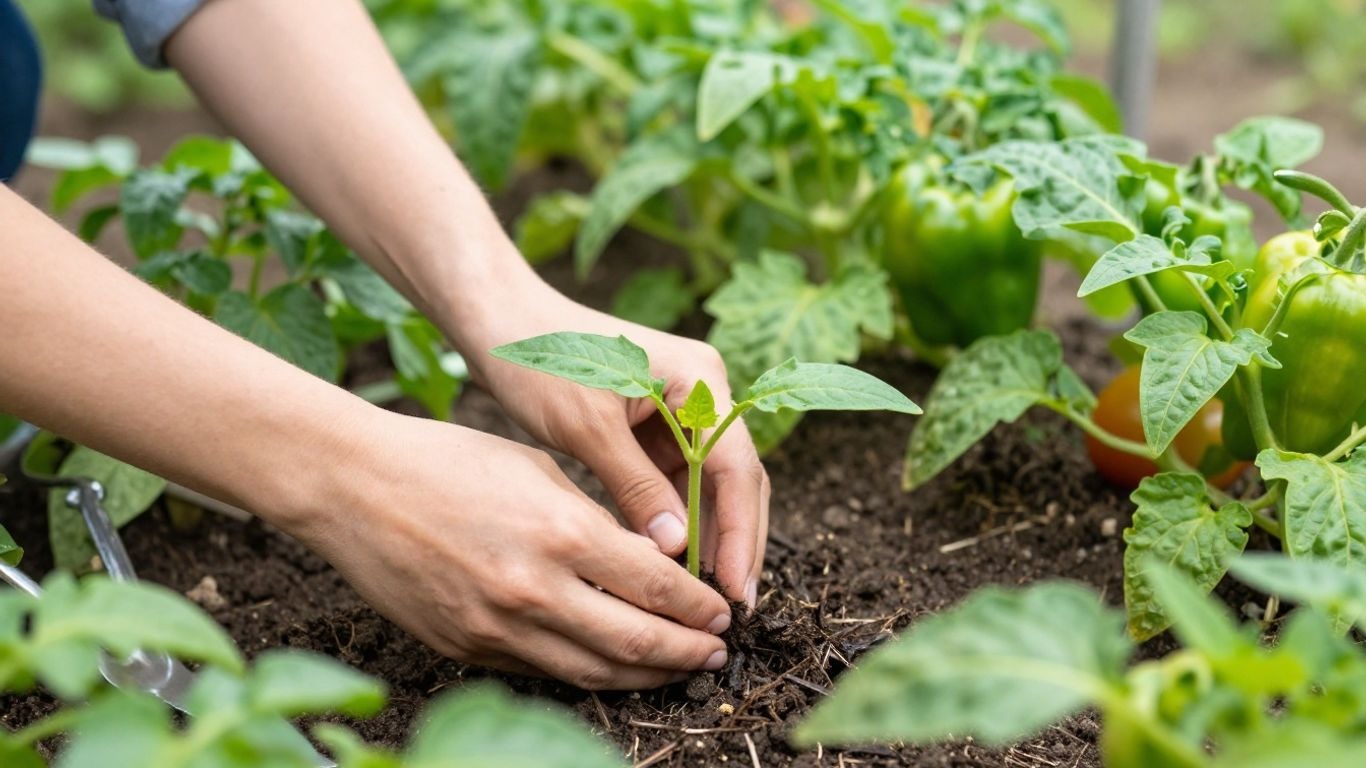
Planting Your Vegetables
Fine! The soil is ready, the place is selected, and you are all set with your seedlings or seeds. It is what will really start to work your magic in creating a home vegetable patch! I always recommend starting with seedlings for several reasons, especially for beginners.
They give you a jump start, and it’s gratifying to me, to be honest, to see a little plant you bought grow into something edible. If you are going the seed route, just be sure to check the seed packet for planting depth and spacing. It’s an essential tip for beginner vegetable gardeners, and one that makes a big difference.
When I am planting seedlings, I prefer digging a hole slightly larger than the root ball. Then I place the seedling in slowly so that the top of the root ball is level with the soil surface. I pack the soil around it and lightly pat it down. Do not plant them too deep, as with a lot of compost or manure added to your bed, it is easy to do. You don’t want those rich nutrients to scorch the delicate roots of your young plants. A little conventional compost right around the seedling is a good buffer.
Gardening, like learning crafts such as macrame wall hanging patterns, becomes more enjoyable once you start practicing.
Here’s a quick overview of what I usually spread out. This is simply a guideline, and you’ll learn how to approach it in practice. This used to happen as part of your first-time vegetable garden planning!
- Leafy greens (lettuce, spinach, kale): 6–8 inches between plants. They don’t take up a ton of room, and they’re great for filling in spaces. Some of these you can even grow indoors with the right setup, including leafy salad greens.
- Root Vegetables (Carrots, Radishes): These require approximately 2-3″ between seeds or seedlings. This allows them to grow straight as the soil is loose.
- Fruiting Plants (Tomatoes, Peppers, Beans): These require more room. You say that tomatoes may require 2-3 feet; beans can be grown closer in rows, however, 4-6″ between plants.
Step forward and get your hands dirty! For beginners, the most satisfying aspect of growing vegetables is planting. It’s the point when you stop planning something and do it.
If you are direct-seeding, consult the packet for planting depth. The general rule of thumb is to plant seeds twice as deep as they are wide. Water gently after planting. I prefer to water with a watering can that has a fine rose, so I don’t wash away the seeds. This is a crucial part of simple vegetable gardening for novices! You are laying the groundwork for success in growing vegetables as a beginner.
Essential Garden Care and Maintenance
The real work begins once your plants are in the ground, but it’s also the best part. With just a few key things in mind and implemented, your garden will thrive like never before!
First of all, watering is very critical. I’ve discovered that the best way to decide when to water is by checking soil moisture. Stick your finger in the dirt an inch or two down, and if it feels dry, then water. Nevertheless, consistency is critical, especially while plants are young. Calibrating the soil in a way where it’s moist but not soggy is key, as overwatering can be just as bad as underwatering. How much water you need really depends on the weather and what kind of plant it is, so monitor things.
Weeding is another big one. Those bad weeds always want to rob your veggies of water and nutrients. I do them when they’re small, usually after a rain when the soil is soft. It is far easier to oust them at that point.
Here’s a quick rundown of what I focus on:
- Watering: Check soil moisture regularly, water deeply when needed.
- Weeding: Remove weeds when they are small to prevent competition.
- Pest and Disease Monitoring: Keep an eye out for any signs of trouble.
- Feeding (Optional): Some plants might benefit from a little extra food.
Speaking of critters and disease, it’s smart to take an occasional walk-through of your garden every couple of days. Check underneath leaves and on stems for any bugs or other things that don’t look quite right. Identifying problems early makes them far easier to handle. A hard spray of water can sometimes dislodge aphids, or if things get serious, you may need to use a specific organic spray.
Don’t get discouraged if you see a few bugs or a yellowing leaf now and then. It is all part of the learning experience. Generally speaking, a healthy plant can combat small problems by itself. Continue to observe and respond as necessary.
With some plants, such as tomatoes, pruning them can actually make them produce fruit and remain healthy. That means pruning some of the excess leafy growth to enhance airflow and channel the plant’s energy into producing fruit. That may sound a little intimidating, but there are lots of online how-tos for specific plants. Starting your garden off on the right foot matters, and this beginner-friendly guide can help with those baby steps.
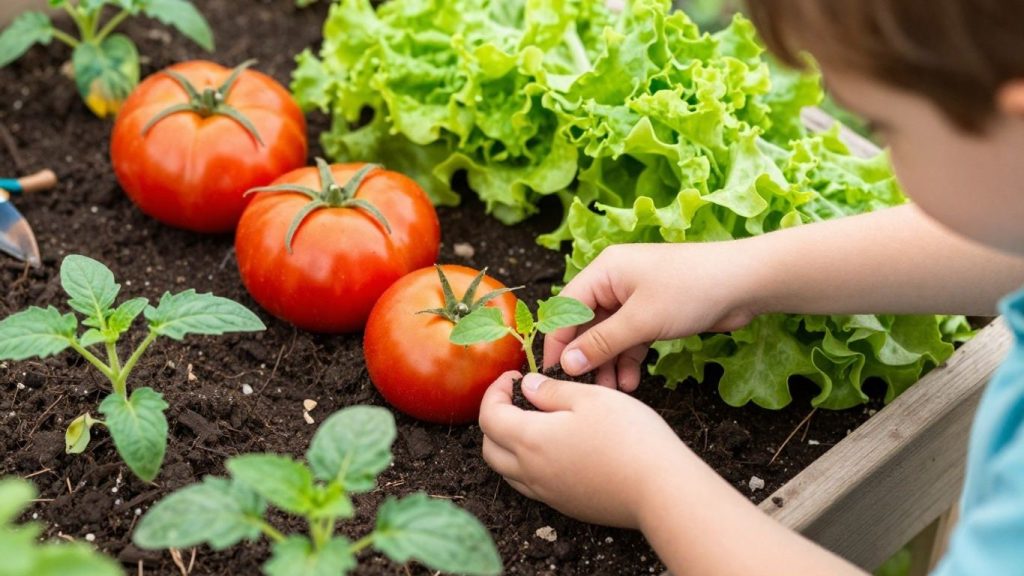
Harvesting Your Bounty
This is the part I really look forward to, harvesting and eating what I’ve grown! There’s something deeply satisfying about plucking a juicy tomato or digging up a fresh carrot from the earth.
Like much of what you eat at this time of year, many of the plants will continue to produce if you keep picking. With leafy greens, say lettuce or Swiss chard, when you snip off the outer leaves, it triggers the plant to make more. It’s like a continuous supply! The more you harvest, the more that plant often wants to give.
Cooking with your own vegetables becomes even more enjoyable if your kitchen is well-equipped with tools like the best kitchen appliances or specialized tools for baking from best kitchen appliances for baking.
Here’s a quick guide on when to pick some common beginner veggies:
- Tomatoes: Harvest them fully colored, with some softness when squeezed. Give it time; the perfect cheese or tomato is worth waiting for.
- Cucumbers: Pick at size desired for use, generally a couple of inches long. If they get too large, they can turn seedy and less tasty.
- Beans: Pick them often, even if you don’t intend to use them immediately. And that keeps the plant making more pods.
- Carrots: Baby carrots can be pulled for an early treat, or you can wait until fall to harvest larger ones, often sweeter. They can even remain in the ground for a period after the first frost.
- ZUCCHINI: Get ready for a lot! They should be harvested when young and tender. If you miss one, it can become a giant squash overnight.
Once the plants start producing, it’s a good idea to check them daily. And sometimes a vegetable can go from perfect to past its prime in just a day or two. A quick check in the morning can mean the difference between delivering flavor and texture to your harvest.
Make sure you consider what you’ll do with all that fresh produce. Some of these things are best eaten immediately, others can be preserved for another time. A few simple preservation techniques, freezing or pickling, for example- can bookend that experience of your garden with months of enjoying its bounty.
Wrapping Up Your Garden Journey
So there you have it! Beginning a vegetable garden can feel like so much, initially, but one step at a time has been my motto. If things don’t happen to unfold perfectly from the get-go, don’t despair. I know I’ve had my fair share of wilting plants and confusing times.
The important thing is to keep trying, learn from what you learn, and have fun along the way. Before long, you will be reaping your own fresh veggies, and I’m not joking when I say the first bite of something you grew yourself is pretty darn great. Happy gardening!
Frequently Asked Questions
How much sun does my garden need?
The majority of vegetables are big fans of sunshine! I look for a place that receives at least six to eight hours of direct sunlight daily. If you can’t manage quite so much sun, don’t worry too much; some plants, like lettuce, will put up with a little less.
What are the easiest vegetables for a beginner to grow?
I find that items such as lettuce, radishes, beans, and zucchini are very forgiving for new gardeners. They tend to grow quickly and don’t require a lot of special care, which is lovely when you’re first starting.
Do I need a big yard to start a garden?
Not at all! You can even begin small, with a few pots on a balcony or a small raised bed in part of your yard. The thing to remember is that you can provide your plants with enough sun and water, no matter how small the real estate.
How do I prepare the soil?
Just as a plate of delicious food (a gourmet dinner), the plants also need good soil! I always add some compost and perhaps a little aged manure. It also adds important nutrients and makes the soil well-drained, so the roots of the plant don’t get waterlogged, which is super important.
When should I water my plants?
The best time to water is in the morning. This allows the plants a chance to absorb the water before the heat of the day and discourages diseases that could bloom from wet leaves overnight. I normally do the finger test for soil; if the top inch is dry, time for water.
What if I make a mistake and my plants don’t grow well?
Don’t get discouraged! Gardening is a learning experience, and everyone makes mistakes. Every year, I have a small notebook just updating what worked and what didn’t. It guides me on what to change next time. And even if one plant doesn’t survive, you’ll have others to enjoy!