How to Thread a Sewing Machine: A Beginner’s Guide
Threading a sewing machine can seem like a puzzle at first, especially when you’re just starting out. I remember my first time; it felt like I was trying to untangle spaghetti while blindfolded. But honestly, once you get the hang of it, it’s not that bad.
This guide is all about showing you exactly how to thread a sewing machine so you can skip the frustration and get straight to the fun part: sewing!
Key Takeaways
- Make sure your presser foot is up when threading to open the tension discs.
- Always follow the numbered path or diagrams on your machine.
- The thread must go through the take-up lever; don’t skip this step.
- Bring the bobbin thread up by holding the top thread and turning the handwheel toward you.
- Test your stitches on scrap fabric after threading to check for correct tension and stitch formation.
Why Threading Your Sewing Machine Correctly Matters
Okay, so you’ve got your sewing machine all set up, maybe even picked out some fun fabric. But before you can start making that awesome tote bag or fixing those jeans, there’s one really important step: threading the machine. I know, I know, it sounds like a chore, but trust me, getting this right makes all the difference.
If I don’t thread my machine properly, it’s like trying to drive a car with square wheels – nothing works right. The stitches end up looking all wonky, the thread might bunch up underneath, or worse, the machine just jams and makes unhappy noises.
Getting the thread path correct is the absolute key to smooth, even stitches. It’s not just about making pretty seams; it’s about avoiding a whole lot of frustration later on. Think of it as laying the foundation for your sewing project. A good foundation means a strong, beautiful finished product. A bad one? Well, you’ll probably end up with a tangled mess and a desire to just put the whole thing away.
Here’s why it’s so important:
- Stitch Quality: Correct threading ensures the top thread and bobbin thread lock together properly, creating neat, consistent stitches. Mess it up, and you get loops, skipped stitches, or puckering.
- Machine Function: When threaded right, your machine runs smoothly. Incorrect threading can cause jams, break needles, or even damage the machine over time.
- Thread Tension: Proper threading is directly linked to correct thread tension. This is what gives your stitches that balanced look, not too tight and not too loose.
Honestly, I used to just rush through threading, thinking it wasn’t that big of a deal. Then I’d spend ages trying to figure out why my stitches looked terrible. Once I started paying attention to every little guide and lever, my sewing improved dramatically. It really is that simple, and it makes using your sewing machine so much more enjoyable.
Gathering Your Supplies to Thread a Sewing Machine
Before I can even think about sewing, I need to make sure I have the right stuff ready to go. It’s like getting your ingredients together before you start cooking – you don’t want to be halfway through and realize you’re missing something important.
The Sewing Machine
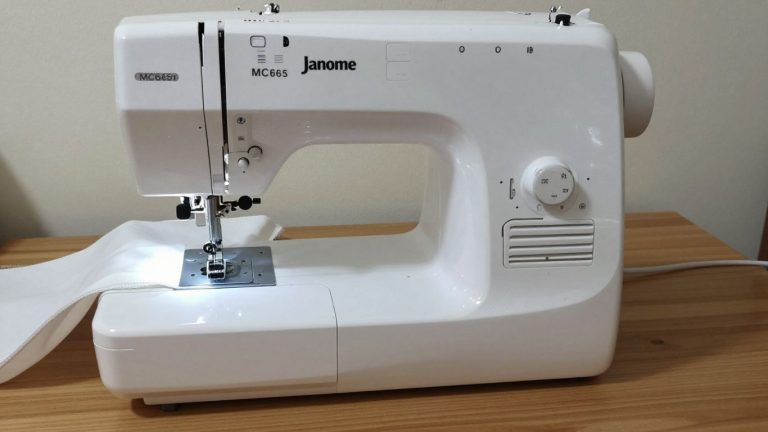
First off, obviously, you need your sewing machine. It doesn’t have to be fancy, especially when you’re just starting out. Mine is a pretty basic model, and it gets the job done. Just make sure it’s clean and in working order. Sometimes, just giving it a quick wipe-down and checking that all the parts are where they should be is a good first step.
Thread
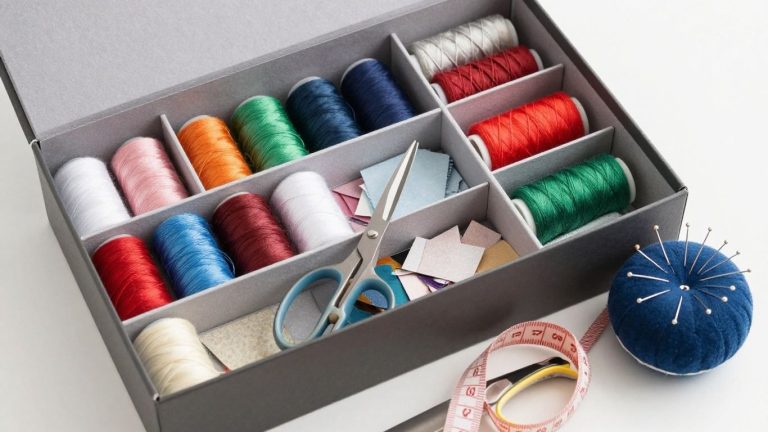
This is where things can get a little overwhelming. There are so many types of thread out there! For general sewing projects, I usually stick to all-purpose polyester thread. It’s strong, comes in a million colors, and works well with most fabrics.
If you’re doing something specific, like quilting or embroidery, you might need a different kind, but for learning to thread, a standard spool is perfect. It’s good to have a few basic colors on hand, like white, black, and maybe a neutral gray. If you’re unsure about which thread to pick for your project, there are some helpful guides out there that can point you in the right direction.
Needles
Your sewing machine needle is another key player. Needles come in different sizes and types, too. For everyday sewing on medium-weight fabrics, a size 80/12 or 90/14 needle is usually a safe bet. You’ll want to make sure your needle is sharp and not bent.
A dull or damaged needle can cause all sorts of problems, like skipped stitches or fabric snags. It’s a good idea to replace your needle fairly often, especially if you sew a lot. I keep a little pack of assorted needles handy, just in case.
Having the right supplies ready makes the whole process much smoother. It’s not just about having the items, but also about knowing they are in good condition and suitable for what you plan to do. A little preparation goes a long way.
Step-by-Step Guide to Threading Your Sewing Machine
Threading a sewing machine might seem a bit intimidating when you’re a first-time sewing machine user, but honestly, it’s like following a map. Once you get the hang of it, it becomes second nature.
This sewing machine threading guide will walk you through the process, making it one of the easier parts of your beginner sewing machine setup. We’ll cover both the upper thread and the bobbin, which are the two main players in getting your machine ready to sew.
Step 1: Prepare Your Machine
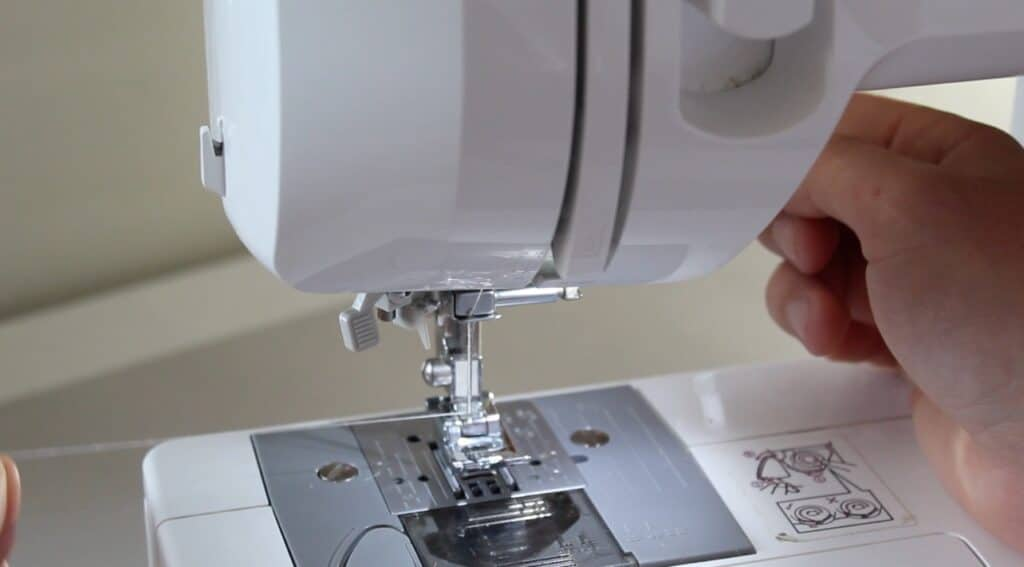
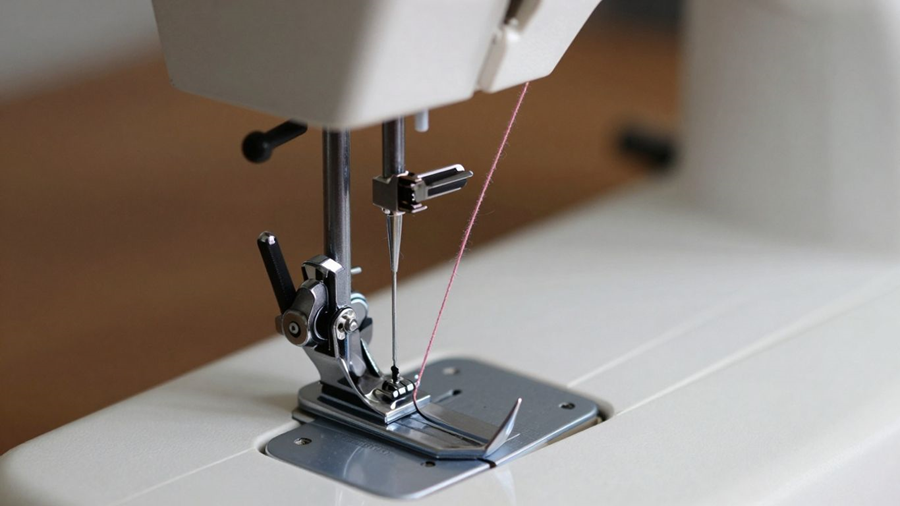
Before I even think about putting thread anywhere, I always make sure a couple of things are set. First, I lift the presser foot. This is that little lever that holds your fabric down when you’re sewing. Lifting it opens up the tension discs, which is super important for the thread to slide through smoothly.
Next, I make sure the needle is all the way up. You can usually do this by turning the handwheel on the side of the machine towards you. Getting these two things right makes the whole threading process so much easier.
Step 2: Thread the Upper Thread
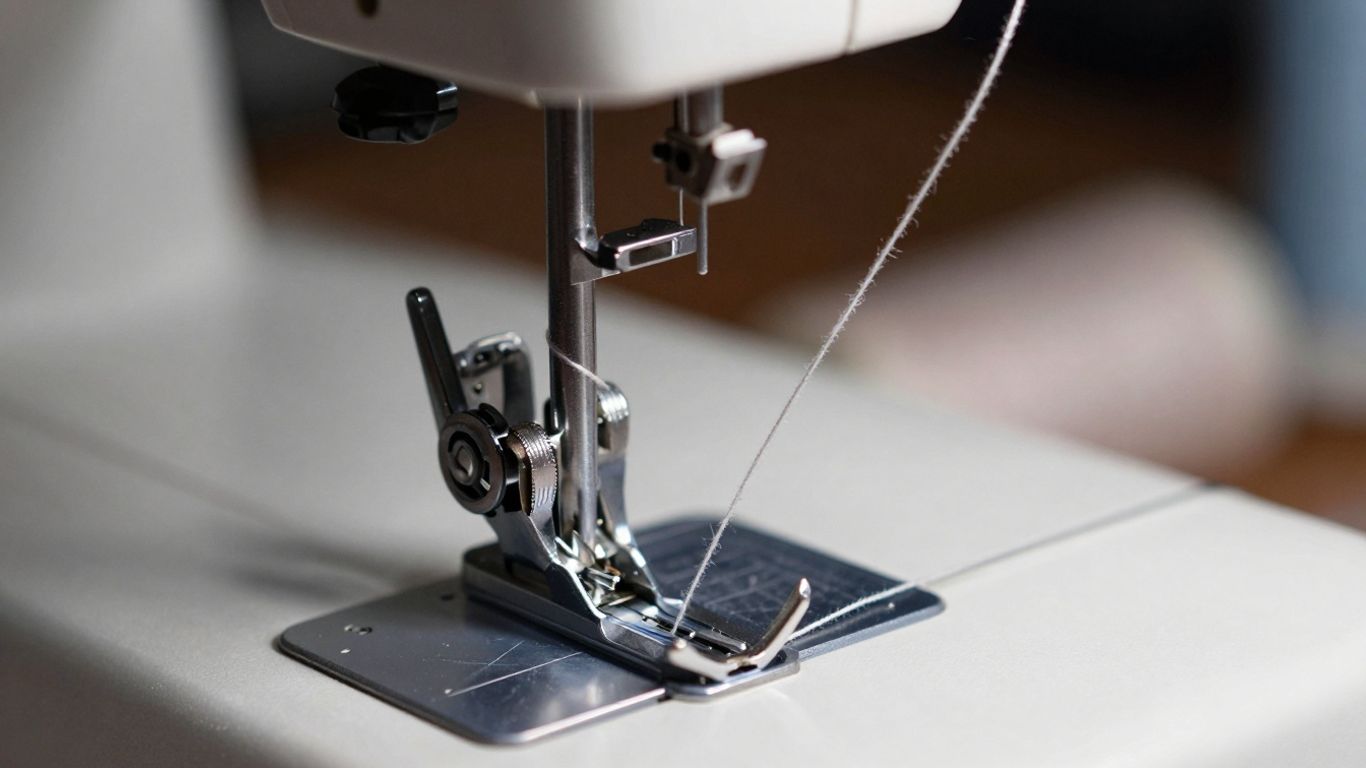
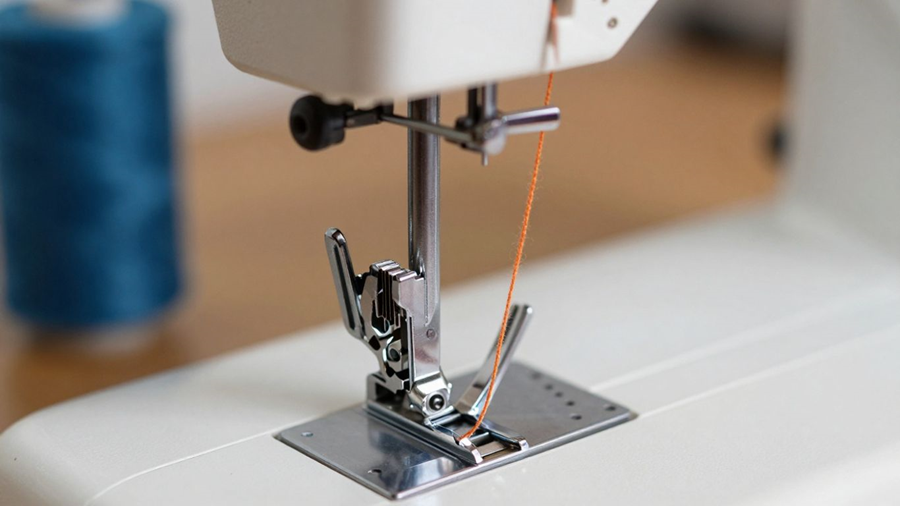
This is where we get the main thread ready. You’ll start by placing your spool of thread onto the spool pin, usually located on the top of your machine. Make sure it’s on there securely and can spin freely. Now, follow the numbers or diagrams on your machine – most have them! They’re like little breadcrumbs guiding you through the thread path.
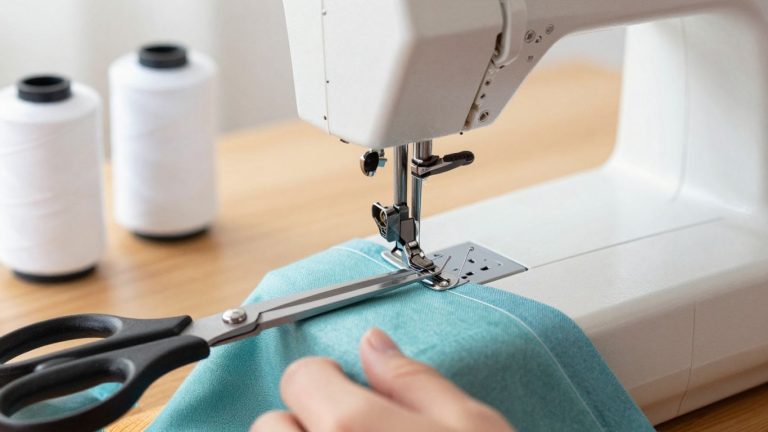
You’ll typically guide the thread through a few guides, then down and around the tension discs, and then up to the thread take-up lever. This lever is a metal arm that moves up and down. It’s really important to get the thread through the eye of this take-up lever.
After that, you’ll bring the thread back down, through another guide or two, and finally, thread it through the eye of the needle. For threading a needle for sewing machine, a clean, sharp end on your thread helps a lot. Some machines even have an automatic needle threader, which is a lifesaver!
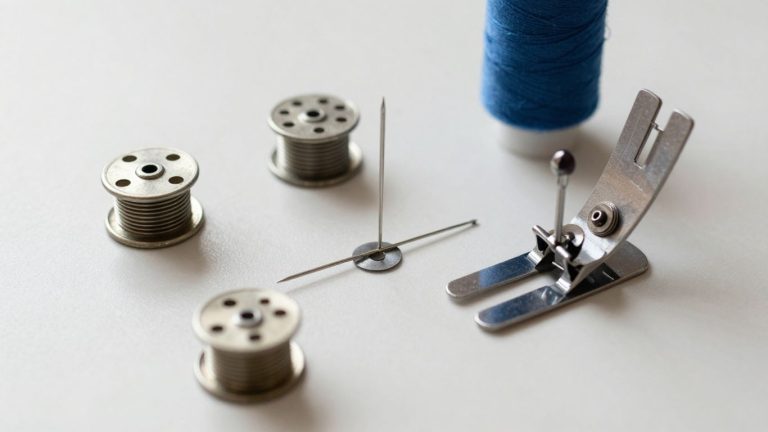
Step 3: Thread the Bobbin
Now for the bobbin. This is the little spool that holds the thread for the underside of your stitches. Most machines have a separate process for winding the bobbin. You’ll usually place an empty bobbin on a special winder spindle, thread the machine from the spool through a guide or two, and then loop it through the bobbin itself.
Then, you’ll engage the bobbin winder (often by moving a small lever) and press the foot pedal. The machine will wind the thread onto the bobbin evenly. This sewing machine bobbin winding tutorial is key for a good stitch. Once it’s full, you just snip the thread and take the bobbin off.
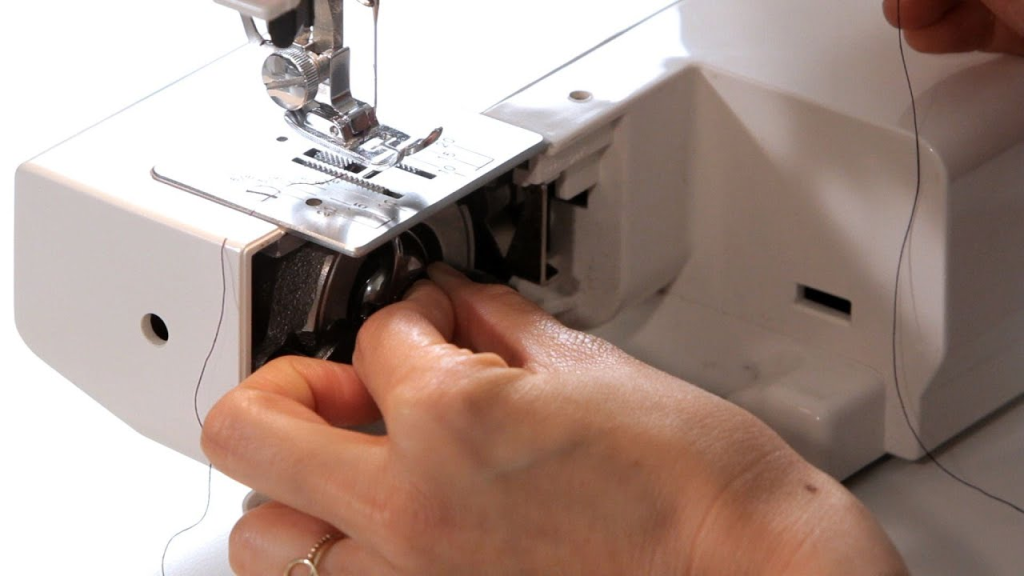
Step 4: Insert the Bobbin and Bring Up the Bobbin Thread
This part is how to load sewing machine thread from the bottom. You’ll place the wound bobbin into its case or slot, making sure it’s oriented correctly (check your manual if you’re unsure – it matters!). Then, you’ll guide the thread from the bobbin through a little slit or channel.
The final step here is to bring that bobbin thread up to meet the upper thread. You do this by holding both threads loosely in your hand and turning the machine’s handwheel towards you to lower the needle and then bring it back up.
This action will catch the bobbin thread and pull it up through the needle plate, creating a loop. You can then use your finger or scissors to pull that loop completely free. Now you have both threads ready to go!
After you’ve completed these steps, it’s a good idea to do a test stitch on a scrap piece of fabric. This helps you see if the tension is right and if everything is running smoothly before you start your actual project. It’s a simple check that can save a lot of frustration.
Here are the basic steps to thread a sewing machine:
- Raise the presser foot.
- Lift the needle to its highest position.
- Place the spool of thread on the spool pin.
- Follow the numbered guides on your machine for the upper thread path.
- Thread the take-up lever.
- Guide the thread through the final guides down to the needle.
- Thread the needle (front to back is common).
- Wind the bobbin.
- Insert the bobbin correctly.
- Bring the bobbin thread up through the needle plate.
If you’re still finding it a bit tricky, don’t hesitate to check out a sewing machine setup guide specific to your model. It can make all the difference!
Common Threading Mistakes and How to Fix Them
Okay, so you’ve followed the steps, but maybe things aren’t quite right. Don’t worry, I’ve been there. It’s super common to mess up threading a sewing machine, especially when you’re just starting out. The good news is, most problems are pretty easy to fix once you know what to look for.
One of the biggest culprits is skipping the take-up lever. This is that little arm that moves up and down as you sew. If you miss threading the thread through it, your stitches will likely look messy, or you might get loops of thread underneath your fabric. Always double-check that your thread goes through every single guide and tension point. It sounds simple, but it’s so easy to accidentally bypass it.
Another common issue is thread bunching up underneath. This usually means the top thread isn’t set right, often because the presser foot was down when you threaded it. The presser foot needs to be up so the tension discs can open and grab the thread properly. If you’re seeing this, unthread the whole machine and start again with the presser foot up. It’s a pain, but it usually sorts it out.
Here are a few other things to watch out for:
- Needle Threading: Make sure the thread goes through the eye of the needle from front to back, unless your machine specifically says otherwise. Using a needle threader can be a lifesaver here.
- Bobbin Insertion: Is the bobbin wound evenly? And is it in the right way, with the thread unwinding in the direction your manual shows? A wonky bobbin can cause all sorts of grief.
- Thread Path: Did you follow all the little guides and numbers on your machine? Sometimes a thread can get caught on a burr or just slip out of a groove without you noticing.
If your stitches are looking uneven or loose, it could be tension, but it’s also often a threading issue. Try re-threading the entire machine, making sure the presser foot is up. If it’s still wonky, then you can start playing with the tension settings. Sometimes, just changing the needle can fix a multitude of sins, too. A dull or bent needle can cause skipped stitches or thread breaks.
Before you start your actual project, always do a little test stitch on a scrap piece of fabric. This way, you can catch any threading mistakes before they become a bigger problem.
Tips for Smooth Sewing
Once I got the hang of threading my machine, I noticed a big difference in how my projects turned out. It’s not just about getting the thread through the right holes; it’s about setting yourself up for success. Here are some beginner sewing machine tips that have really helped me.
- Always raise the presser foot before threading. This opens up the tension discs, letting the thread slide in without getting snagged. It’s a small step, but it makes a world of difference.
- Check your manual. Seriously, even if you think you know what you’re doing, every machine is a little different. Mine has numbered guides, and following them exactly prevents so many headaches. If you’ve misplaced yours, you can often find a digital copy online for your specific model.
- Use good quality thread. Cheap thread frays easily and can cause your machine to jam. I found that investing a little more in decent thread meant fewer breaks and smoother stitches. It’s worth it!
- Do a test stitch. Before you start on your actual project, grab a scrap piece of fabric and sew a few lines. This lets you see if the tension is right and if the thread is feeding properly. It’s a quick way to catch any issues.
I also found that keeping my machine clean and oiled, as per the instructions, helps a lot. Dust and lint can really gum things up. For me, the biggest takeaway is that taking a few extra minutes to thread correctly saves me so much time and frustration later on.
It really is the foundation for good sewing, and once you get it right, you’ll see how much easier everything else becomes. If you’re looking for a reliable machine, checking out reviews for something like the Singer 4452 can give you an idea of what features make threading easier.
Conclusion
So there you have it. Threading a sewing machine might seem like a big deal at first, and honestly, I remember feeling a bit overwhelmed myself when I first started. But after going through the steps a few times, it really does become second nature. Just remember to take your time, follow the numbers or diagrams on your machine, and don’t forget that crucial take-up lever!
If you run into trouble, don’t be afraid to unthread and try again – it’s amazing how often that fixes things. Now that you’ve mastered this, you’re one step closer to making all those sewing projects you’ve been dreaming about. Happy sewing!
Frequently Asked Questions
Do all sewing machines thread the same way?
Not exactly, but the main steps are pretty similar for most machines. The path the thread takes and where certain parts are located might differ a bit. Some machines even have special features like automatic threaders. But once you learn the general process, you can usually figure out any machine by looking at its manual.
What’s the most common mistake when threading a sewing machine?
A super common mistake is skipping the take-up lever. This is that little hook or slot that moves up and down while you sew. Many people go through all the other steps but accidentally miss this one. If you skip it, your stitches won’t form right, and you’ll get messy thread or no stitches at all. Always make sure your thread goes through every single guide!
How can I tell if my sewing machine is threaded correctly?
You’ll know it’s threaded right when you can pull up the bobbin thread by turning the handwheel towards you and gently pulling the top thread. If you sew a test line on scrap fabric and get neat, even stitches without bunching or skipped stitches, you’re good to go! If not, it’s time to double-check every step.
Does the bottom thread go through the needle?
Nope, the bottom thread, which comes from the bobbin, doesn’t go through the needle at all. It stays in the bobbin case underneath. Only the top thread goes through the needle. When you sew, the needle pulls the top thread down to loop around the bobbin thread, creating your stitches.
Which way should the thread go into the needle?
For most sewing machines, you’ll thread the needle from front to back. This means you’ll be facing the front of your machine and pushing the thread through the eye of the needle towards the back. Some older or special machines might be different, but front-to-back is the standard.
How do I load the bobbin into my machine?
Loading the bobbin depends on your machine type. If it’s a top-loader, you’ll lift the cover near the needle and drop the bobbin in, making sure the thread unwinds the right way. For front-loaders, you’ll put the bobbin into a separate case first, then slide that whole thing into the machine.